

Alternate Title: Hey, I Made a Big 4 Pattern!

It’s true, I’ve made a couple of big 4 patterns in the past (like, very distant past). One was a formal dress (which I believe was my very first article of clothing ever…probably not the best idea), and one was a top. Neither turned out exceptional, each was rather difficult to sew, and we may or may not be able to blame those experiences on me not jumping into sewing clothes much sooner.
But, thankfully, I’ve got more experience under my belt now so sewing this pattern was not quite so demoralizing.
I made this shirt for Ben for Christmas this year. And actually I made him one for Christmas the year before as well.
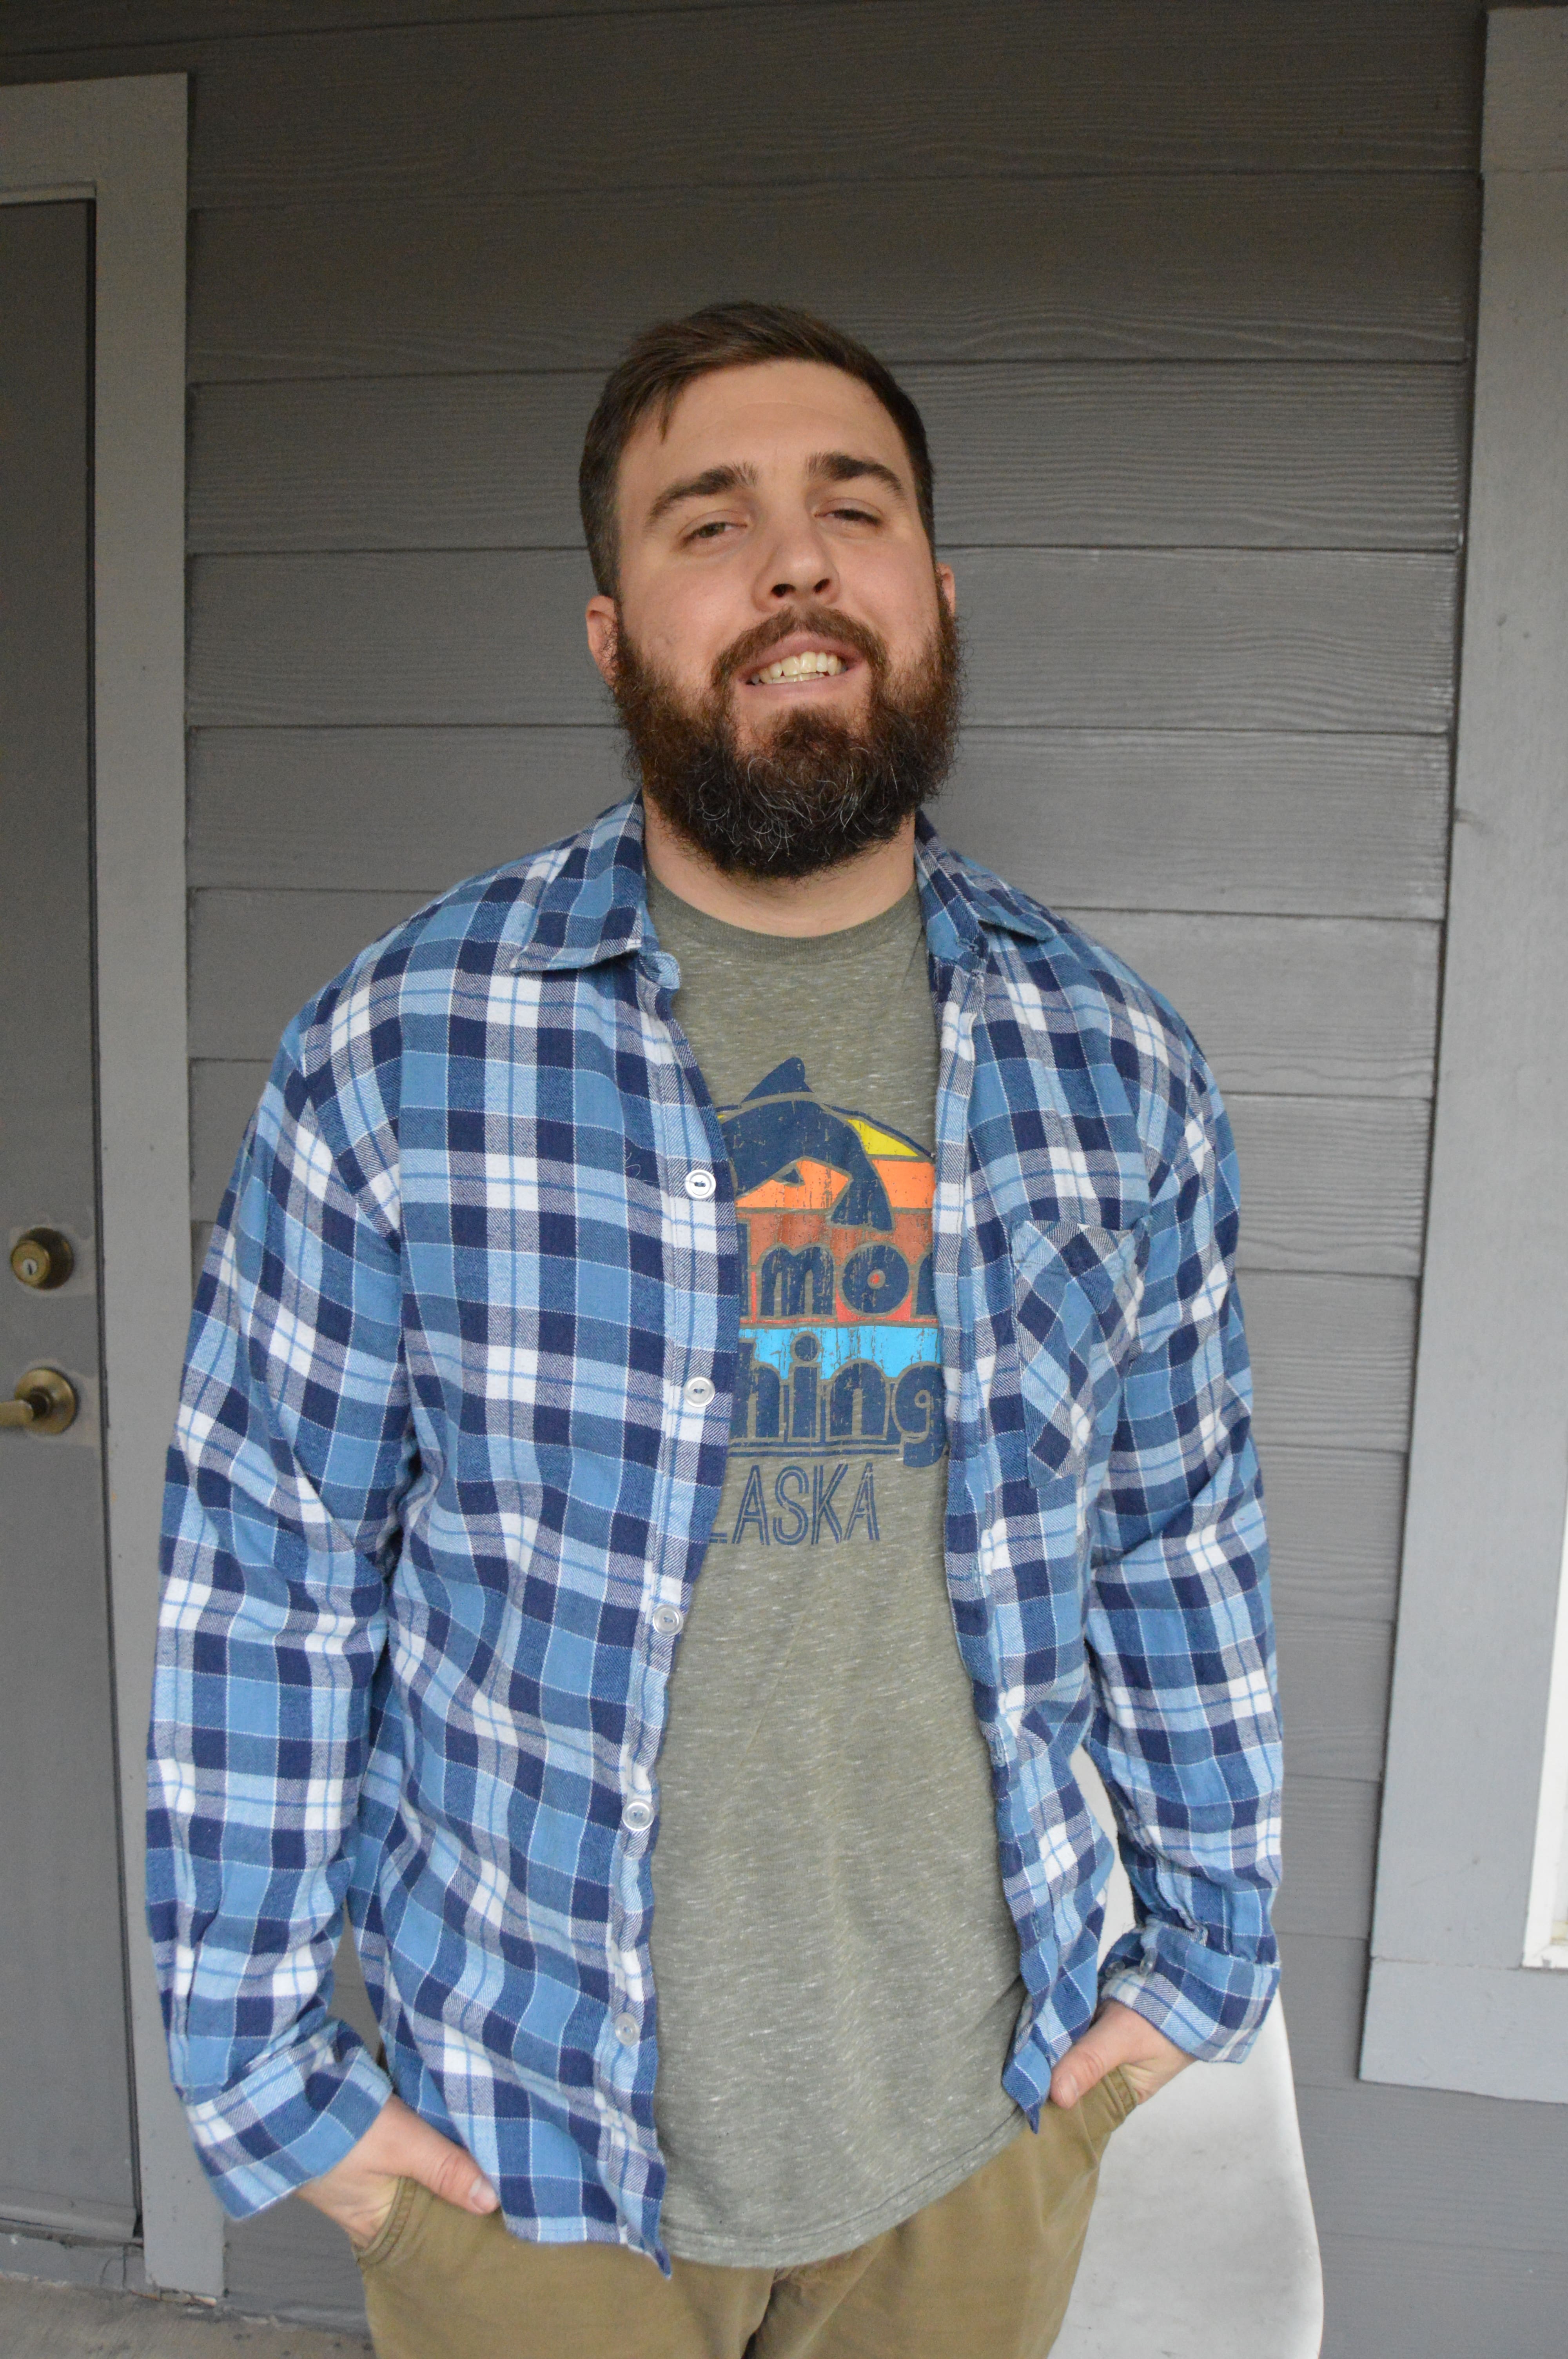
This blue plaid one is the one from the year previous (2019) and it definitely counted as my muslin. I took careful measurements but I knew that, since he wasn’t trying it on as I sewed, it might not fit perfectly. I also kind of skimped on the buttons…which I don’t think I’ve admitted to Ben. But I probably needed one more button but that’s all I had, so I made it work. I guess it’s fine because Ben usually wears the shirt like this: open with a tee underneath.

Are you guys reading how much Ben hates having me take pictures of him wearing my makes? Because he really hates it. So God bless him for allowing it, I suppose. I’ll take what I can get.
It was really fun sewing this shirt this year and being able to notice all the places where my skills have improved. I also remember a few points in the instructions where I had to read and reread to understand what I was supposed to do but this time around there was none of that. Thank heavens, I’m getting better! That’s good enough for me!
So anyway, back to this most recent shirt, Ben started asking me to make some clothes for him for Christmas. I had some big plans but in the end, this and his pajamas were the only things that came to fruition. And this was by far was the most time consuming thing I made for Christmas. It took probably a week and half of sewing (which was just 1-2 hours during the day as I could while he was otherwise occupied or gone).

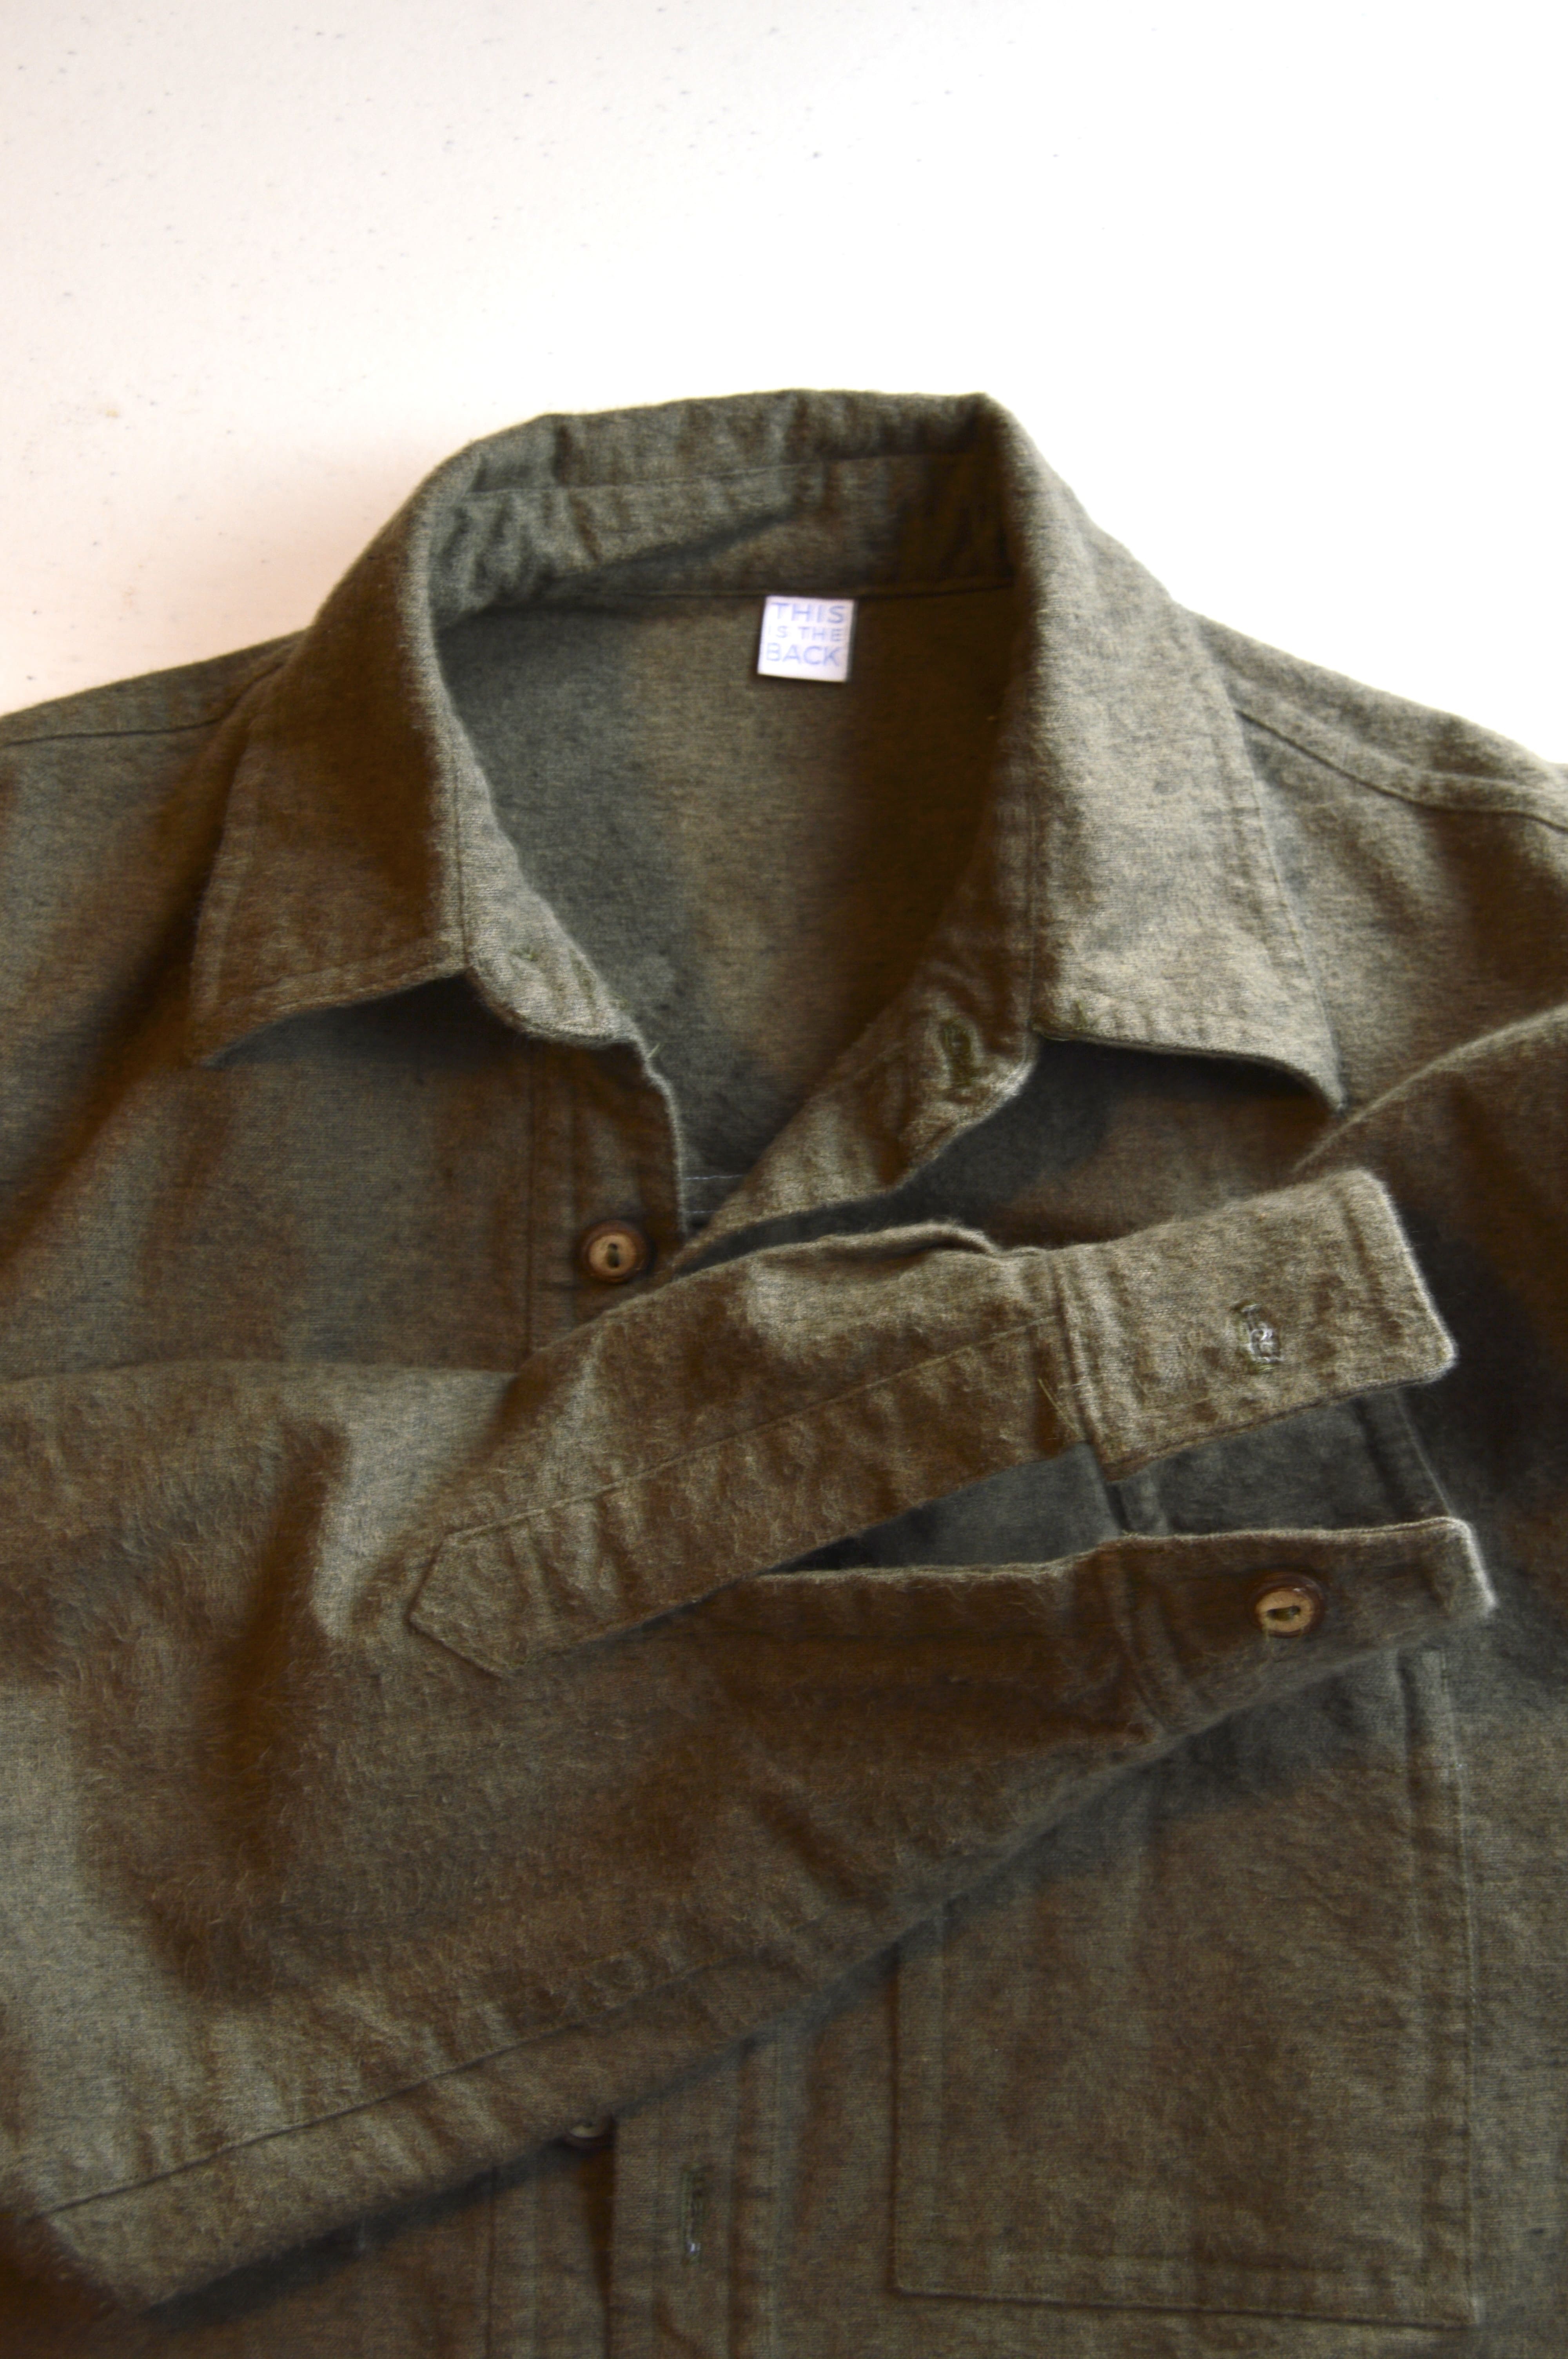
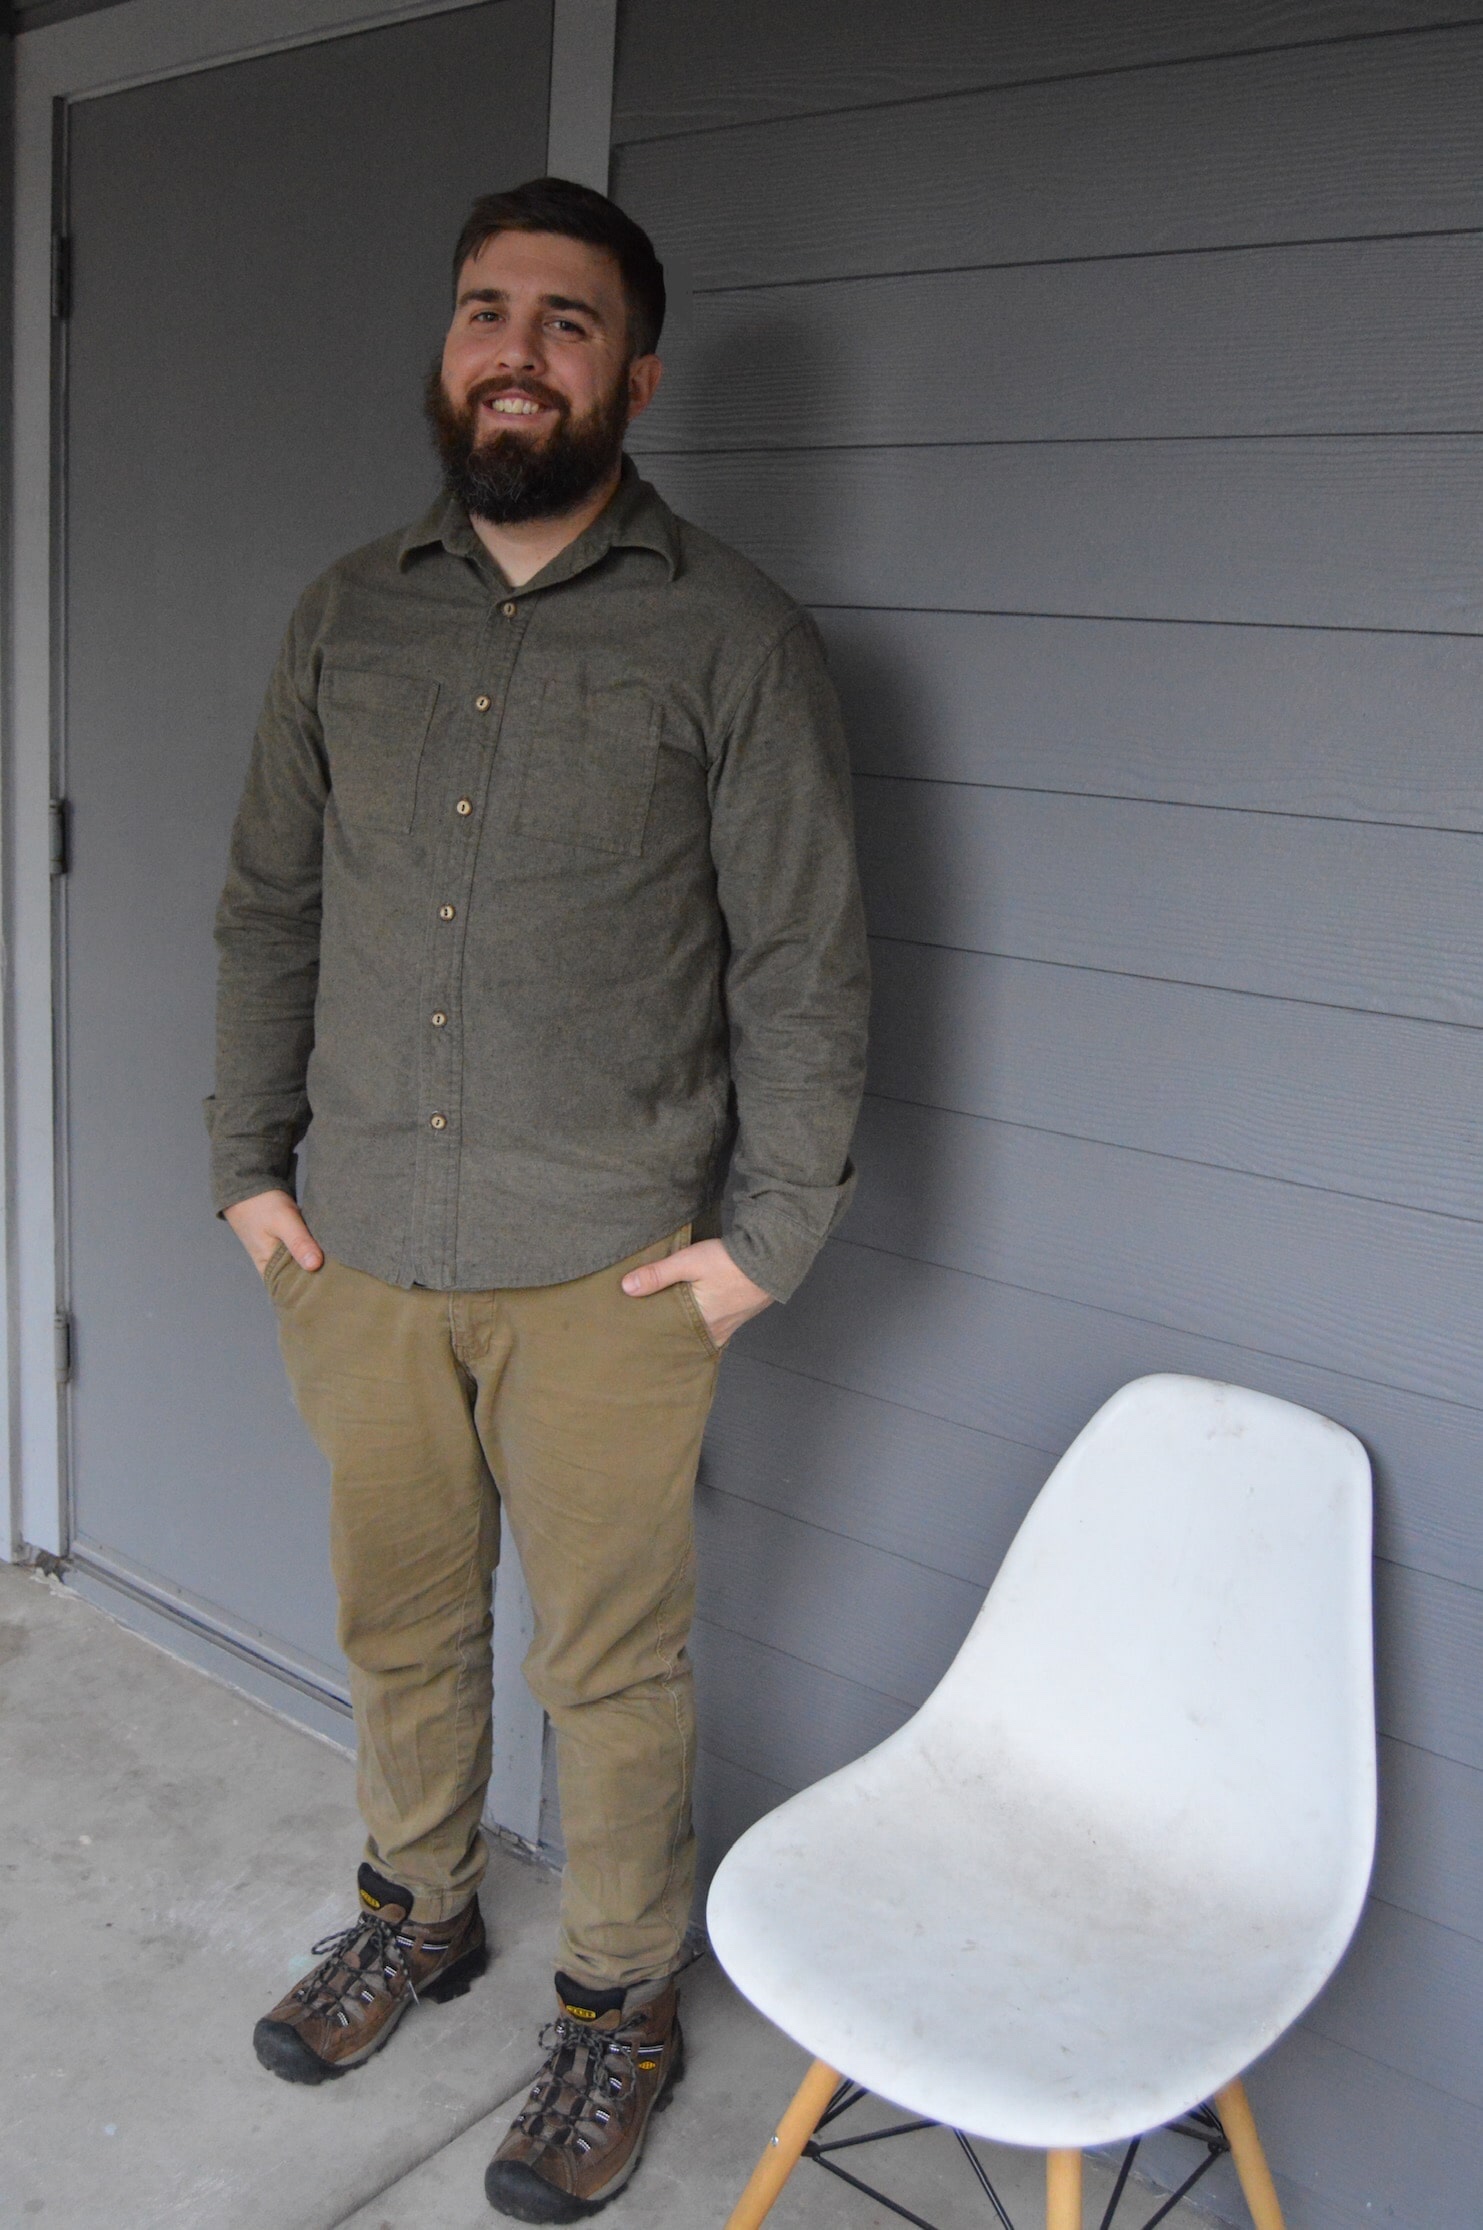
I got this fabric from my mom’s stash (she got it for free from someone else). It’s a muddy green color, which I personally thought was right up Ben’s alley (this sounds like I’m teasing, but I’m not). Also, it’s a very sturdy fabric. It feels like a thick flannel. My guess was that it’s a wool and I asked my mom what she thought and she agreed that it seems like wool. So we’re not totally sure of the fiber content, but I think our guesses are as good as any.
The thing I often forget about collared button down shirts is just how many pattern pieces there are. This one has 15 (not all of them are totally necessary) but then you have to remember interfacing (there is plenty of interfacing). And because of the top stitching, you do have to pay attention to your thread color. So, there is plenty of prep work to be done before you even get to the sewing.

Like I mentioned above, sewing this took quite a bit of time, but some of that was due to my own personal choices. For one, I ended up deciding to do flat fell seams throughout, which was just so darn satisfying. It seriously made the insides of the shirt look so nice and so professional. When I made the blue plaid one, I just serged seams that weren’t otherwise encased, and it was much quicker but doesn’t look nearly as nice. I was so, so proud of those seams when I finished and very disappointed because I couldn’t brag about them to anyone! Christmas secrets are hard! Even the sleeves are sewn on with flat fell seams. I was worried the curve would make the seam turn out wonky, but the trick was to snip the curve before sewing that final seam; it was smooth sailing. I had no issues there.

Here’s a picture of the inside. It’s pretty easy to see those seams since I kept my bobbin thread white. When Ben opened this on Christmas morning the first thing I pointed out were these flat fell seams, and the truth is that I know no one appreciates them like I do, but I really am just so proud.
Another thing that takes some time is topstitching. Since discovering the awesomeness of my edge-stitching foot, I can’t not use it. I mean, it makes topstitching look really nice and professional. It does require changing out my presser foot a lot, but it’s worth it!
It’s hard to say what’s the most difficult part of sewing a pattern like this. Many of the steps require you to pay close attention to the instructions as well as to be very exact with your sewing. On top of that, you do have to keep symmetry in mind to a certain extent (with pockets, buttons, collar corners, cuffs and cuff plackets). I don’t worry too much about the stuff that you aren’t looking at at the same time (like the cuffs). But I do try to be mindful of making the collar symmetrical. I still struggle with pockets, but I do my best and attribute any nuances as part of the beauty of handmade (yes, some might just call this lazy haha). So there’s not any one thing that lends itself to being more difficult than the rest, but the pattern is one that requires concentration and at least a certain amount of attention to detail. Of course, the hard work is very satisfying, so it’s not without its rewards.
I do want to speak for a second about sewing a commercial pattern. It is not the same as sewing a pattern from an independent designer and I think there are pros and cons in either category. This pattern was cheaper than buying from an independent designer ($5, on sale), but it only includes 5 sizes (something I didn’t realize when I bought it; I had to go back to the store to exchange for the correct sizes). I think the biggest difference that I’ve noticed between Big 4 and independent is just how much support you get with independent. In my experience, their (indie) instructions are always way more detailed and beginner friendly. They have multiple pictures of each step and then they’ll often have additional resources online (You Tube videos or blog tutorials) on top of that. I also feel pretty confident that if you emailed or messaged those independent designers with questions, they’d get back to you pretty quickly. The Big 4 patterns don’t have that level of aid, no matter how you slice it, but again, that’s sort of reflected in the price tag. The truth is that I think the Big 4 patterns are for more experienced sewists. I’ve heard of some companies where this is especially so, and for this particular pattern from Simplicity, I think having some solid experience will only make things go smoother. I do think a beginner could have success with this pattern (after a muslin or two!), but just be warned that there is no hand holding. You need to know basic sewing terminology (like what stay stitching is, for example)
Back to this shirt, besides the insides, my other favorite is the buttons! Incidentally, they are also the only thing I had to pay for, but I love them. I found them at Hobby Lobby, grabbed the only 2 packs they had on the rack, and went for it. I’m still learning about the best techniques for buttons and buttonholes, but I do sew the buttons on using my machine which is so smooth and just makes that part of the process go so much faster. I’ve never used Fray Check so far, but with this shirt I’ve been seeing a bit of fraying on the buttonholes, especially since they get used so much, so I’ve wondered if it’s time to invest. I’ll have to do more research on whether or not it makes a big difference.
The only change I made to the pattern this time around was I took in the sleeve and the cuff about 1/2 inch on each side (so about 1 inch total). This was after asking Ben how he liked the fit of the first draft and he said the sleeves were too baggy at the forearm. I’ve actually read a lot of reviews that say the same thing, but unfortunately none really mentioned how to fix it. After altering it by taking that extra bit off of each side, I realized that maybe a simpler fix would be to omit the pleats altogether by folding the pleats on the paper pattern and cutting like so. This might be a better choice, especially if you’re worried about losing real estate on the cuff. I was worried that the cuff would be too small after taking an inch off but luckily Ben said that whatever I did fixed the problem, so I was able to wipe a bead of sweat off my forehead. But next time I might try removing that pleat, which I think makes for a more modern look anyway.

Sorry, very random picture, but I forgot to take a picture of the back of the shirt, so I suppose this will do (side note, and totally unrelated: after New Year’s, we took our girls and Jaeger dog on a camping trip in a yurt! It was seriously fun).
Anyhow, I think I’ve said about all I can say about sewing this shirt. I was really happy with how it turned out and, more importantly, Ben seems to really love it. As pictured above, it meets the needs of Ben’s personal taste in perusing the outdoors but it looks nice enough that he can also wear it to work/school. I think the shirt is very Ben and I’ll have a hard time finding such a good fabric/pattern combo if I make it for him again next Christmas.

Pattern: Simplicity 1544
Size: 40 (I think…)
Adjustments: I took about half inch on either side of the sleeve (starting at the bottom and going up about 3-4 inches. I took accordingly from the cuff as well.
Fabric: mystery fabric but very possibly a wool flannel (from my mom’s stash)
Cost: Fabric and notions all free from stash; Buttons $5; Pattern $5
Will I make this pattern again?: Yes, definitely.

