


I’d like to think that I’m not a prude, but posting photos of my underthings online (not even me wearing said underthings) gives me low level anxiety, so maybe I am a bit prudish? But I will post this because I’m really happy with how this turned out and proud that I’ve cracked into another facet of garment sewing.
And, yes, as mentioned above, there are no pictures of me actually wearing the bralette I made. I know those posts are so incredibly helpful to other sewists, but you’ll have to find them elsewhere. I know it’s 2022 (Happy New Year, by the way!) but here I am hyperventilating in the corner to be saying things like bra and boobs (good heavens!) on the internet. So, sorry, but you’ll just have to deal with that (unless you’re like me and borderline scandalized by this post, in which case you can tune in some other time for topics less related to underwear).
Ahem. Anyway…

When I first discovered that people sewed their own bras, I was totally flabbergasted and intrigued. I couldn’t believe that that was A Thing. But it is and it is amazing to see the beautiful as well as functional things that people create. I fell down the rabbit hole of handmade bras and knew that it was something I wanted to try at some point. And I almost pulled the trigger probably half a dozen times before this time, thinking I was going to make one, but my interest always waned and I would move onto something else.
But this time there was an actual need, which might be what finally spurred me on. I still don’t quite understand why this pregnancy was so different from my first two, but with this one, I gained quite a bit of weight (like, more than what a doctor would say I should have). During the pregnancy, in only a few months, my chest measurement increased by over five inches, and has only gone down slightly since transitioning from pregnant to nursing. Not to get all into struggles with a postpartum body, but in the past I haven’t been able to lose much pregnancy weight until I stop nursing. So as difficult as it is for me, I know that I shouldn’t just be waiting around for my old clothes to fit. And after trying on a dozen and even purchasing a few bras, I knew it was time to take matters into my own hands and try making my own. I had nothing to lose at this point.
So for months I’ve been wearing this nursing bra, which is very comfortable but not much in the way of support. When looking for a new bra and then subsequently a bra pattern, I was looking for something with a bit more support and coverage but that would still be comfortable. And no thanks on the underwires. They’re fine, just not while I’m in the early days of nursing. In the end of my pattern and pattern review searching, I came down to two patterns: Cloth Habit’s Watson Bra or Emerald Erin’s Jordy Bralette. And honestly, since my discovery of bramking, I’ve always assumed the Watson Bra would be my first attempt. A big reason I ultimately ended up going with the Jordy was that it has three views (which essentially is just three variations on fabrics you can use), one of which is foam-something I had intended to use with the Watson without knowing that the pattern should specifically be drafted for it. So that was a big deciding factor, but honestly it also just came down to me feeling like that was the right pattern to try.
And that might sound crazy but also I think it was absolutely the right choice for a beginner like me. I can’t imagine an easier place to test the waters of bramaking.
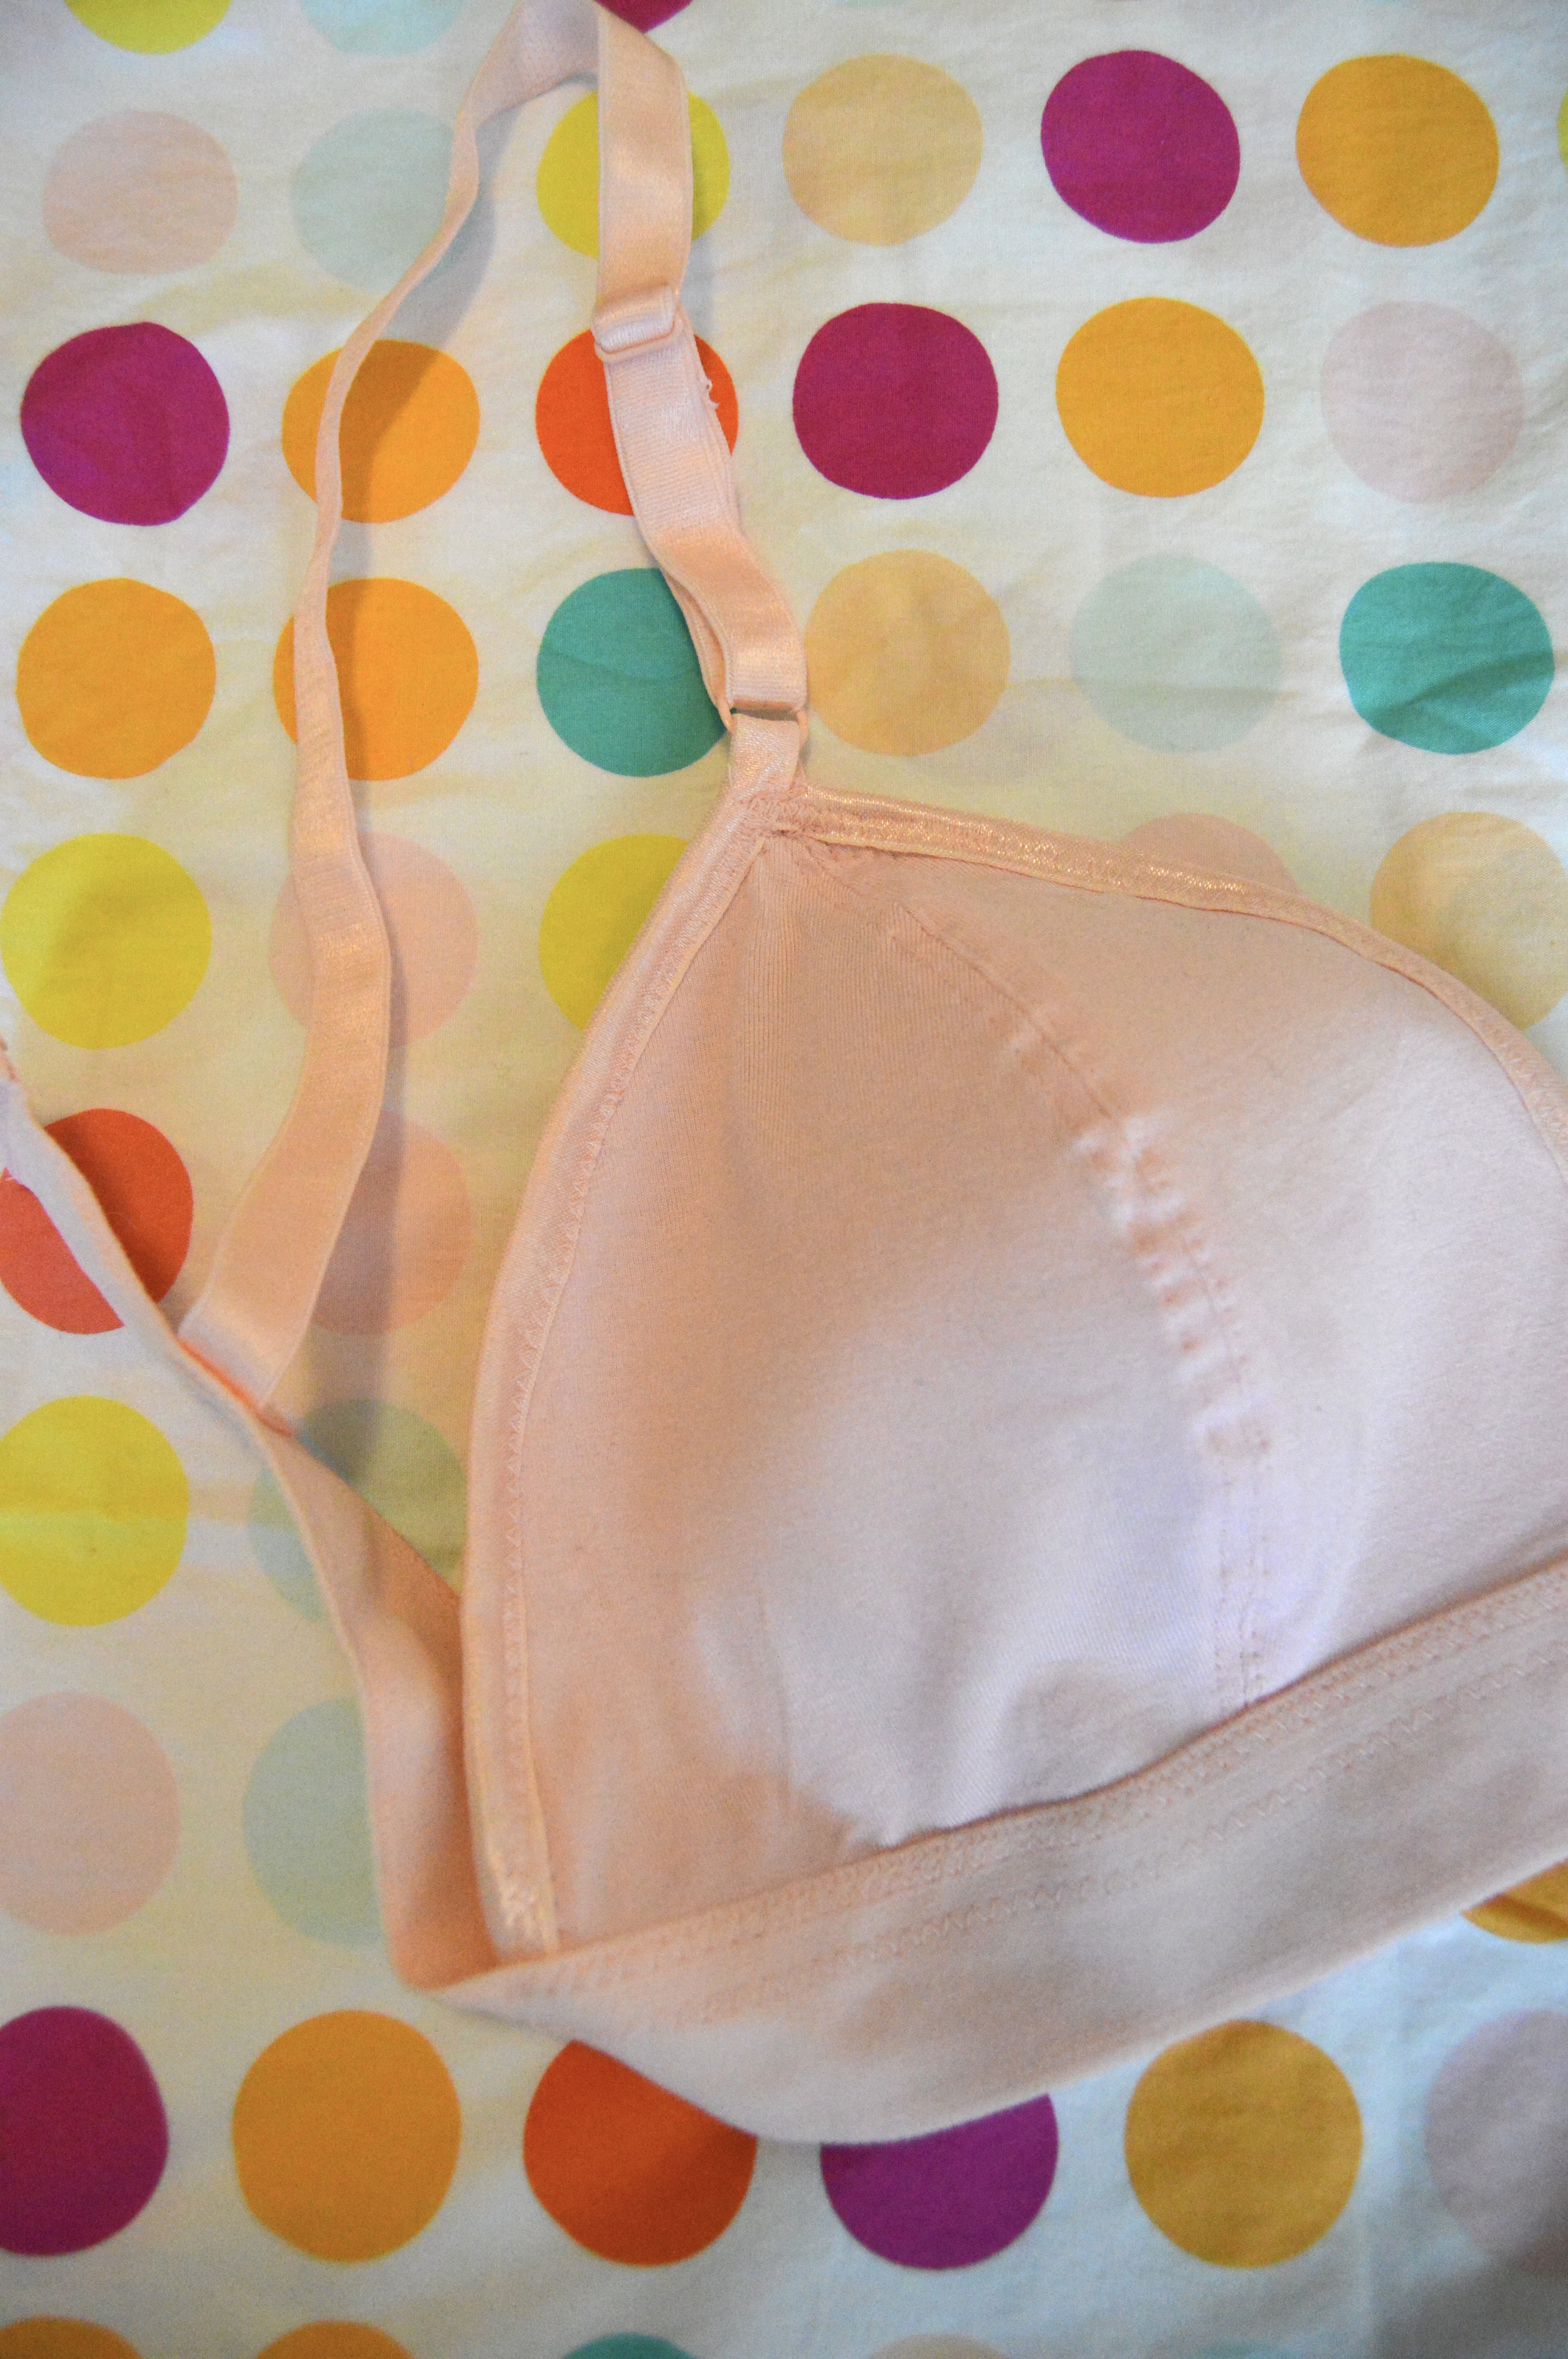
For me, one of the most daunting parts of bramaking is just how much stuff you need to make a bra, most of which I’m totally unfamiliar with. So I always knew that I’d buy a kit when the time came and luckily Emerald Erin offers a foam Jordy Bralette kit for around $20, which is a good deal in my opinion. Some reviews said that there was enough foam and fabric to make two bras (and since I’ve made mine, I concur), so also bought a separate Jordy findings kit, which is everything except for the foam and fabric. I bought a few extras as well just in case I wanted to try other views or if I got around to comparing this to the Watson Bra, which might happen at some point, in which case, I’ll definitely let you know. I am super happy with the kit. Everything seems to be high quality, there are great colors to choose from, and she also includes a card that explains what all the elastics are for, so you can keep everything straight. I would (and most likely will) buy from her shop again.
Before I received my kit, I started watched Erin’s video on how to make your Jordy and I was so surprised at how quickly she had it all come together. It was really impressive. And truly, when I had all my stuff and got into making my bralette, it really did come together very quickly. The design is so basic, you only have to construct your cups and then sew all the parts together. For me, the trickiest part was getting the cup right, but it’s easy enough to hold the sewn cup to your chest and determine whether or not it’s a good match. I took slivers off of the foam at the apex because I wasn’t filling out the cup at that particular point. I think I ended up taking just shy of a quarter inch of each side of the cup at the apex to get it to fit me better. I unpicked and resewed three or four times and didn’t really take off that much but it made a big difference in fit and was definitely worth the time. I was nervous about the hardware but it was so simple to install. I’d typically personally rather read an instruction booklet than watch something for step by step information, but her instruction video is so well done that I mostly referred to that while constructing.

I don’t do a good job at keeping track of how long a project takes to complete, but I’d say that start to finish on this was definitely less than two hours, even if I make the start actually printing out the pattern. It’s a very fast project. When I tried it on at the end I was really happy with it! The most noticeable issue was that I didn’t pull my jersey taut enough over my foam pieces so there are drag lines where the cup connects with the straps (it’s only when I’m wearing it, so you won’t see the drag lines in the photos).
I had two main concerns when choosing this pattern. The first was a worry that the triangle shape cups wouldn’t provide ample coverage. But it actually does a pretty good job at covering things up meaning there’s no side boob going on so that’s all good. My other concern was with the band. I was worried that it wouldn’t be enough, i.e. enough to be comfortable, enough to provide support to the cups, etc. To be fair, the band is totally minimal, but it’s actually not so bad. No doubt you’d get more support with something that covers more surface area, but for a bralette, this does the trick just fine, not to mention it contributes to how fast you can get this project completed. And the elastic in the kit is soft and stretchy.

The finished product is pretty comfortable and fits quite well-well enough that I don’t think I’ll make any changes to the pattern the next time I make it. I’ve worn it quite a bit and it does help me feel like I’ve got a bit more support while still being pretty comfortable. I think making a bralette (or bra) can be a little bit risky because you never know what the final product will do to your shape and lift, if you will. But for something as minimal as a bralette, I wouldn’t expect there to be much change to your shape. I worried on this a bit before I bought the pattern and I eventually asked myself if I’d be super disappointed if there was no difference in the shape of my chest between wearing the bralette and not wearing the bralette. Obviously, with a bra, I’d expect at least a bit of a change. But with a bralette, I didn’t want to get my hopes high and then have them dashed. But I decided that even if the bralette did nothing to shape or lift my breasts, it would still be a worthwhile project. It would have foam which would be a step above what I had been wearing. Certainly a small step, but a step nonetheless! In the end I do think it gives just the slightest bit of lift and shaping-nothing huge-but a bit and for me that’s a good thing. Also I think wearing it makes me feel a little more put together since it’s got adjustable straps and a clasp at the back instead of the stretchy nursing numbers I have been wearing. And the foam! It provides a bit more coverage so that’s also been great.

Finally, I just want to mention that making this bra was seriously so much fun. And after finishing it, I felt like I wanted to turn around and make seven more and then try my hand with underwires. This make was so fun and so satisfying. It was a great way to test out bramaking. The pattern and supplies were awesome and it made me want to try out the other pattern that Emerald Erin has, which is an underwire called the Black Beauty Bra. It also has a foam version, not to mention the kits she stocks for it are really pretty. That pattern has a split size range, so I might wait to see if my size changes when I stop nursing, but it is on my radar.
Pattern: Emerald Erin’s Jordy Bralette
Size: 34E
Adjustments: gradually shaved off about a quarter inch on each side of the cup at the apex
Fabric: I bought this kit from Erin’s shop that contained all my fabrics and hardware (I chose pink for every option)
Cost: Kit $20.67; Pattern $11.76 (on sale for black Friday, I believe)
Would I make this pattern again?: Definitely! I would love to try the different iterations but would definitely make more foam versions as well
Anyway, this pattern and kit were great. It’s been a great, nursing friendly bra to wear that has helped me feel a little bit more put together in this crazy stage of life I’m in (just for anyone who is curious, I did not use any sort of nursing specific hardware). If anyone has been interested in trying bramaking but has been unsure of where to start, I can say that this would be an awesome starting point, as it has been one for me!


Nice work on your Jordy! There is a Facebook bra-making group, one that is limited to women only. That makes the fitting, definitely the hardest part of bra-making, so much easier! (Bra-makers beginners through intermediate is the name of the group). Here’s a tip: try Madalynne’s free Barrett pattern. It is easy to adjust for size if you pair larger cups with a small band, if your measurements go in that direction. Free! I’ve made it with no “gap” in the center for more support, using power net to line the cups as well.
LikeLike
So much good information, thank you!!!
LikeLike