


Buckle up for some unflattering photos!
Unfortunately, this pattern didn’t work out for me at all! The pattern didn’t mesh well with my body, the fabric I used wasn’t great and even I myself got in the way by making some questionable judgment calls. In any case, I’m really sad it didn’t work out. I had high hopes!
I bought the Brooks Jeans pattern the week it was released from Helen’s Closet Patterns, which is basically unheard of for me! I like to read many positive reviews before I commit to paying money for anything, especially if I’m going to spend time on it in addition to the money. But the product listing photos were just SO GOOD, I decided to go for it. I was in need of some jeans and I wasn’t feeling inspired by anything else, so this all seemed to be coming together rather fortuitously. I snagged the pattern a couple days after its release while the sale was still going on.

I did briefly look online for fabric but in the end I just got it from Joann-for speed! I was seriously wanting to get going! However, the selection at Joann isn’t exactly great even if it does take up a decent amount of space. Quantity over quality and all that. Anyway, I ended up going with what you see above which is a no-stretch 100% cotton denim. I can’t remember the weight but it was between 9-11 oz. The color is kind of middle ground as far as blue jeans go but they are kind of a funky denim, not in feel but in look. I thought the funkiness would wash out and it most definitely didn’t. Instead of having distinct warp and weft the threads rather look staticky. It’s strange and I don’t think I like it. Up until a certain point in the project I dreamt about just bleaching the jeans but now that I know I’ll never actually be wearing them, I won’t go through the hassle.

I’ve heard more than once about the amazing instruction booklet that Helen’s Closet does with its patterns and I was excited to see what all the hype was about. The instructions are very thorough and explanatory, definitely what you’d want if you were sewing jeans for the first time. They were on par with what I’ve seen from other “high end” indie designers (I’m laughing at my usage of “high end” because nobody calls it that, but I dare say you know exactly who I’m talking about! We pay more for their patterns but the instructions are typically top notch!).
The thing that impressed me most from the instructions were just how many finished garment measurements were included. It includes the standards like waist and hip but it also includes stuff like thigh circumference, calf circumference, front rise and back rise. It was incredibly helpful in trying to choose which size was best for me. I decided to start at a 14, grade down to a 12 in the hips and then a 10 from there on down.
I also removed one inch from the back and front rise and I removed 1.5 inches from the legs for length. I also knew I would have to adjust the yokes for my sway back but I did that during the sewing process instead of updating the pattern.

This is my third jeans sewing pattern and the third way I’ve learned how to do a fly. It makes me wonder a bit if there’s a code of conduct between pattern designers to not do the tricky bits in the same way. Before I sewed jeans I assumed that there was one universally superior way to sew in a fly that everyone kind of agreed was The Way but I have definitely been proven wrong. Everyone has their own way which they think is the best. The fly insertion here was easy and painless and maybe the best way I’ve done???
I noted two mistakes as I was sewing: the fly facing and coin pocket are reversed of what they should be. So instead of laying the pattern pieces face up as I cut them out, I had to lay them face down to get them oriented correctly. Since I was sewing this within the week of the pattern’s release, I emailed Helen’s Closet to let them know of the error. I did get a response but it was a “Thanks for letting us know” response and didn’t say if I was right or wrong or if it had been fixed. *Shoulder shrug*

Everything else went pretty smoothly as far as the sewing went but things went south, far and fast, once I started trying to get the fit right.
Here I have to take full responsibility for not making a proper muslin. I doubt I’m the only one in the sewing world who starts a project optimistically calling it a wearable muslin but after a certain amount of time and struggle removes the adjective and just calls it a plain old muslin. That’s precisely what I did here. Though I definitely should have made it a muslin from the start considering I’ve never used Helen’s Closet patterns before and I’ve also never worn no-stretch denim before. It was a bad combo on which to build a pair of wearable jeans and I definitely crashed and burned on this one.

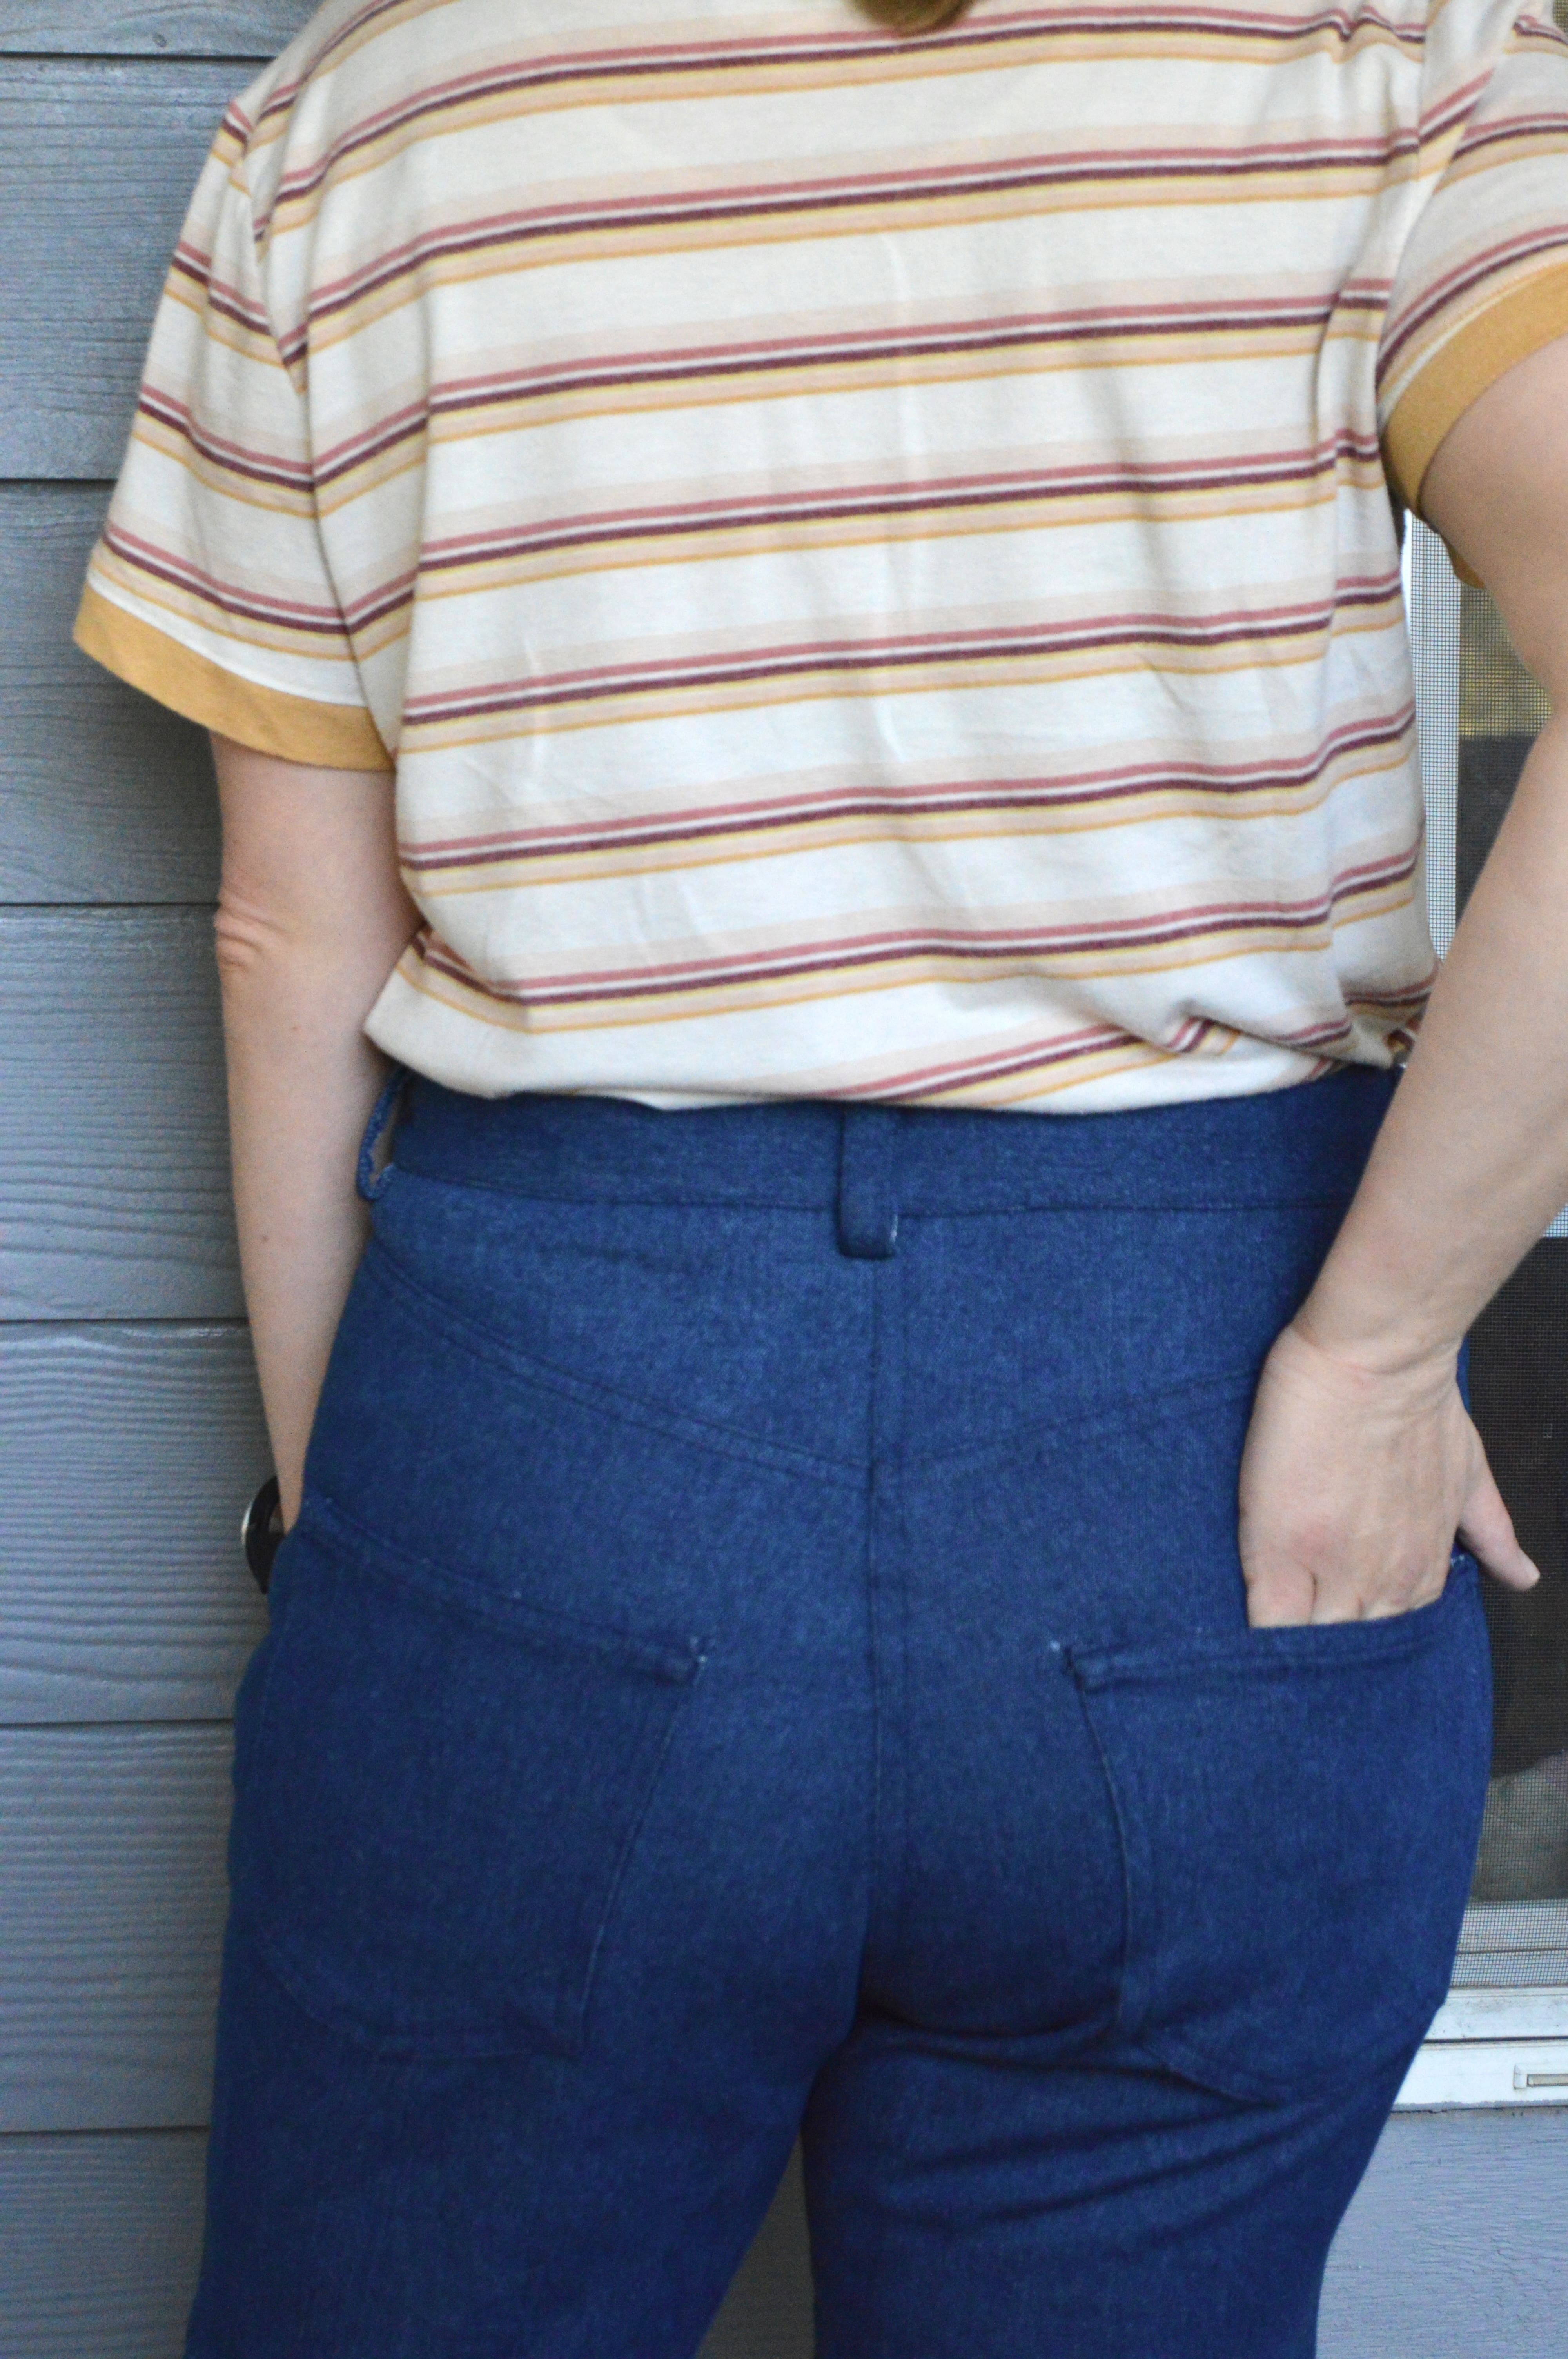
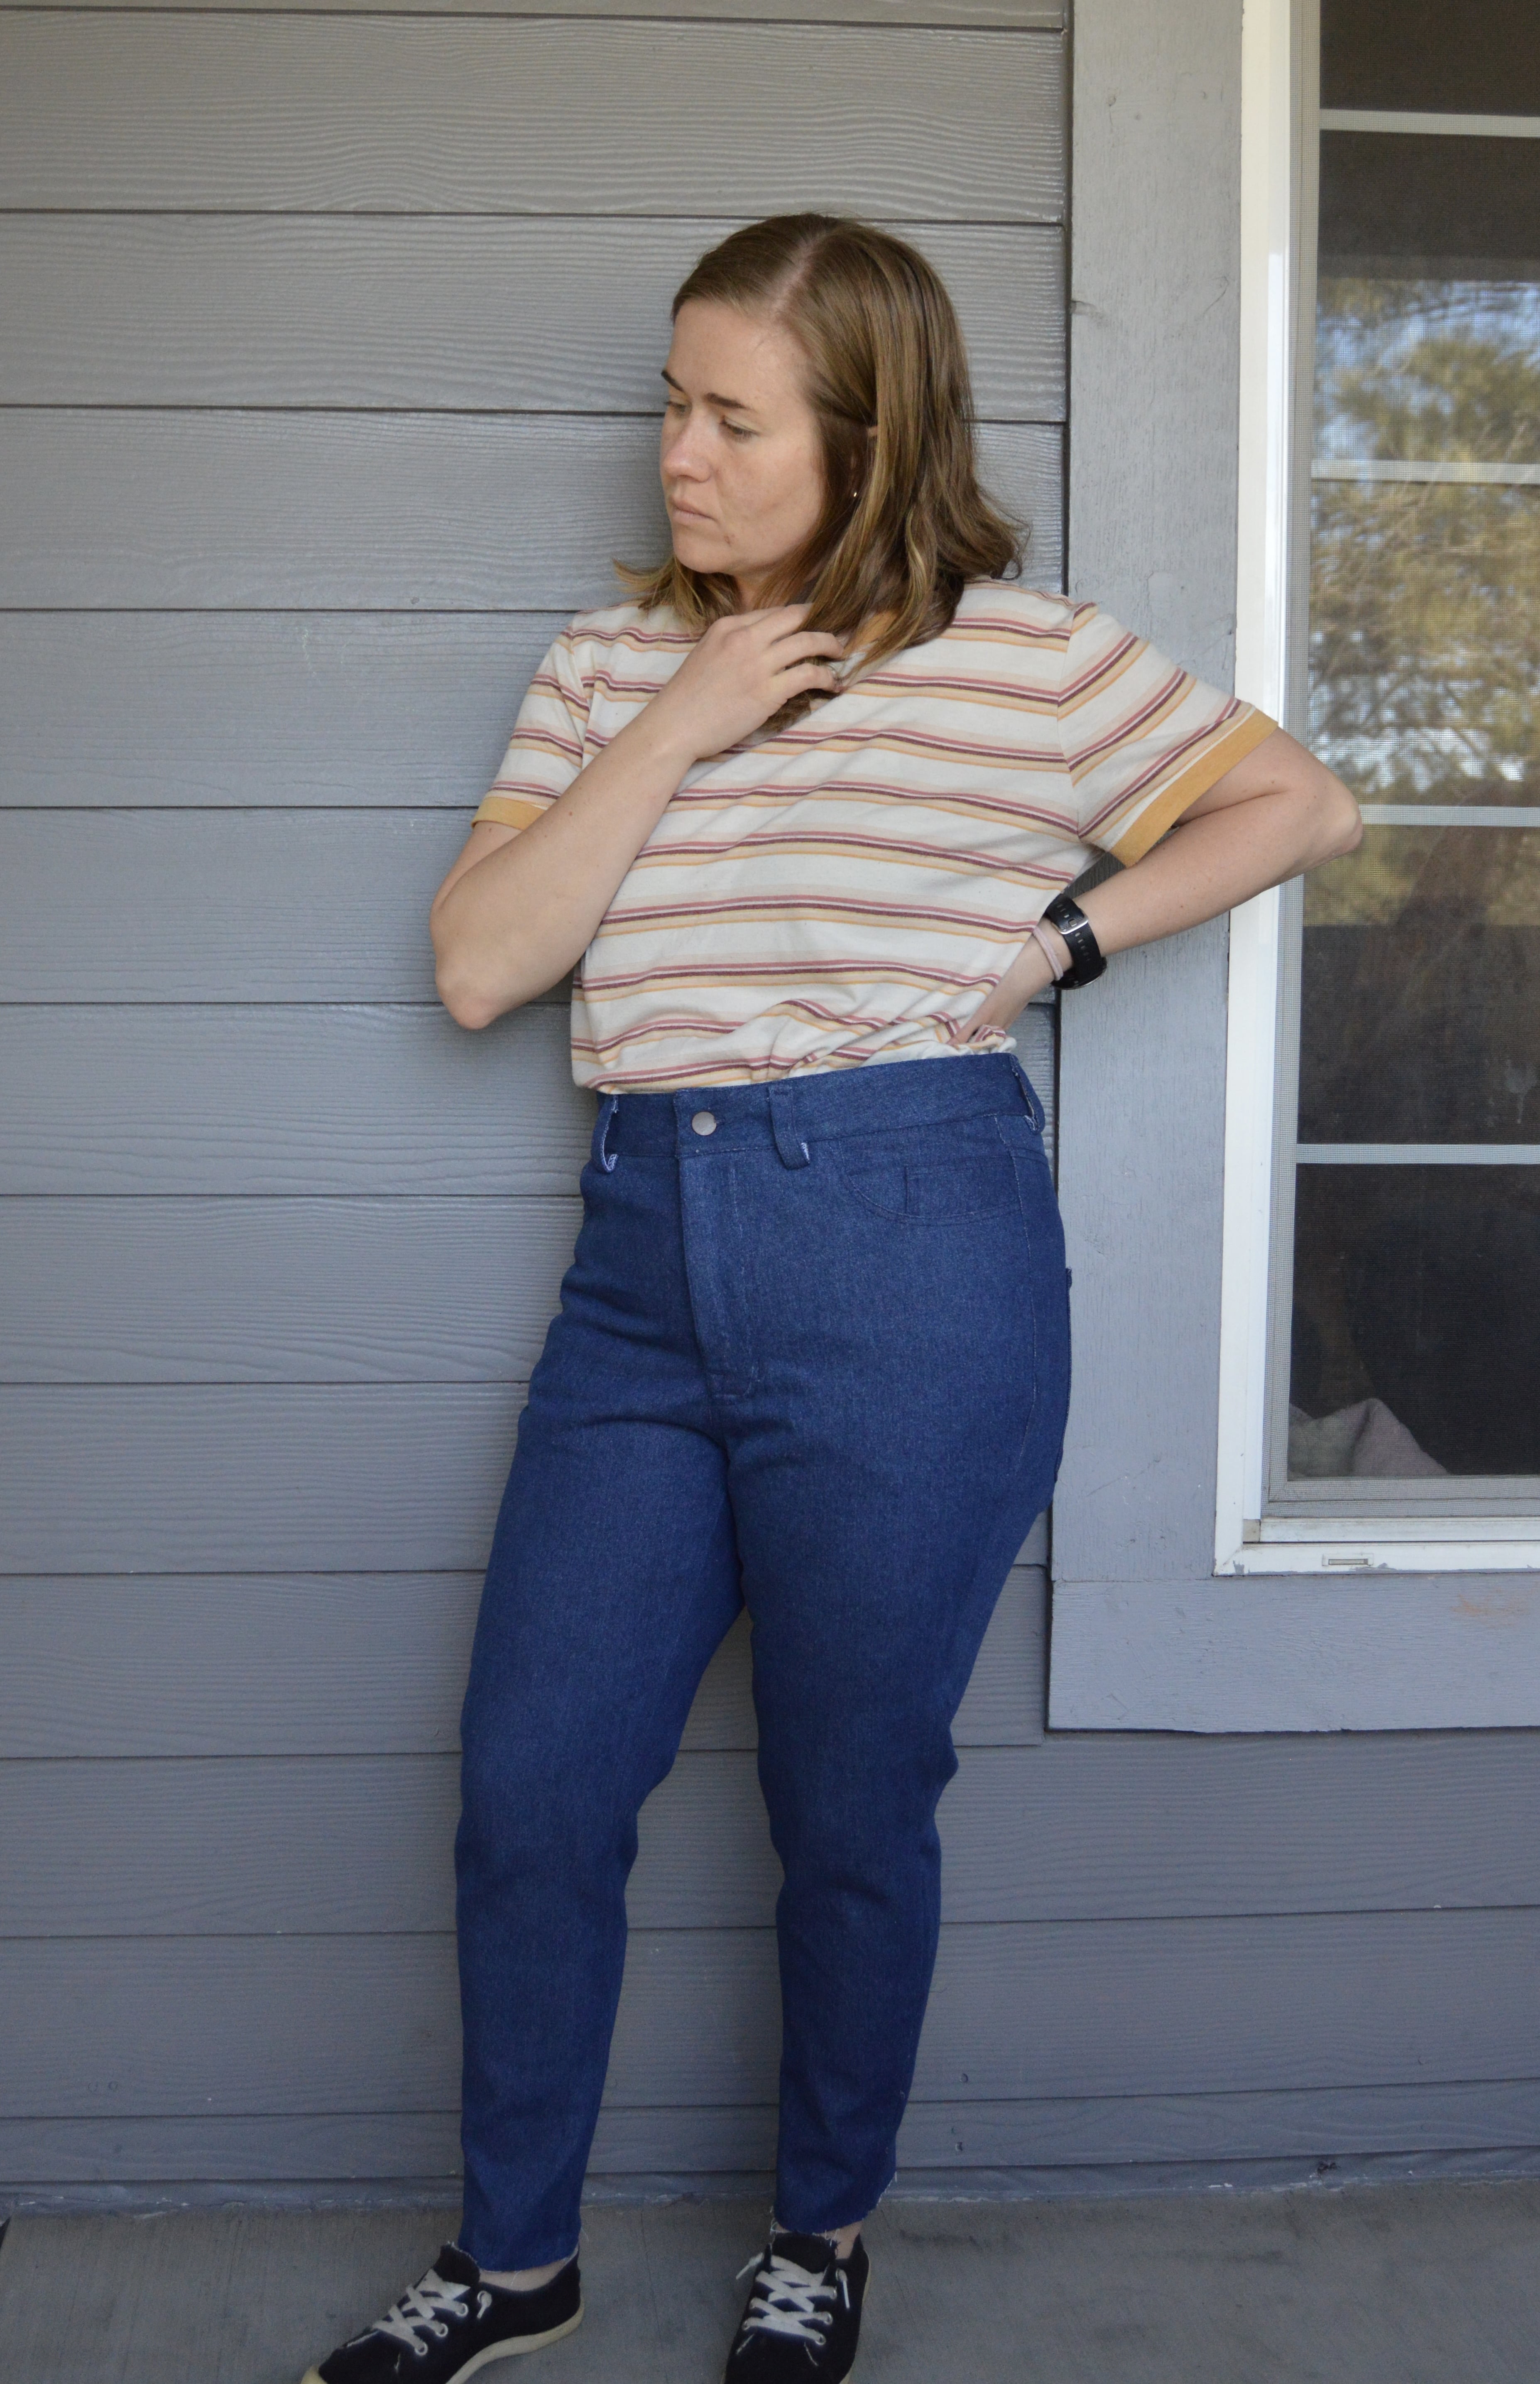
The most notable problem upon trying them on the first time was just how big they felt. The product photos showed these lovely tapered legs but when I tried them on they straight up looked like I was wearing Dad’s pajama pants. They were so baggy and the weird fabric wasn’t helping anything (I so regret not taking a picture of this, trust me!)! I took it to the machine and started taking it in. In the photo above you can see that it took several tries and that I ended having to stray from the edge in order to not have little bubbles of fabric poking out around my hips. I took off maybe 1/2 an inch or so from both side seams (though a little more at the widest part of the hip).

The hips took some tweaking but the legs honestly should have just been taken back to the drawing board. I had already finished the inside seam and so everything I removed was removed from the outer seam. I’d imagine you’re supposed to take from the inside and the outside seams but I’ve never had to remove so much so I have no idea what the correct way is to alter this. As you can see, I took a solid inch and a half or more from the ankle and tapered up from there. I think this is where owning a pair of non-stretch denim would have been beneficial for reference. I tried them on so many times during this process and was looking at the product photo to try to copy the easy taper in the pictures but I didn’t get it right at all. I wonder if I was relying too much on my experience with skinny jeans and inadvertently steered that direction.
By the time I got the legs to a place where I thought they’d work, I was so fed up with this project that I just wanted to get it over with! The last thing I had to do was back pockets and the hem. I had intentionally left pockets for last so I could get the placement right but I was so done with sewing these that I foolishly sewed the back pockets on where the pattern indicated-topstitching and everything-without trying the pants on to see if the placement was okay. I was so tired of putting these stinking jeans on! Obviously that was a very poor decision because the pocket placement per the pattern looks absolutely horrible on me. The pockets should probably be an inch upward and half and inch inward to be be more flattering. At this point I was still thinking I’d wear the blasted things but I didn’t have it in me to unpick all those stitches. I forgot about the pockets and forgot about the hemming and shoved the pants into a deep corner in my closet and told myself to come back to it later.
Well all this happened before Thanksgiving, so you can see how high finishing these was on my priority list.
When I started writing this I decided to check the pattern to see if the leg is tapered at all after the calf and I found that it is but only by 1/4 inch (not per side; total) on the front leg and 1/4 inch on the back leg, so hardly any tapering at all. It seems to me that there is more taper than that on the product photos but who’s to say without seeing the pants in person? Obviously, there weren’t any reviews of the pants online when I bought the pattern (and as far as I know, Helen’s Closet doesn’t post tester photos), but even now I can only find one other review from googling (there might be more on Instagram), and that reviewer also said the cut of the pants seemed wide, which helped me feel a little less unsure.

Anyway, about a month ago I finally got the pants out to see about changing up the back pockets, but first I tried them on and I’m so glad I did! Once they were on my body I knew without a doubt that it was time to scrap them. I would never, under any circumstances, reach into my closet and pull these out to wear. There are just too many things wrong with them and too many fit issues. I thought it was just a goofy taper and ill-placed back pockets but sadly there are lots of other problems too.

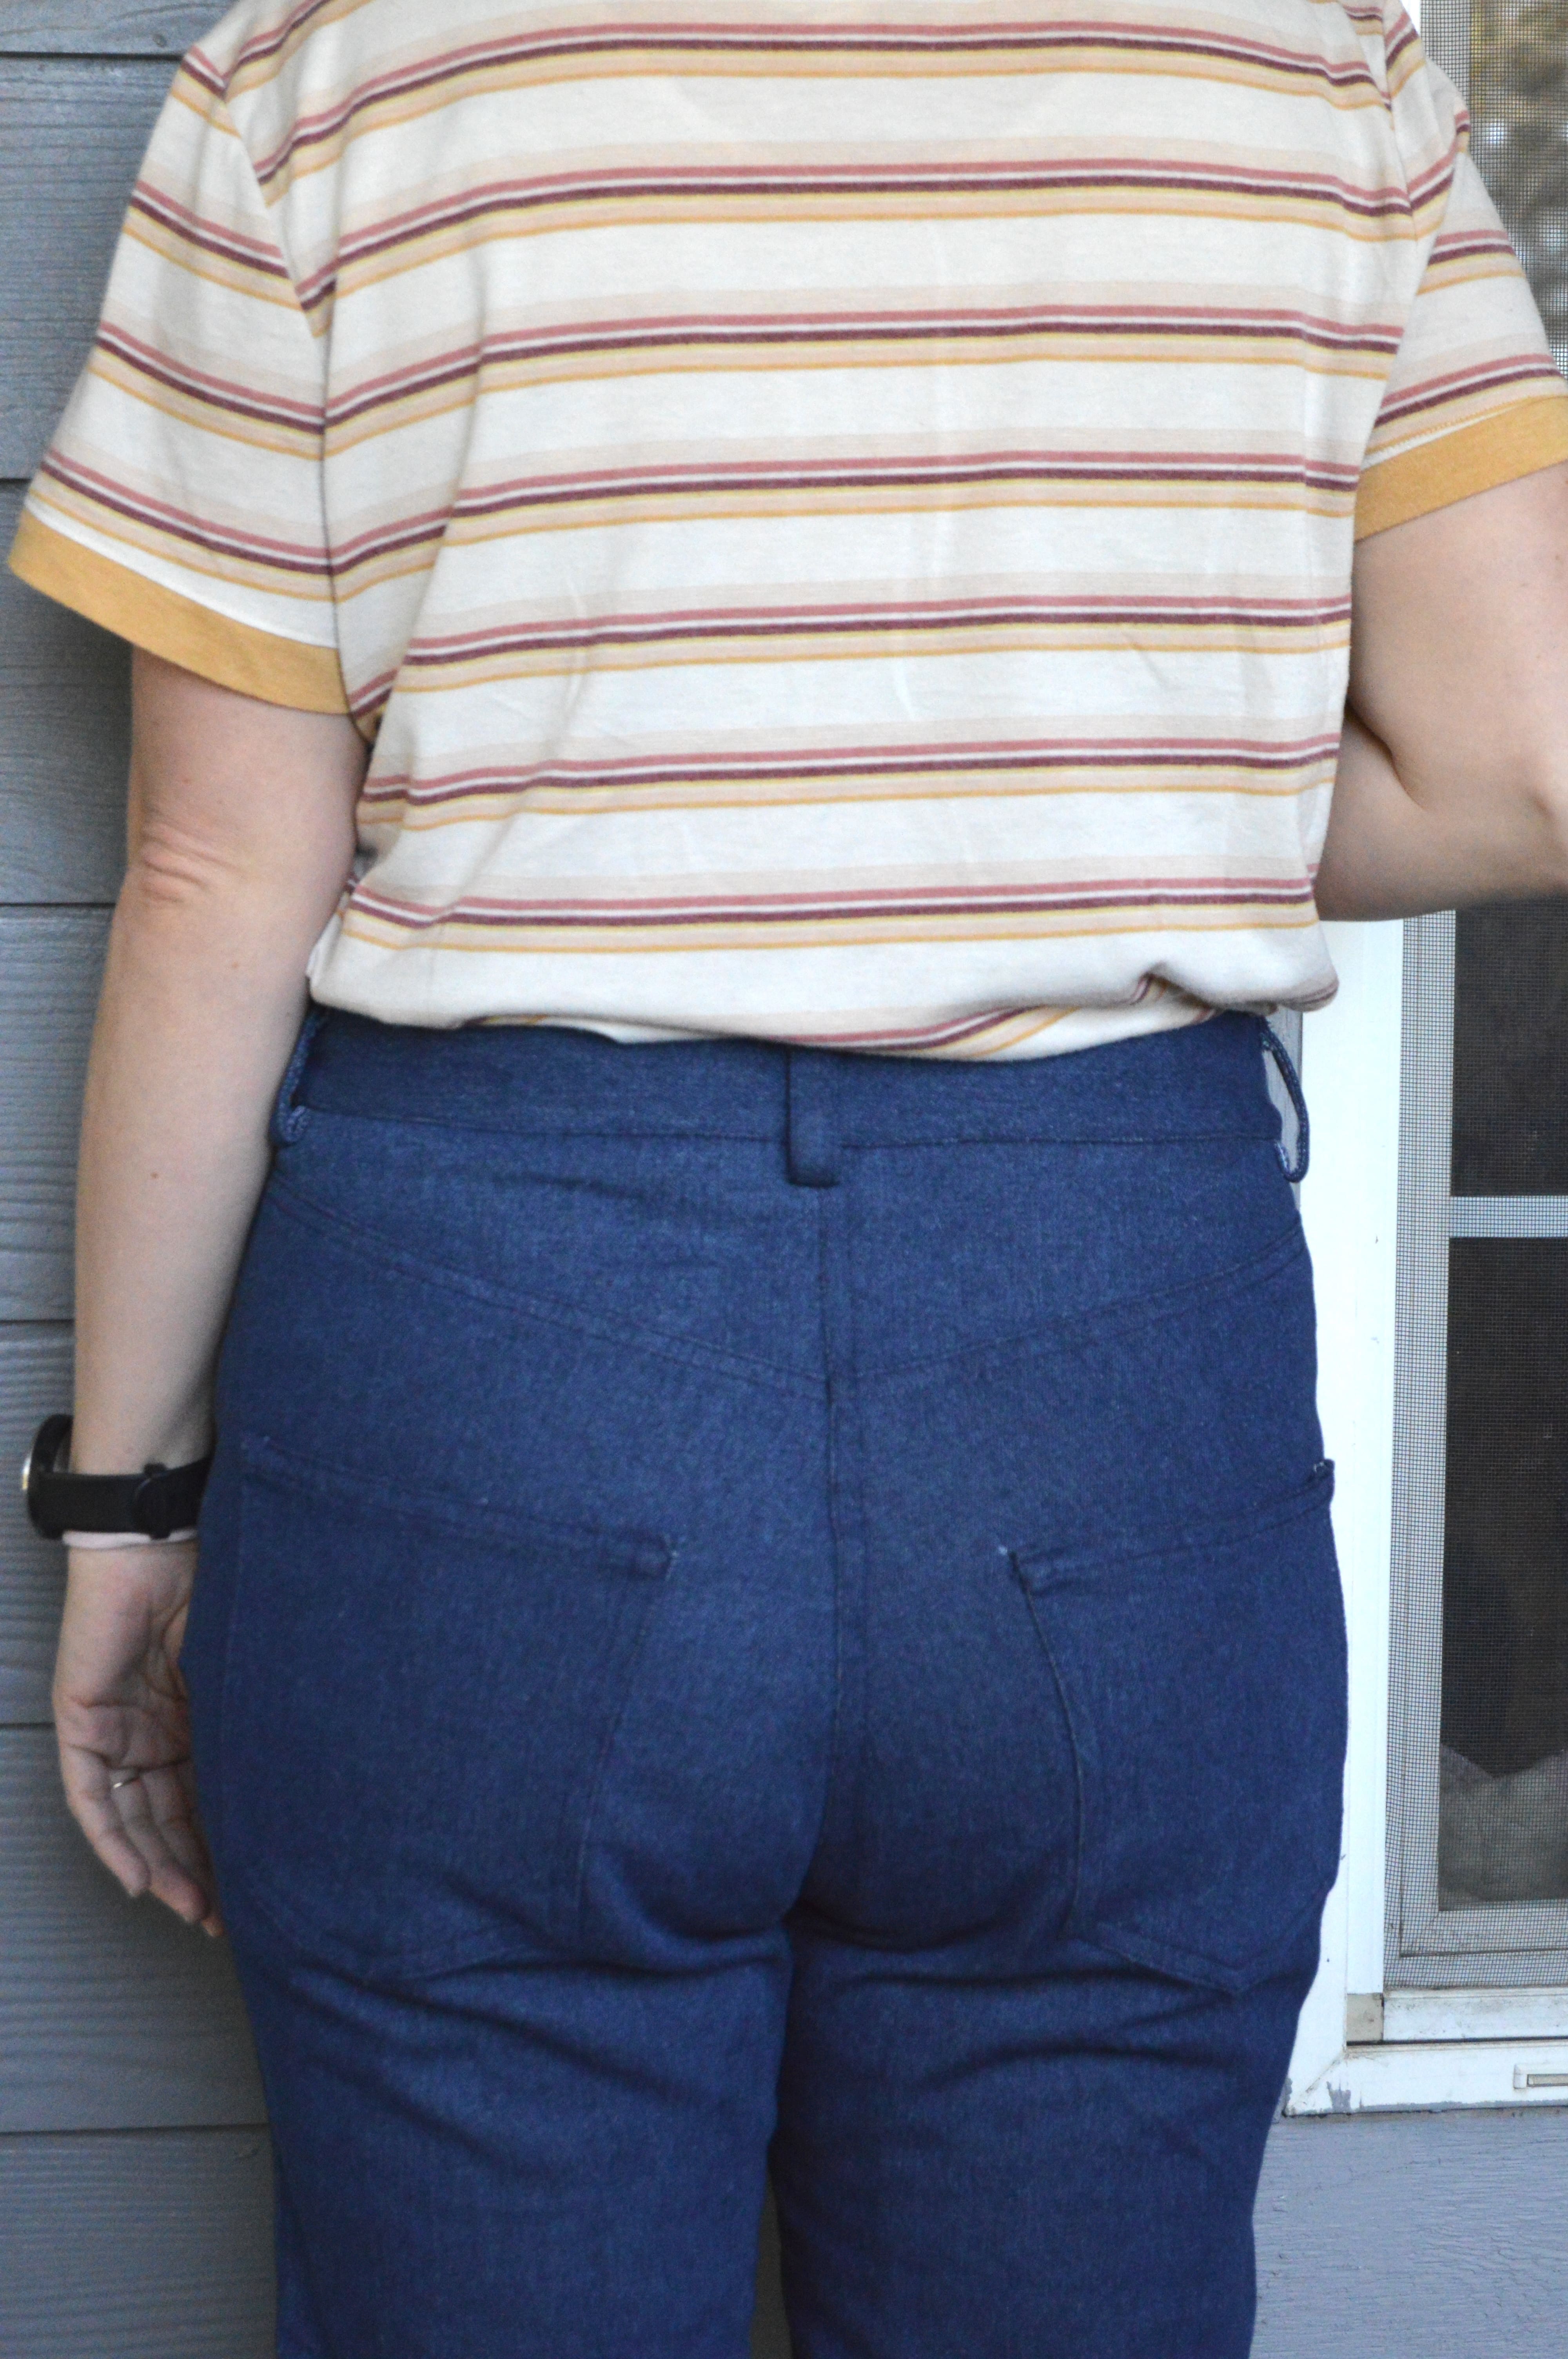
The rise is extremely high. For the size I made, the rise is meant to be over 12 inches with the back rise being over 18 inches. This is totally personal preference and not a problem of the pattern but I discovered that this is waaaaay too high for my liking. I’m a shorter gal (5’3″) and maybe some would say that a higher rise will help me look taller but I’d say it just makes me feel uncomfortable. The top of the pants is an inch or more over my belly button (and I removed an inch so it could have been higher) and when I’m sitting down I can pull the pants all the way up to my bust ha! Not a good look in my opinion.
Not only is the rise extremely high, the crotch on the pants is too low for me. There’s a gap there where there shouldn’t be one, which really gets all sorts of drag lines on.
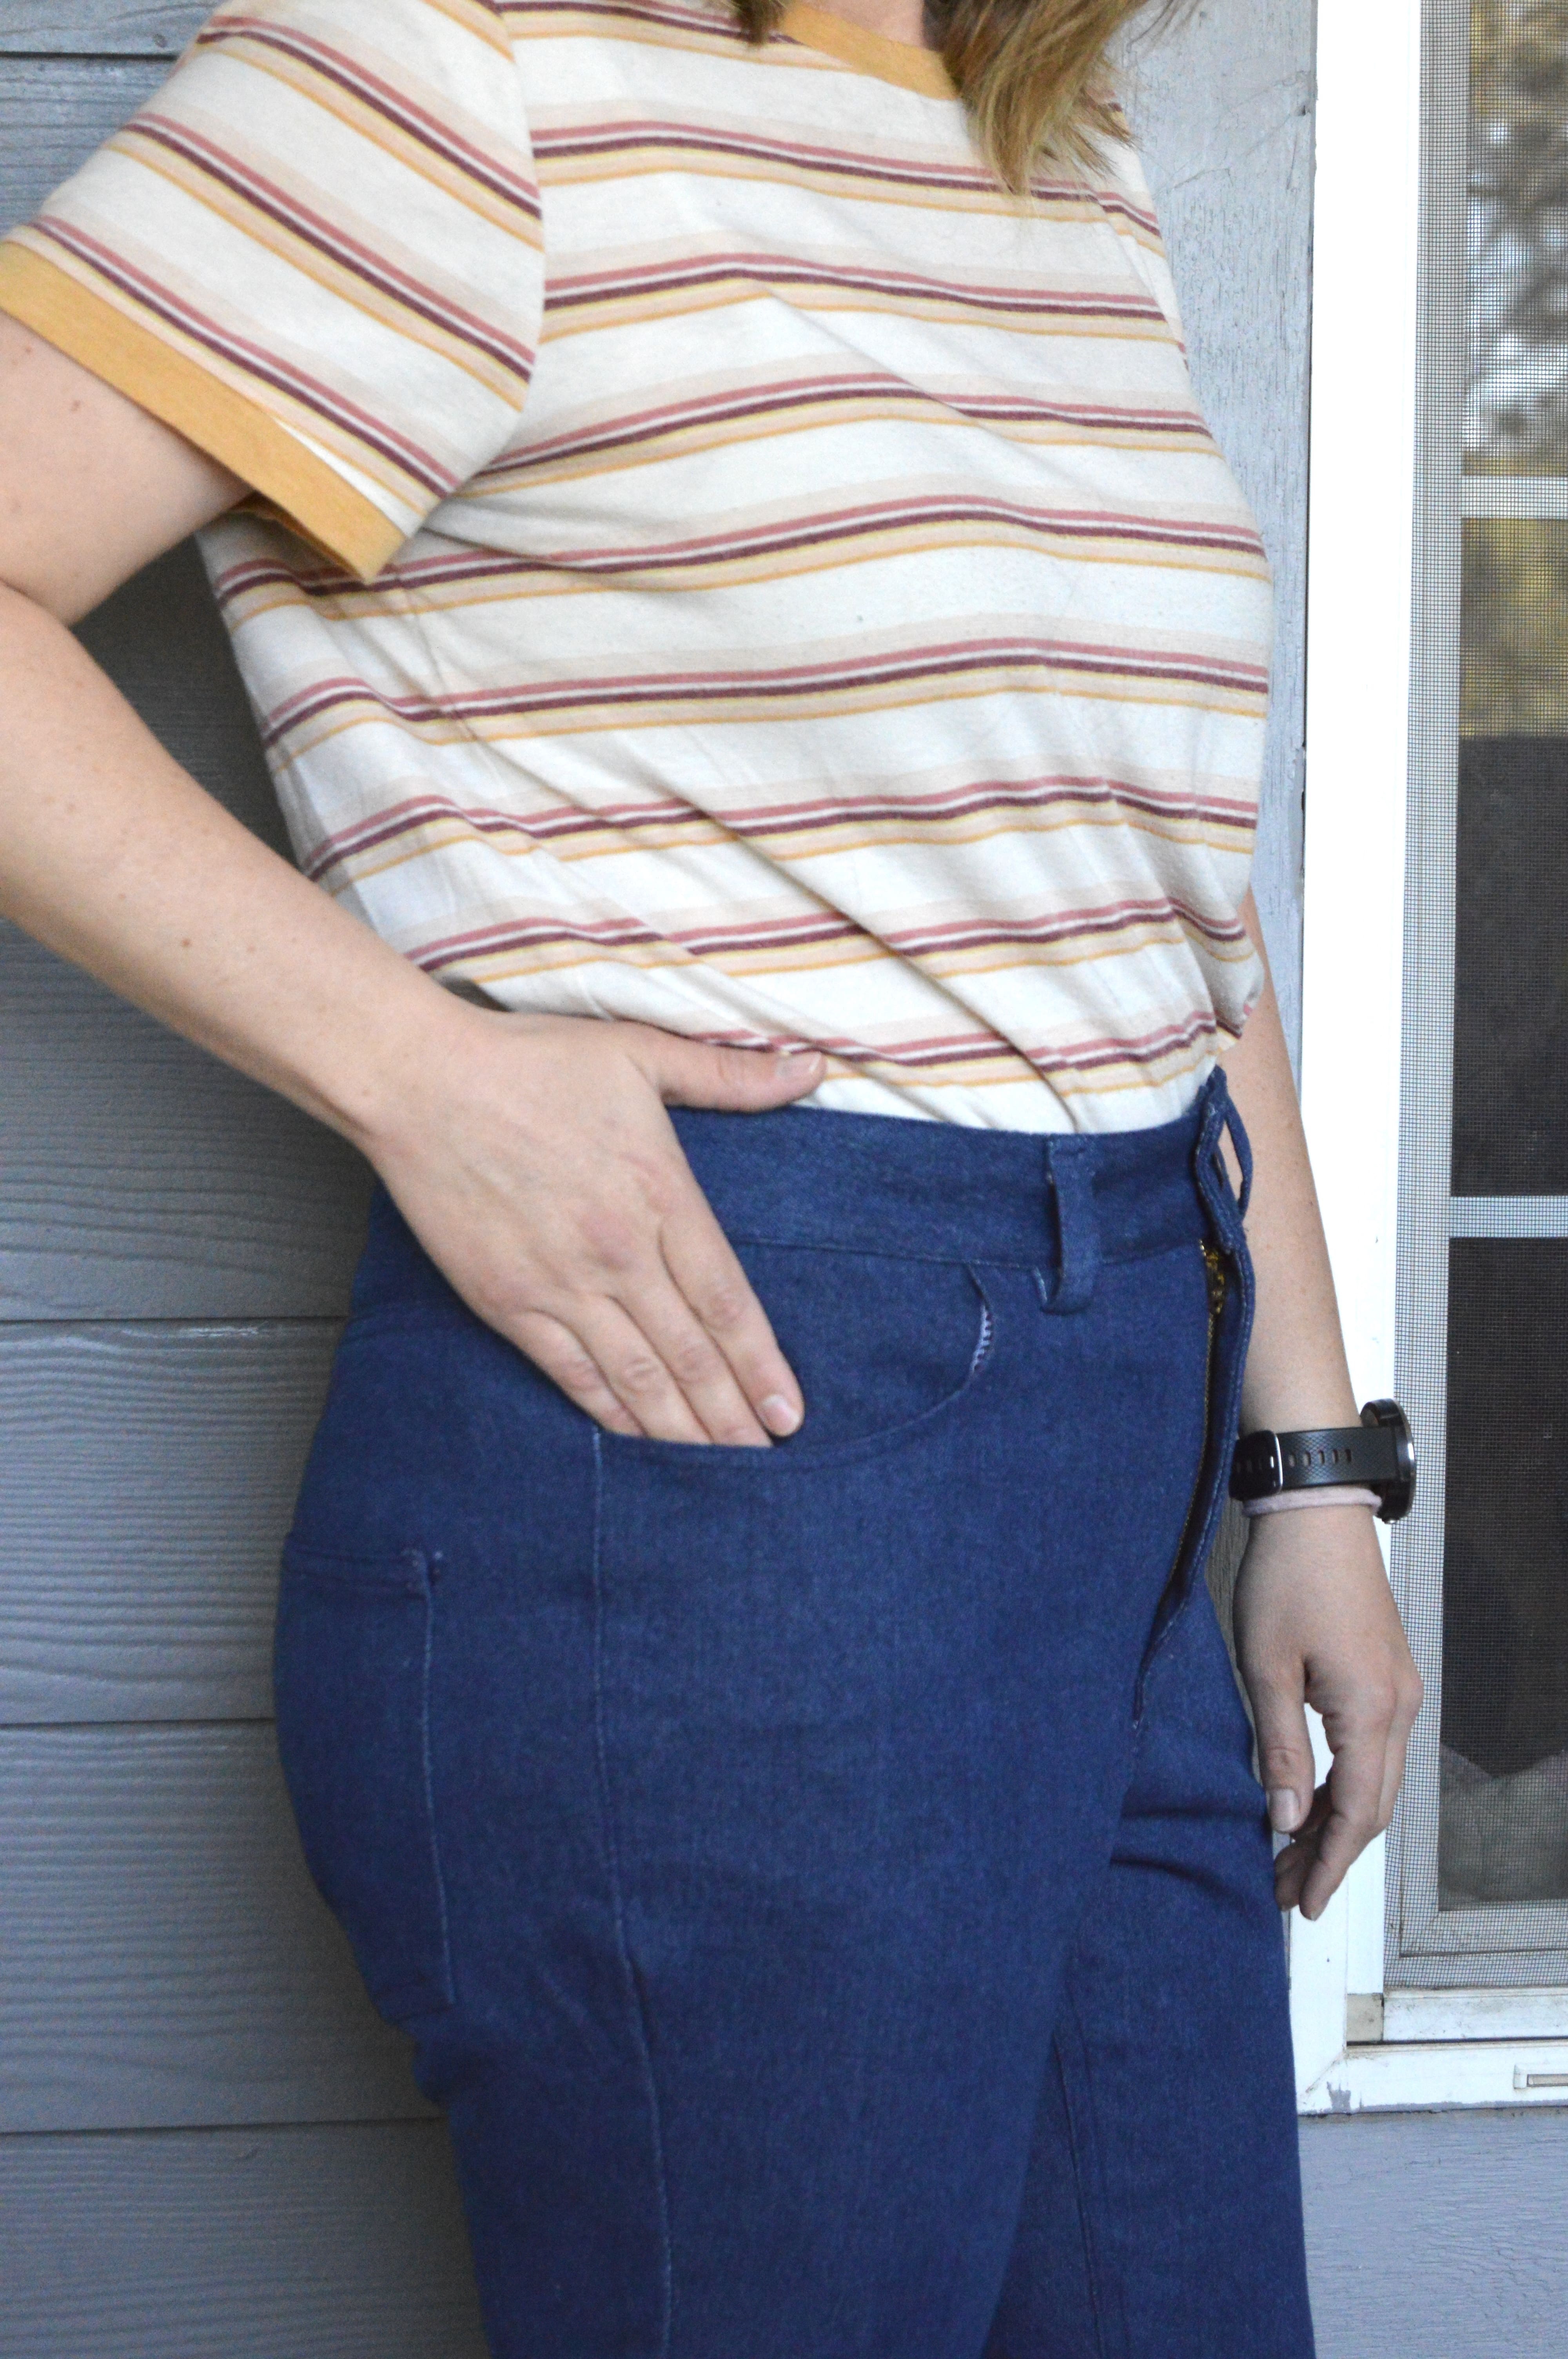
This is nit-picky but something I would absolutely change if I made the pattern again-the pocket bag is too near the entrance of the pocket. See my serger thread peeking out from the pocket in the photo above? If I made these again, I’d shift the pocket facing over another half inch or so to make sure that seam stays hidden.
So if anyone’s keeping track so far we’ve got issues with the fabric, rise, crotch depth (or pelvic floor), pocket facing, back pocket placement, leg shaping and tapering. It’s a smattering that overwhelms me and if I were to make these again I would have to start back at square one because I’d have no idea what to tweak first.
I feel like it’s important to note that my weight has fluctuated from the time I made these to the time I took these photos. So not all fit issues were issues then. I also want to acknowledge that my inexpert leg tapering may very well have messed with the pattern in a way that exacerbated the fit issues I see.
I’ve been seriously struggling with my sewing lately, as you guys may have noticed with many of my recent posts. I’ve never had so many issues with fit in my life. I don’t know whether to place the blame on the patterns, my funky post-partum body, or just my sewing skills in general. It’s hard to be excited for a project and then have it turn out so poorly that it will never, not once, get worn. I’m not quitting yet but I’d be lying if I said I hadn’t thought about it!
As far as this pattern goes, I don’t think I can say it’s a bad pattern, but I feel I can confidently say that it was a bad pattern for me. It’s hard for me to say that because I’ve really come to like and respect Helen/Helen’s Closet after following her business and podcast for years now. This was my first time making something from her. I’m not so burnt that I’ll never try these patterns again but the next one I do try will definitely be a top or a dress that has very little fitting to do. I also don’t want to sign off on never giving the Brooks Jeans a second chance. Never say never. But I do think it’ll be a solid chunk of time before I check them out again. There’s no way I’m going to give them another shot next month, but maybe in a year or two. And obviously making a muslin will be my top priority! I’ve learned my lesson! Now can I have a smidge of my sewing power back, please??
Pattern: Brooks Jeans from Helen’s Closet
Size: 14 at the waist, 12 at the hips and 10 down from there
Alterations: All the things
Fabric: some no stretch denim from Joann
Cost: emotional turmoil (just kidding! I can’t remember how much the fabric was-$30? and maybe $12ish for the pattern?)
Would I make this again?: Give me a year or two before you ask me

I did something similar, buying the half-moon 101 jean son a whim without too much looking after sewing up Ginger, Jalie and Kwik Sew jeans. Gingers are fine, but really I was looking for a straight leg and rigid denim. Turns out the old Mccalls Palmer Pletsch ones were just what I was looking for, though next pair will have some tiny tweaks to improve. So many styles out there!
It helped a lot that I have access to a fabric clearance store, where I can get denim for $3-$4/yard. That makes trying new patterns a LOT less irritating!
It helped me to think of exactly what I wanted in a pair of jeans: sturdy, structure, with enough room for my hips & thighs. What are you looking for?
LikeLiked by 1 person
This is great advice, Katie! There ARE so many styles and truthfully, I don’t think I’m ready for pants with no stretch quite yet!
LikeLike
Thanks for such an in-depth review. I’ve traced out my pattern and will now attempt some changes before cutting out the fabric.
LikeLike
Good luck! I hope you have success and I’d love to see how yours turn out!
LikeLike