

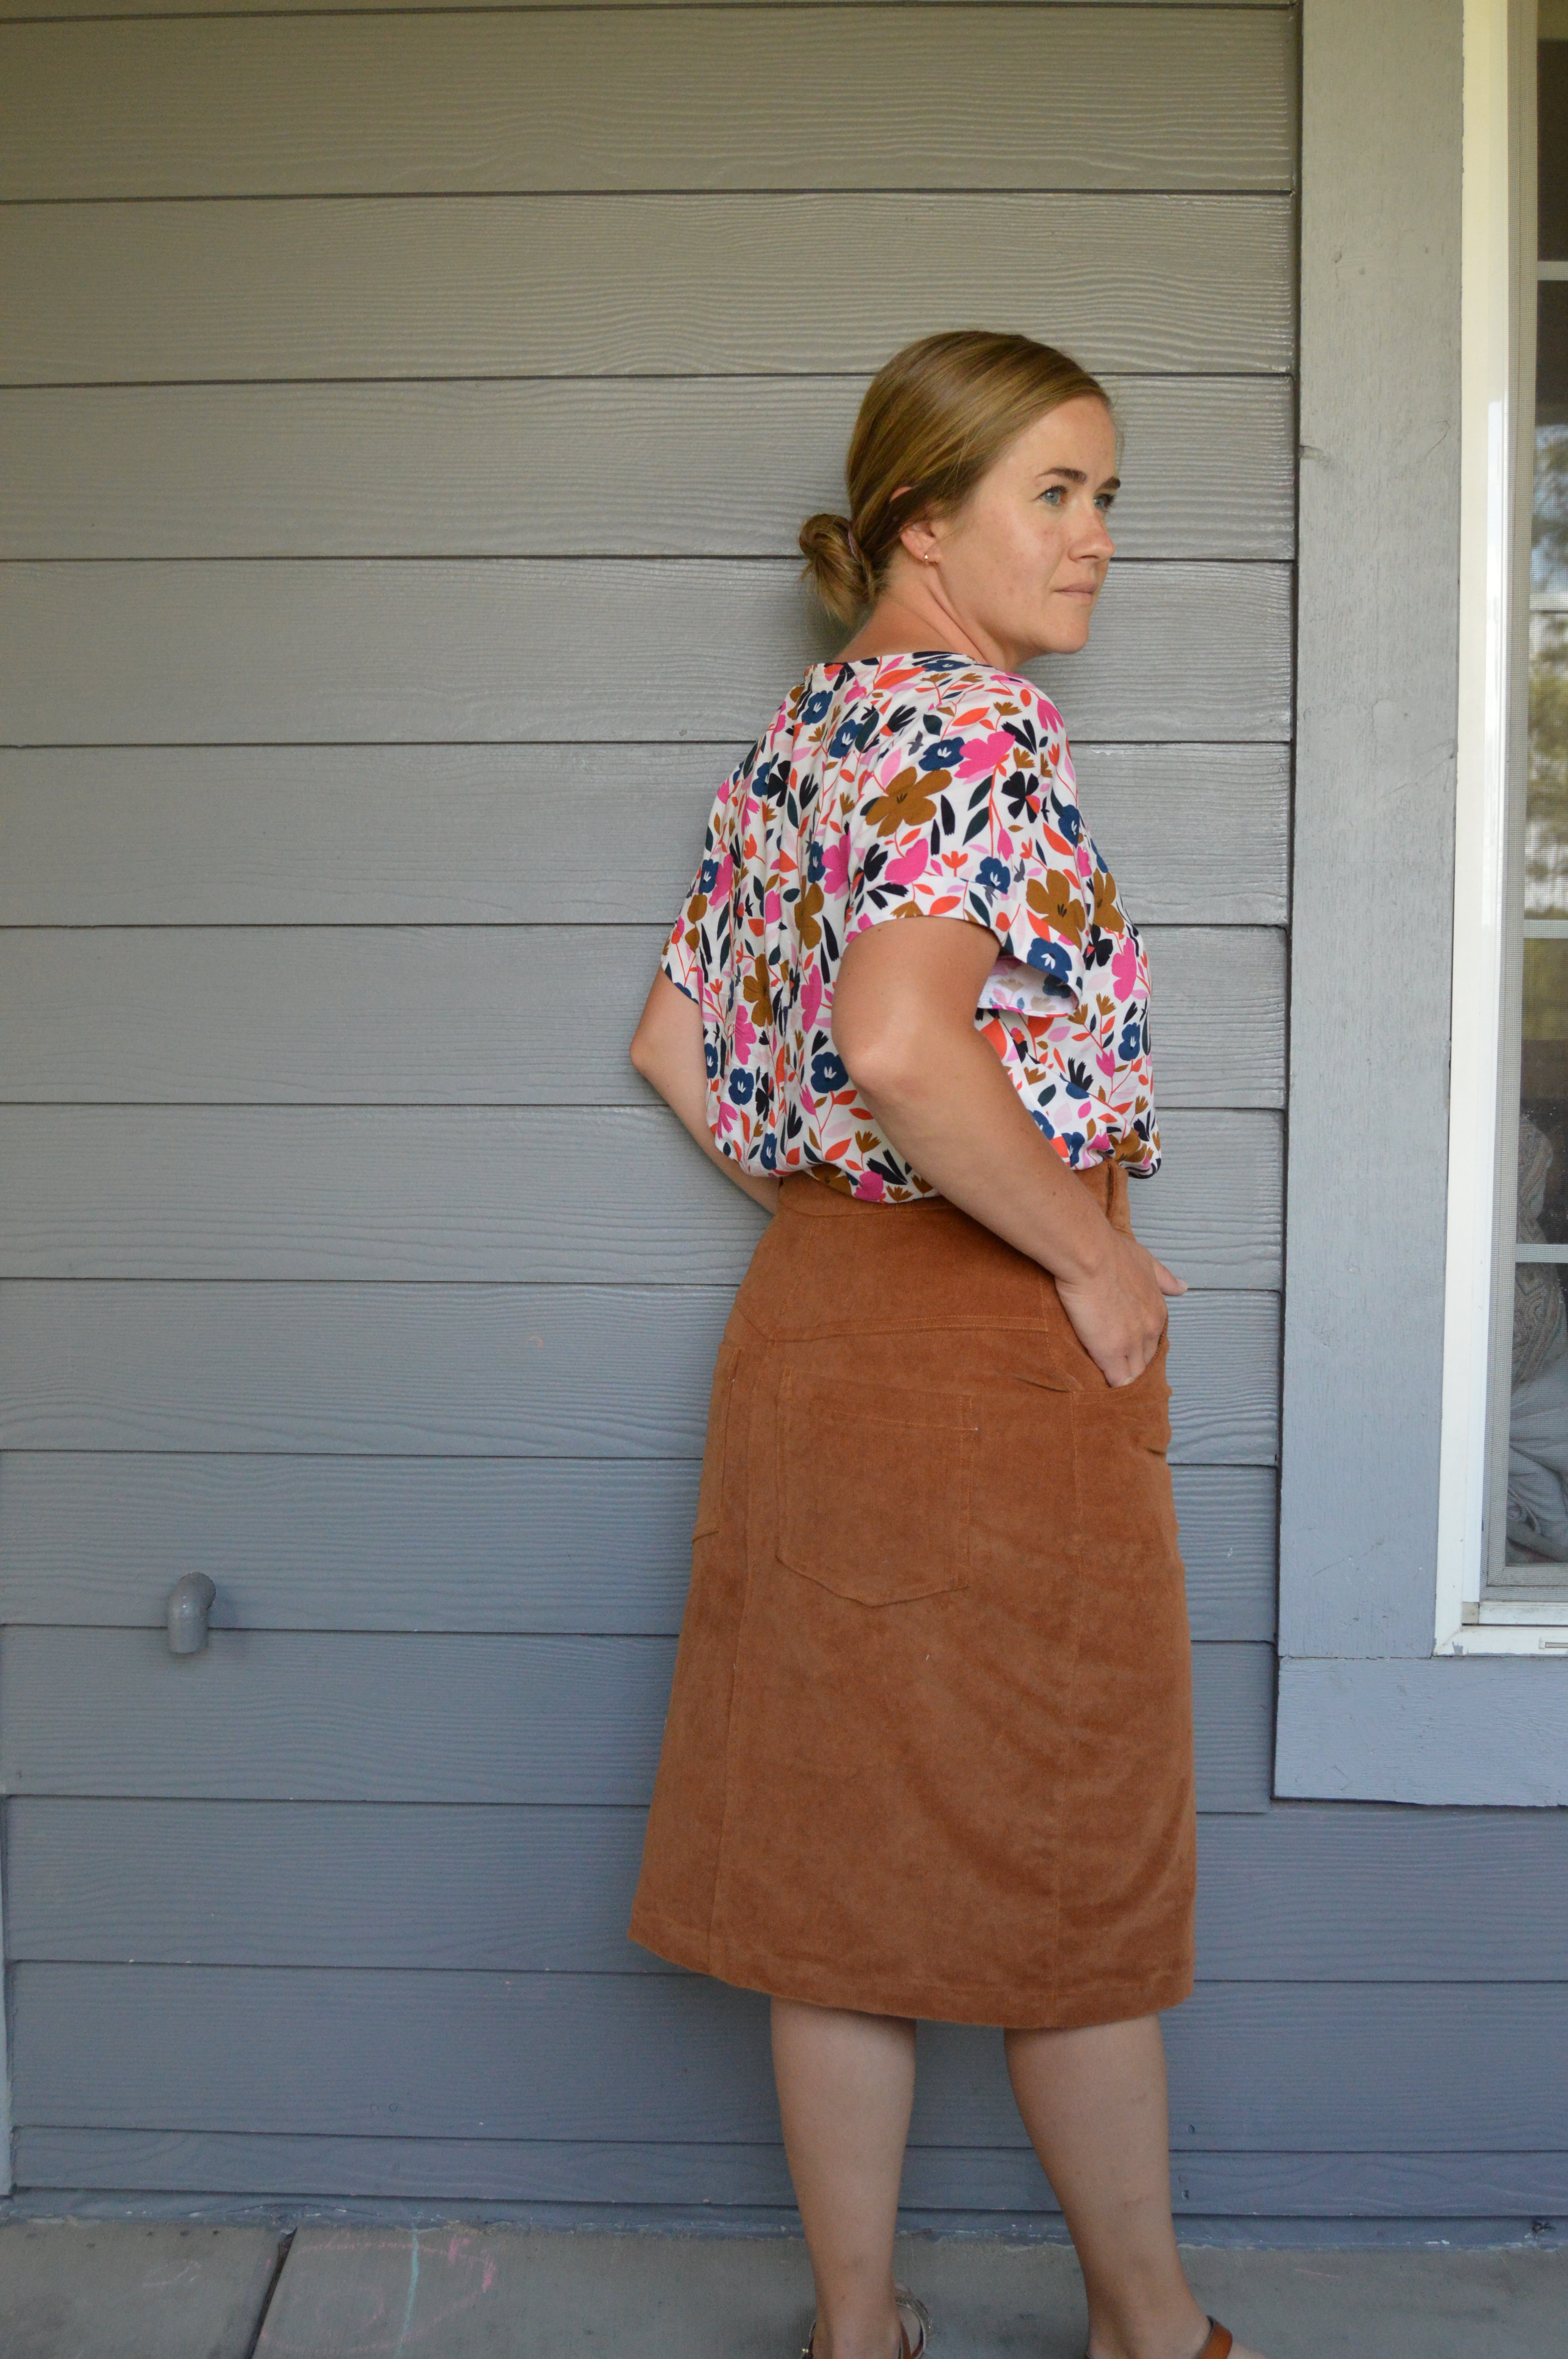
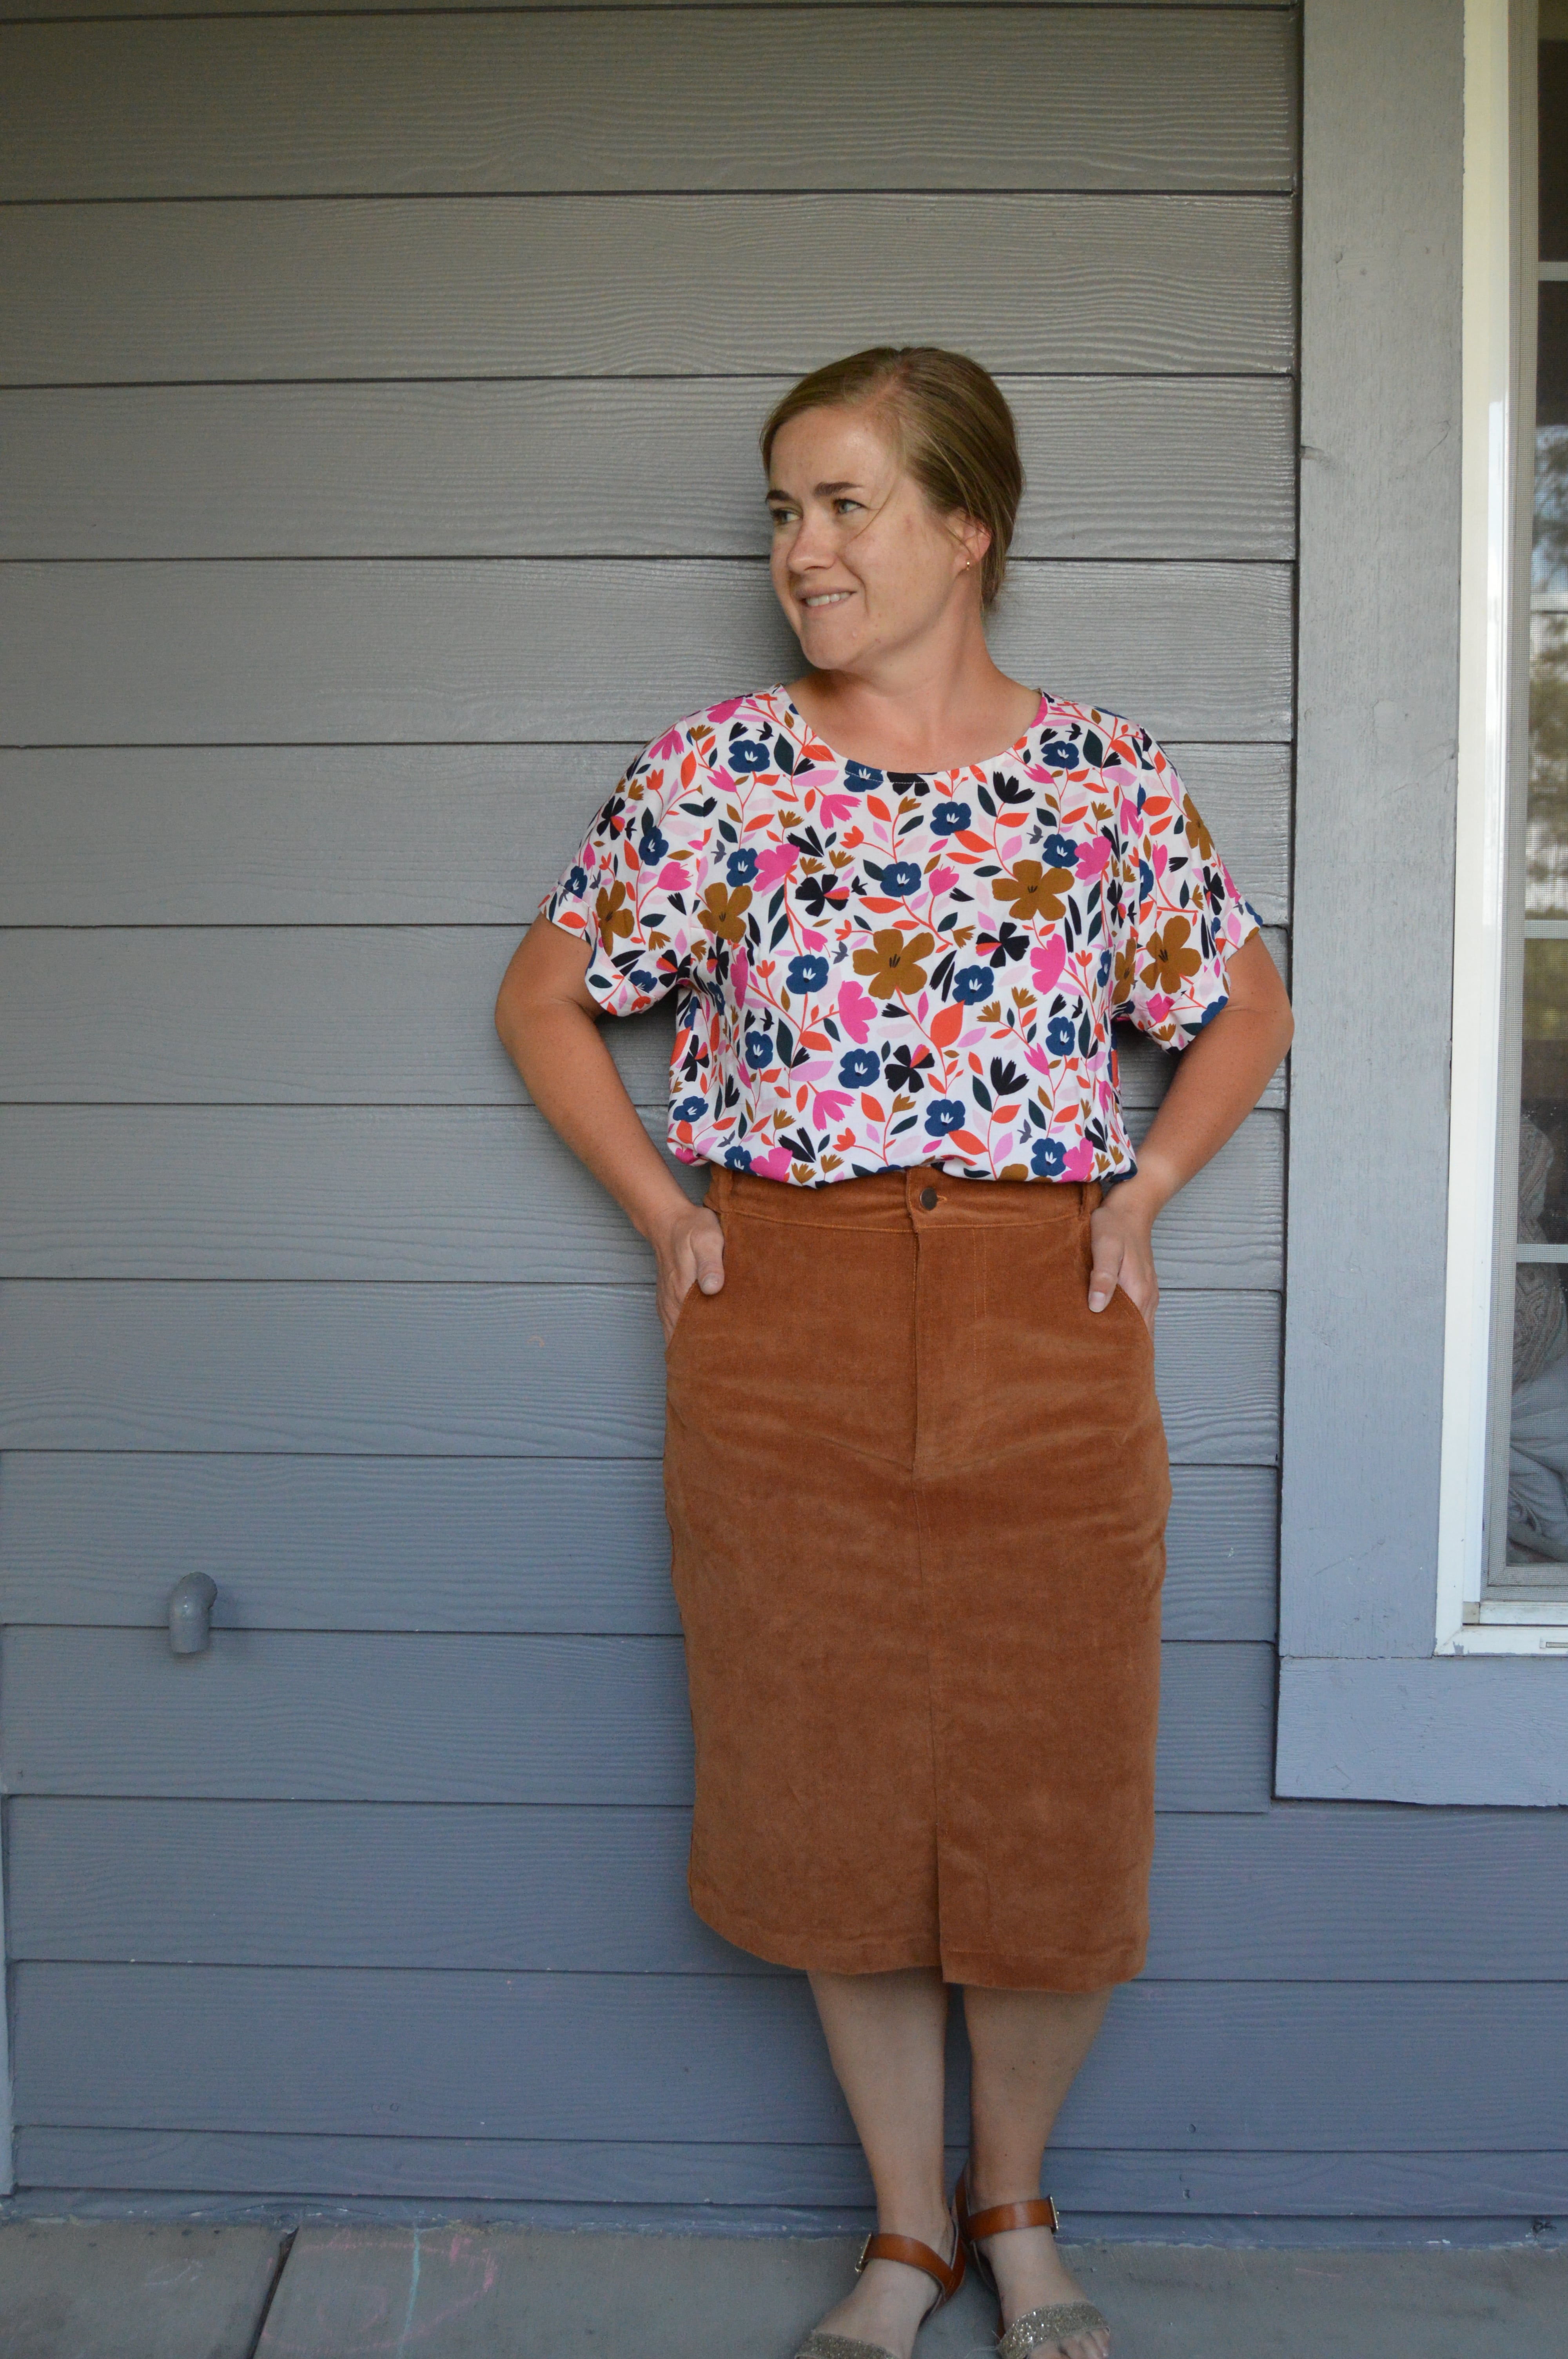
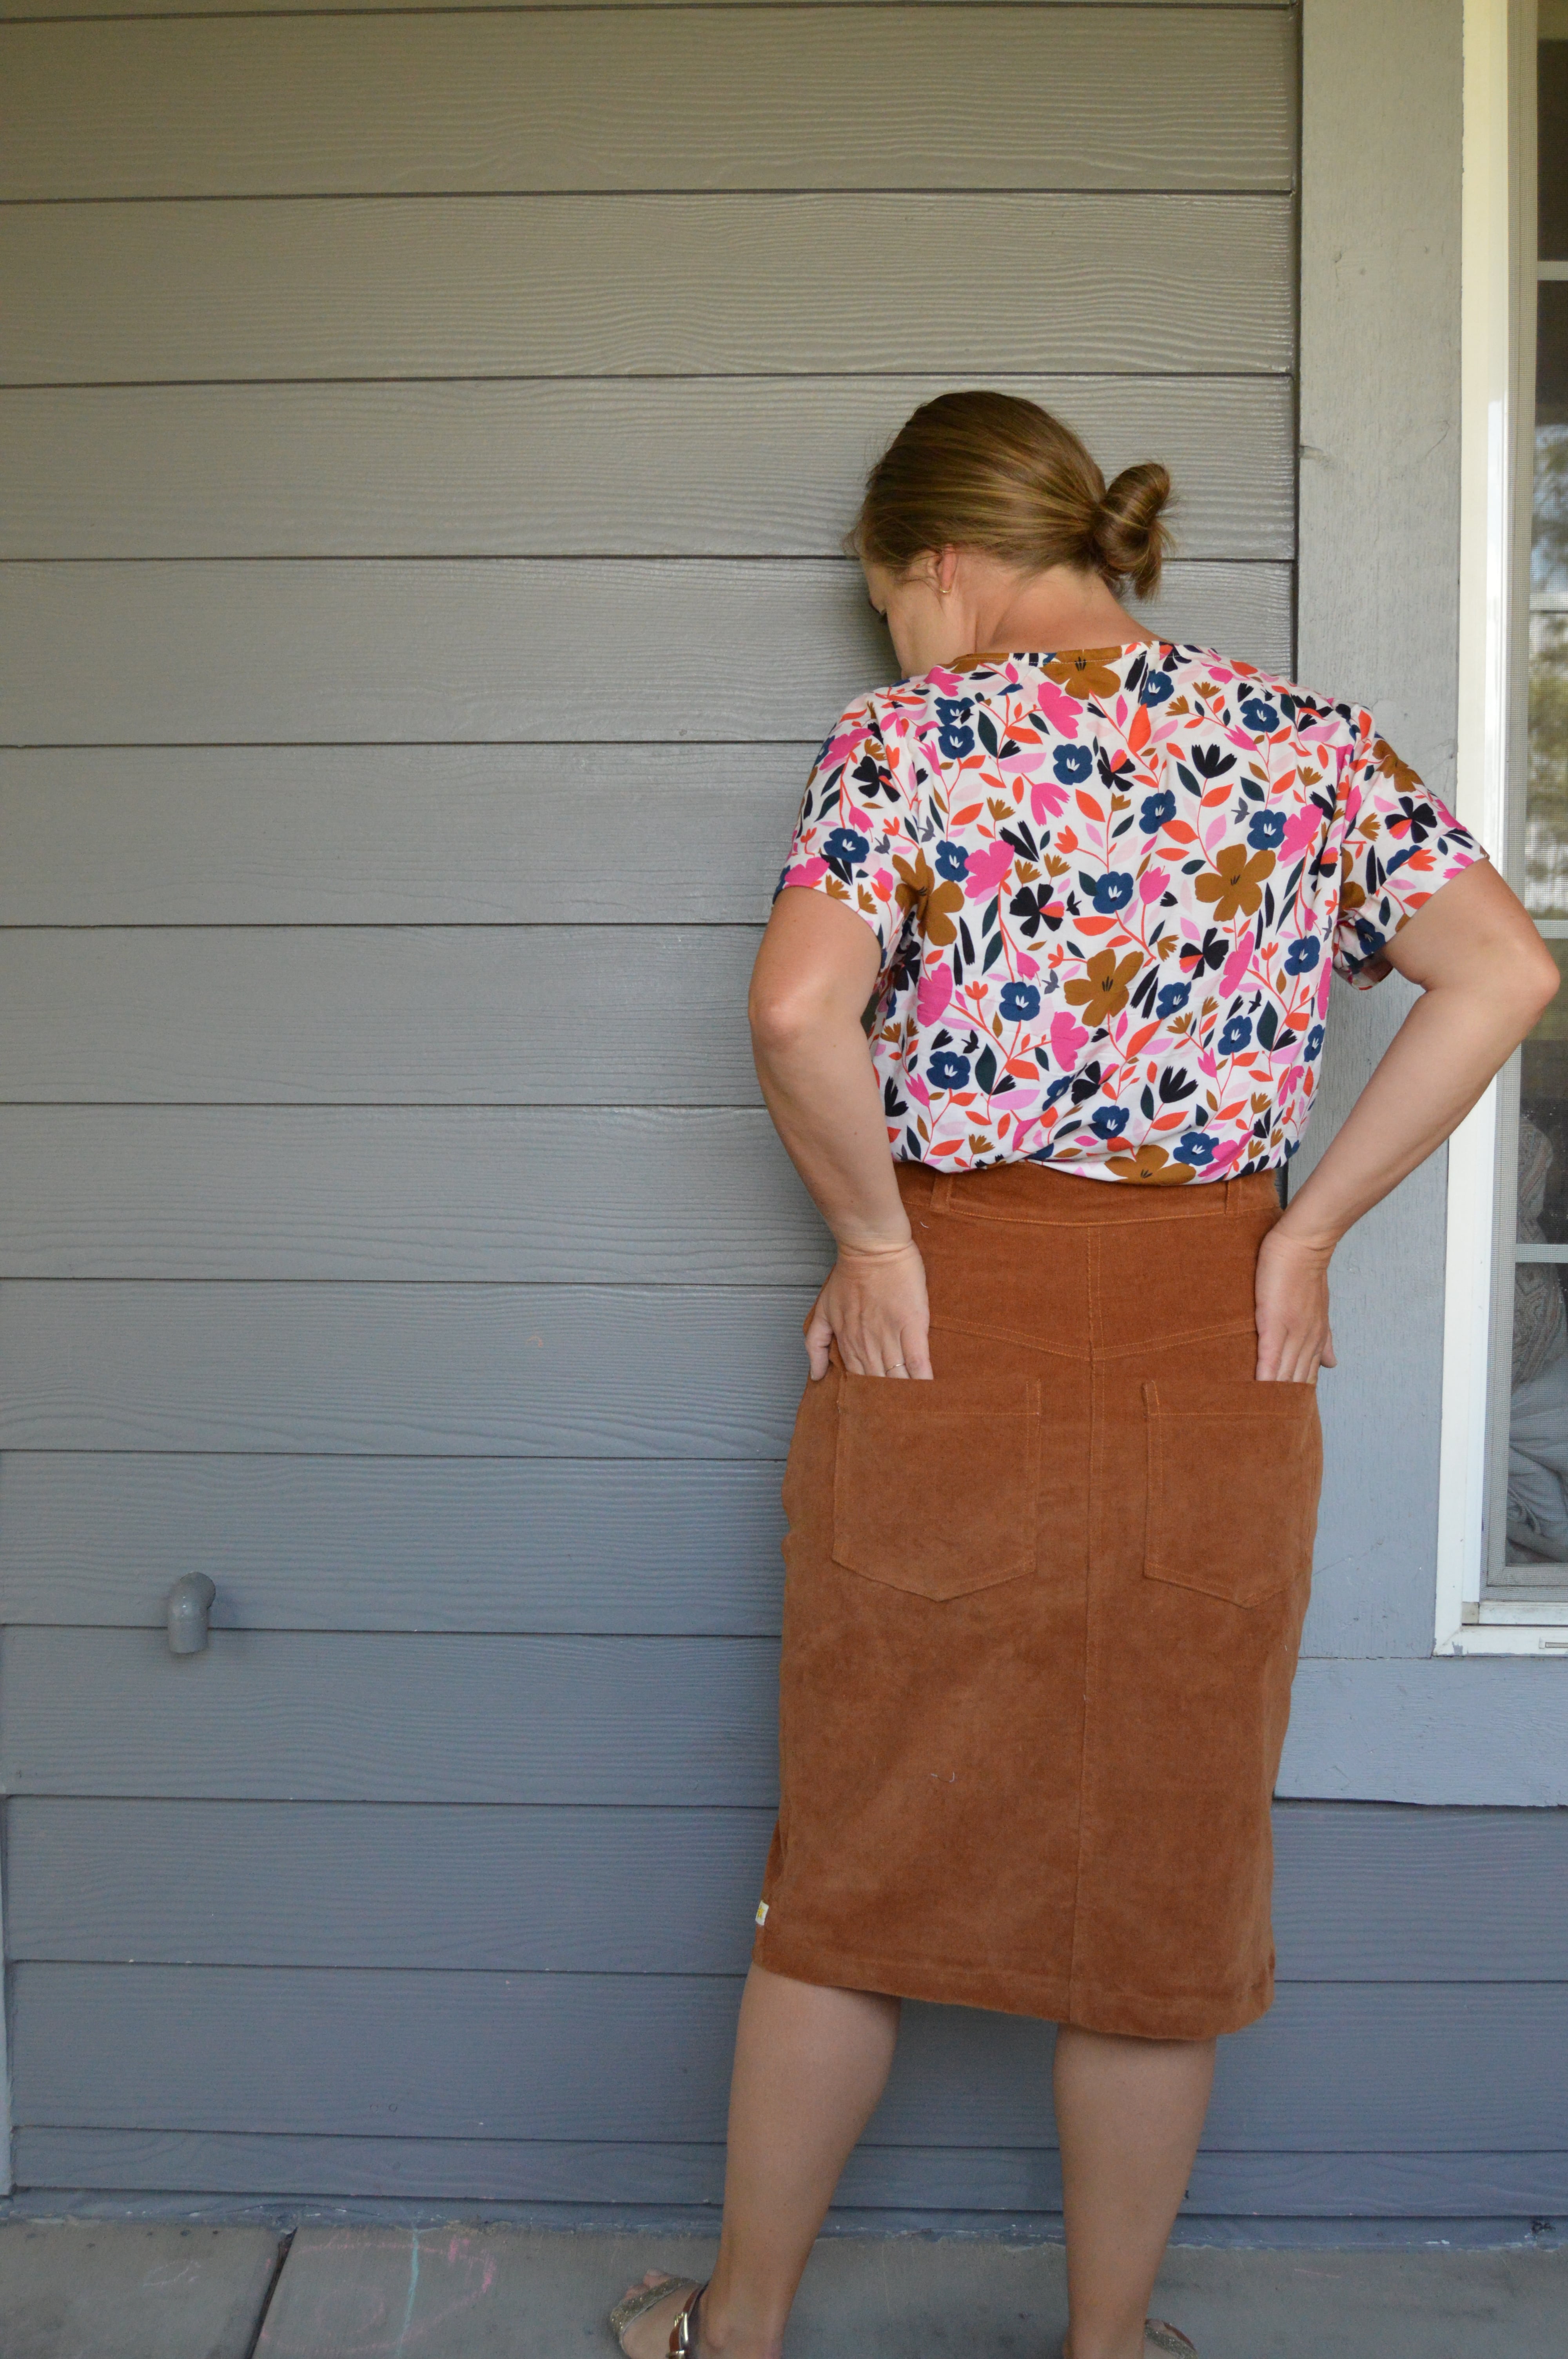
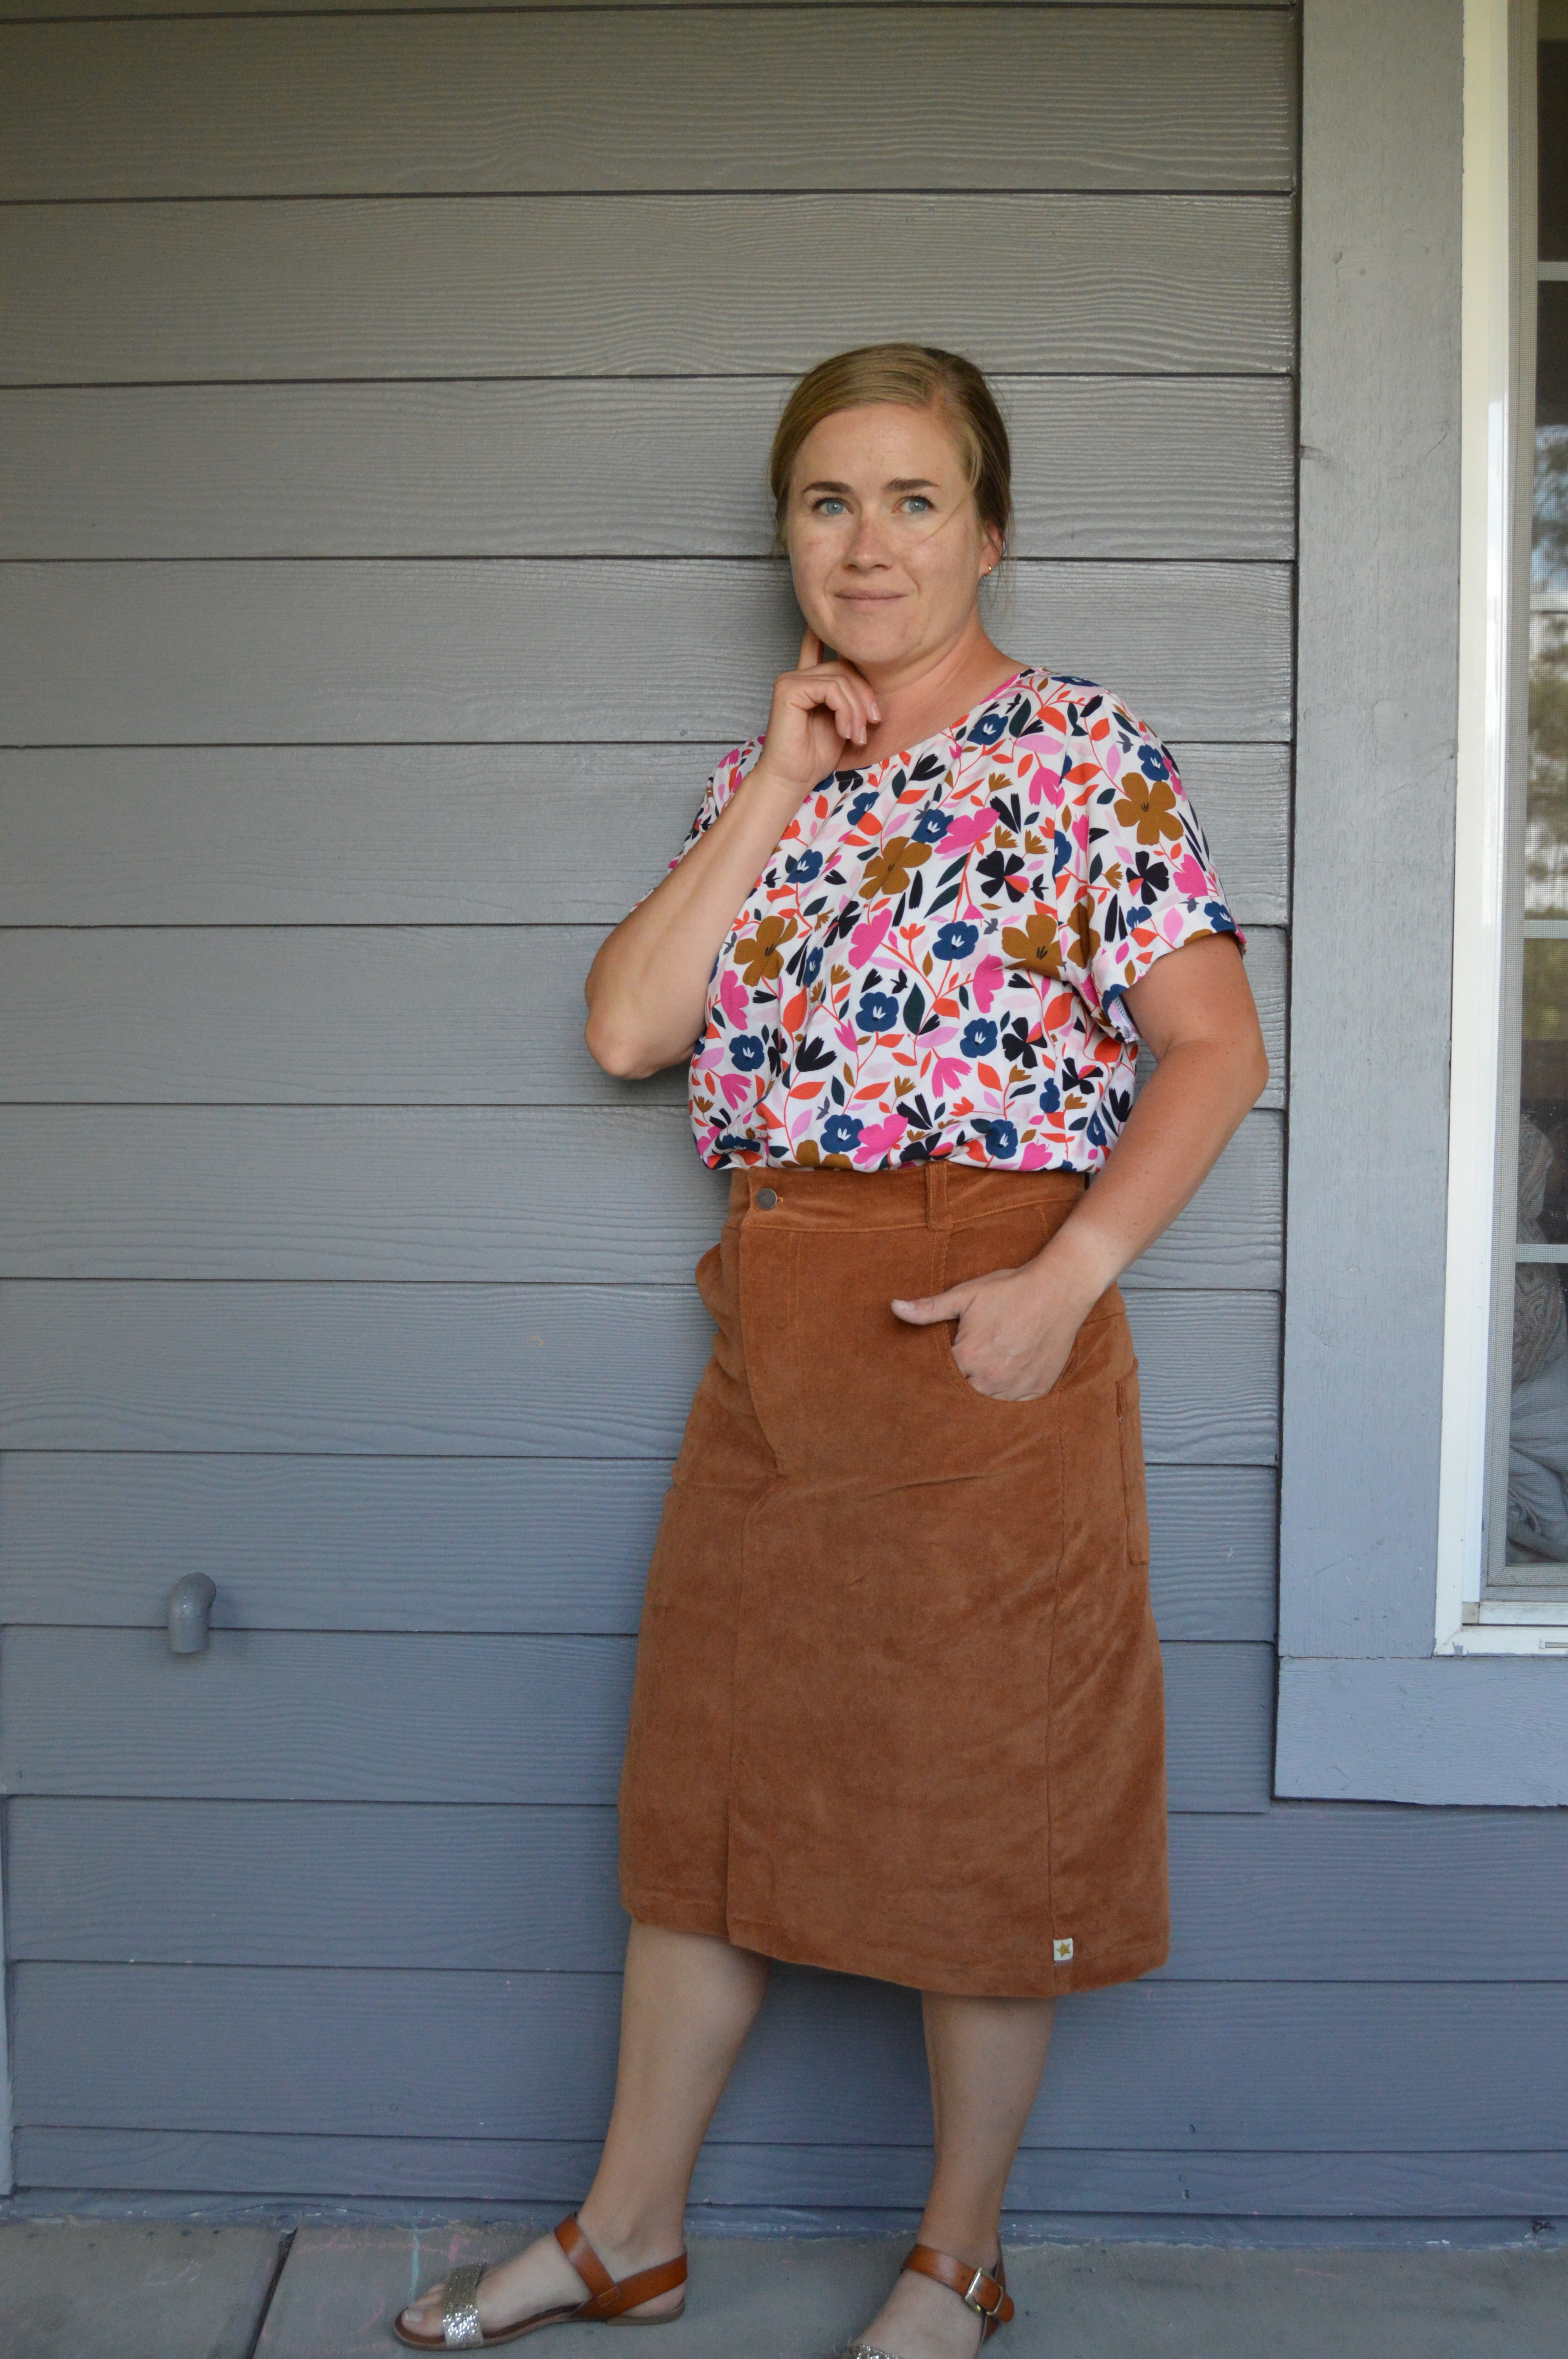
Ahhhh. And yes, that is a relaxed and satisfied “Ahhhh” and not a scared and screaming one. I’m very happy with how this skirt-and this whole outfit-turned out! It feels very “Kim,” and both the top and the skirt are handmade by me!
A few years ago I bought a big haul of fabric from StyleMaker, most of which has sat in my stash for a very long time. One of the lengths of fabric I bought with that haul was this stretch micro wale corduroy in “spice.” It was from the remnant bin and was 1 1/8 yd long. For some reason that I can no longer understand, I thought it would be enough fabric to make some pants but I didn’t even have to lay anything out to know that it was not going to be enough for pants, unless I was interested in making some corduroy shorts, which I was not. So I sat on the fabric and over time considered making a pinafore or something like that but then I found the McCalls 8149 (it’s also labeled “#SterlingMcCalls.” Do you guys use big 4 names? Or just the number? I hardly pause to acknowledge the name but maybe that’s dated of me?) and it felt like the right place for my piece of corduroy.
Determining what size to make was An Issue. My current measurements place me in a size 14 per my bust measurement, size 18W per my waist and size 16 per my hips. It’s not the biggest inconvenience BUT the sizes you get in one envelope are, of course, size 8 through size 16 and the other envelope includes sizes 18W-32W. I initially bought the envelope including sizes 8-16 thinking I could fudge the waist a little bit. But when I made this other McCalls skirt, I fudged the size 16 waist by using a smaller seam allowance but it just didn’t quite do the job. And I ended up with a skirt I’ll never wear because the fit is off (okay that wasn’t the only reason I won’t wear it…). Anyway, I really wanted to avoid that happening again so I brainstormed all sorts of ways that I could make the size 16 work for me. I thought about using a smaller seam allowance, using a waistband piece from a different project, and grading up the pattern myself. It was in the midst of these thoughts that I realized that the pattern (purchased on sale) only cost me $2. Why couldn’t I just get another pattern, this time in the larger size range? Ding, ding ding! Sometimes I surprise myself with how thoroughly I like to complicate things! So I kept my eye out for another pattern sale and bought another of the same pattern.
Phew!
And I hate to admit this to you, but the truth is that because my fabric had stretch, I could have absolutely used a size 16 pattern and it would have fit just fine!
Even so, I’m glad I went with the bigger size even if just for peace of mind.
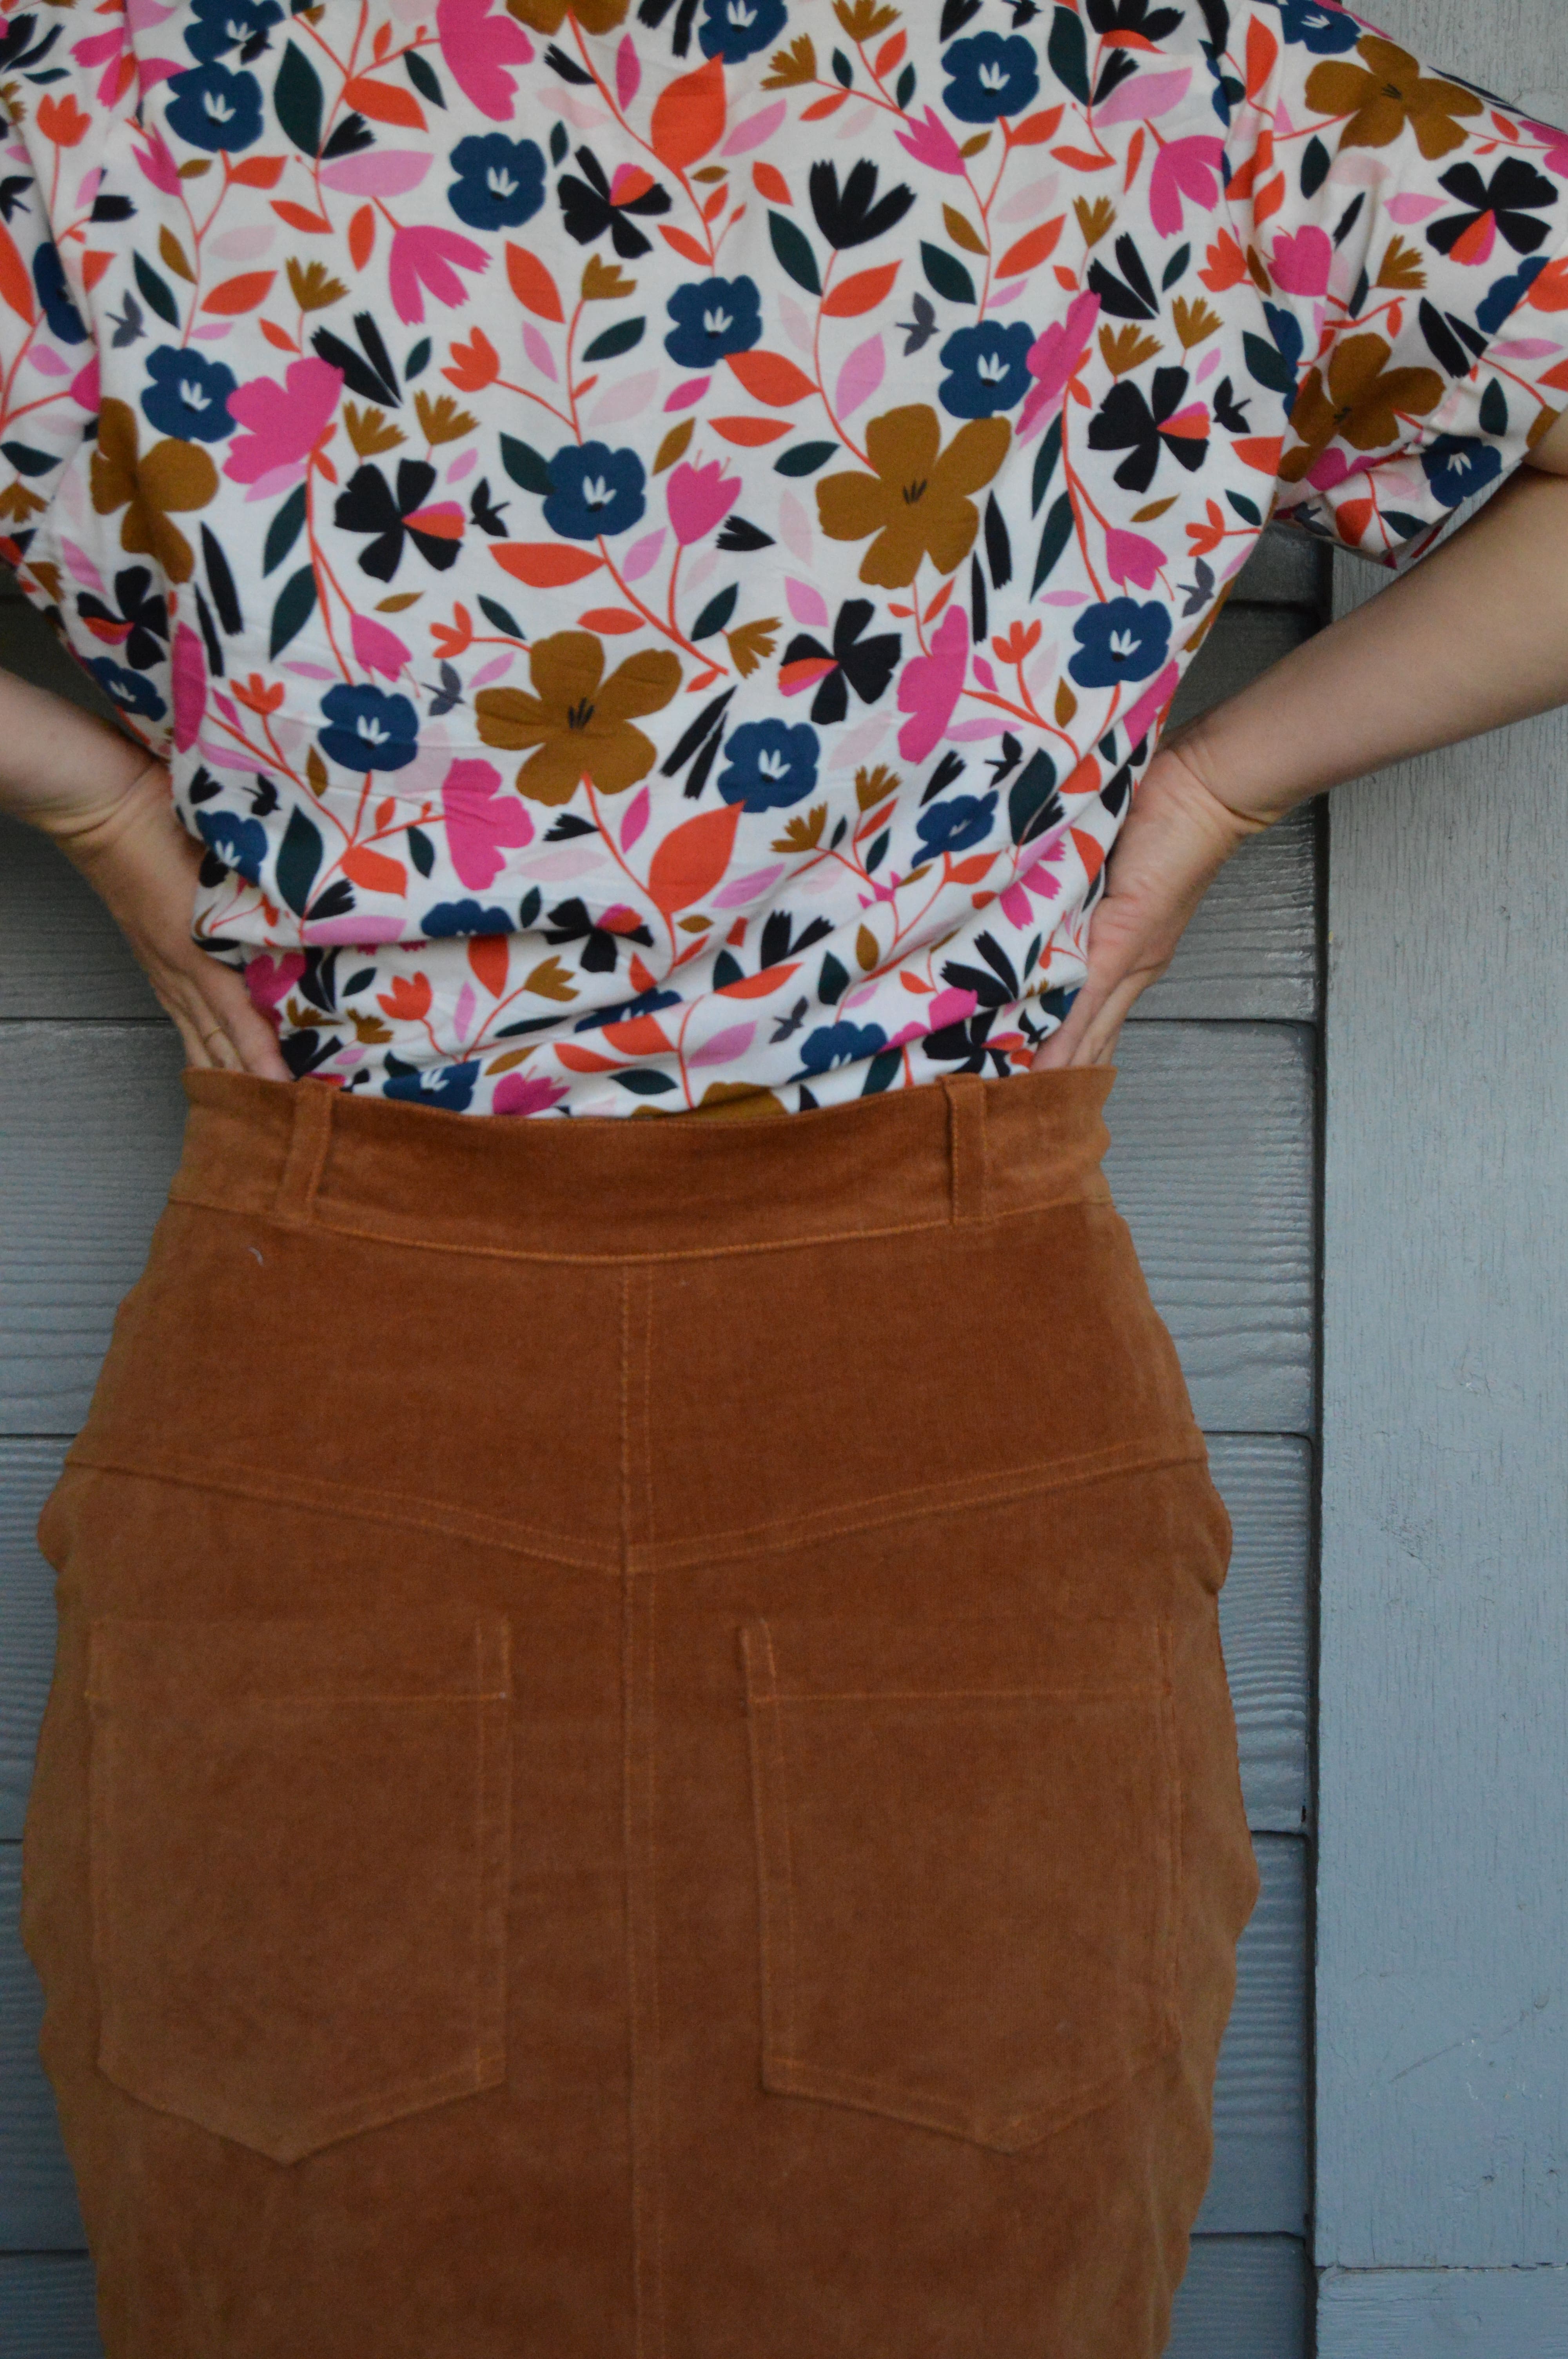
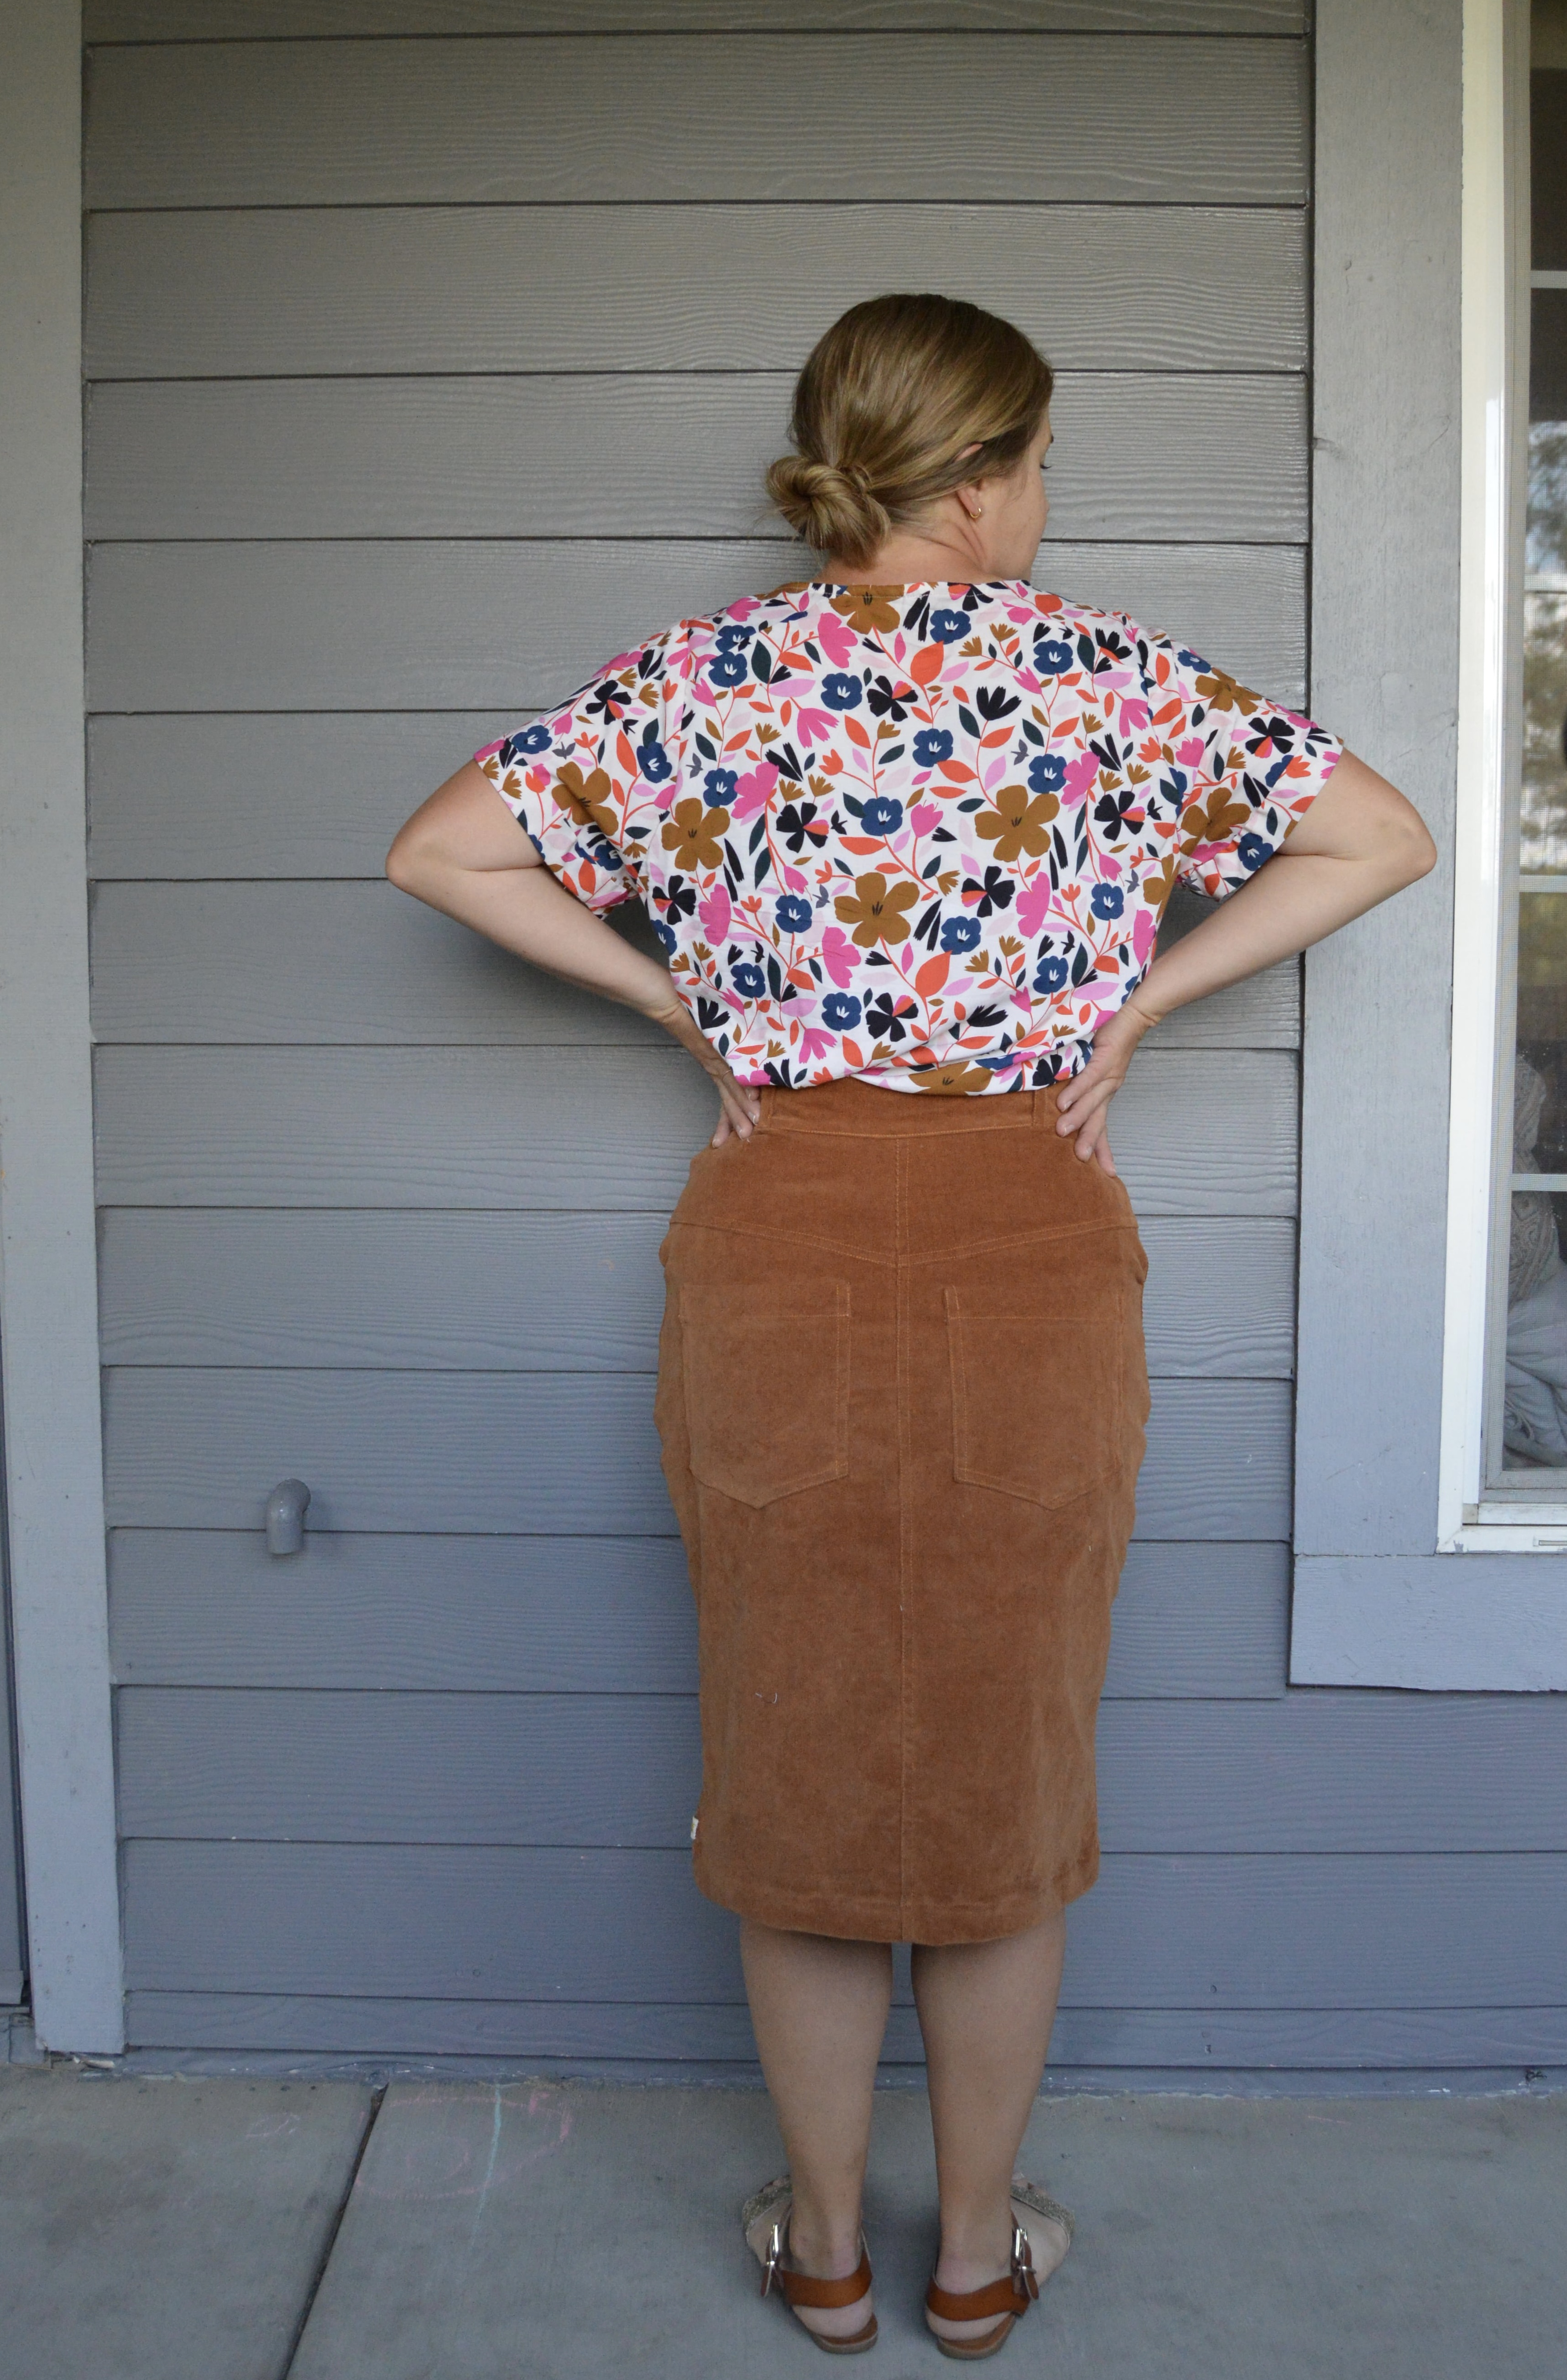
Anyway, back to construction. I found, while cutting this out, that I had barely enough fabric for the skirt (so good thing I didn’t go the pinafore route!). There was one hem that had a serious notch taken out from another pattern piece and I also had to cut the inner waistband and the pockets from a different fabric.
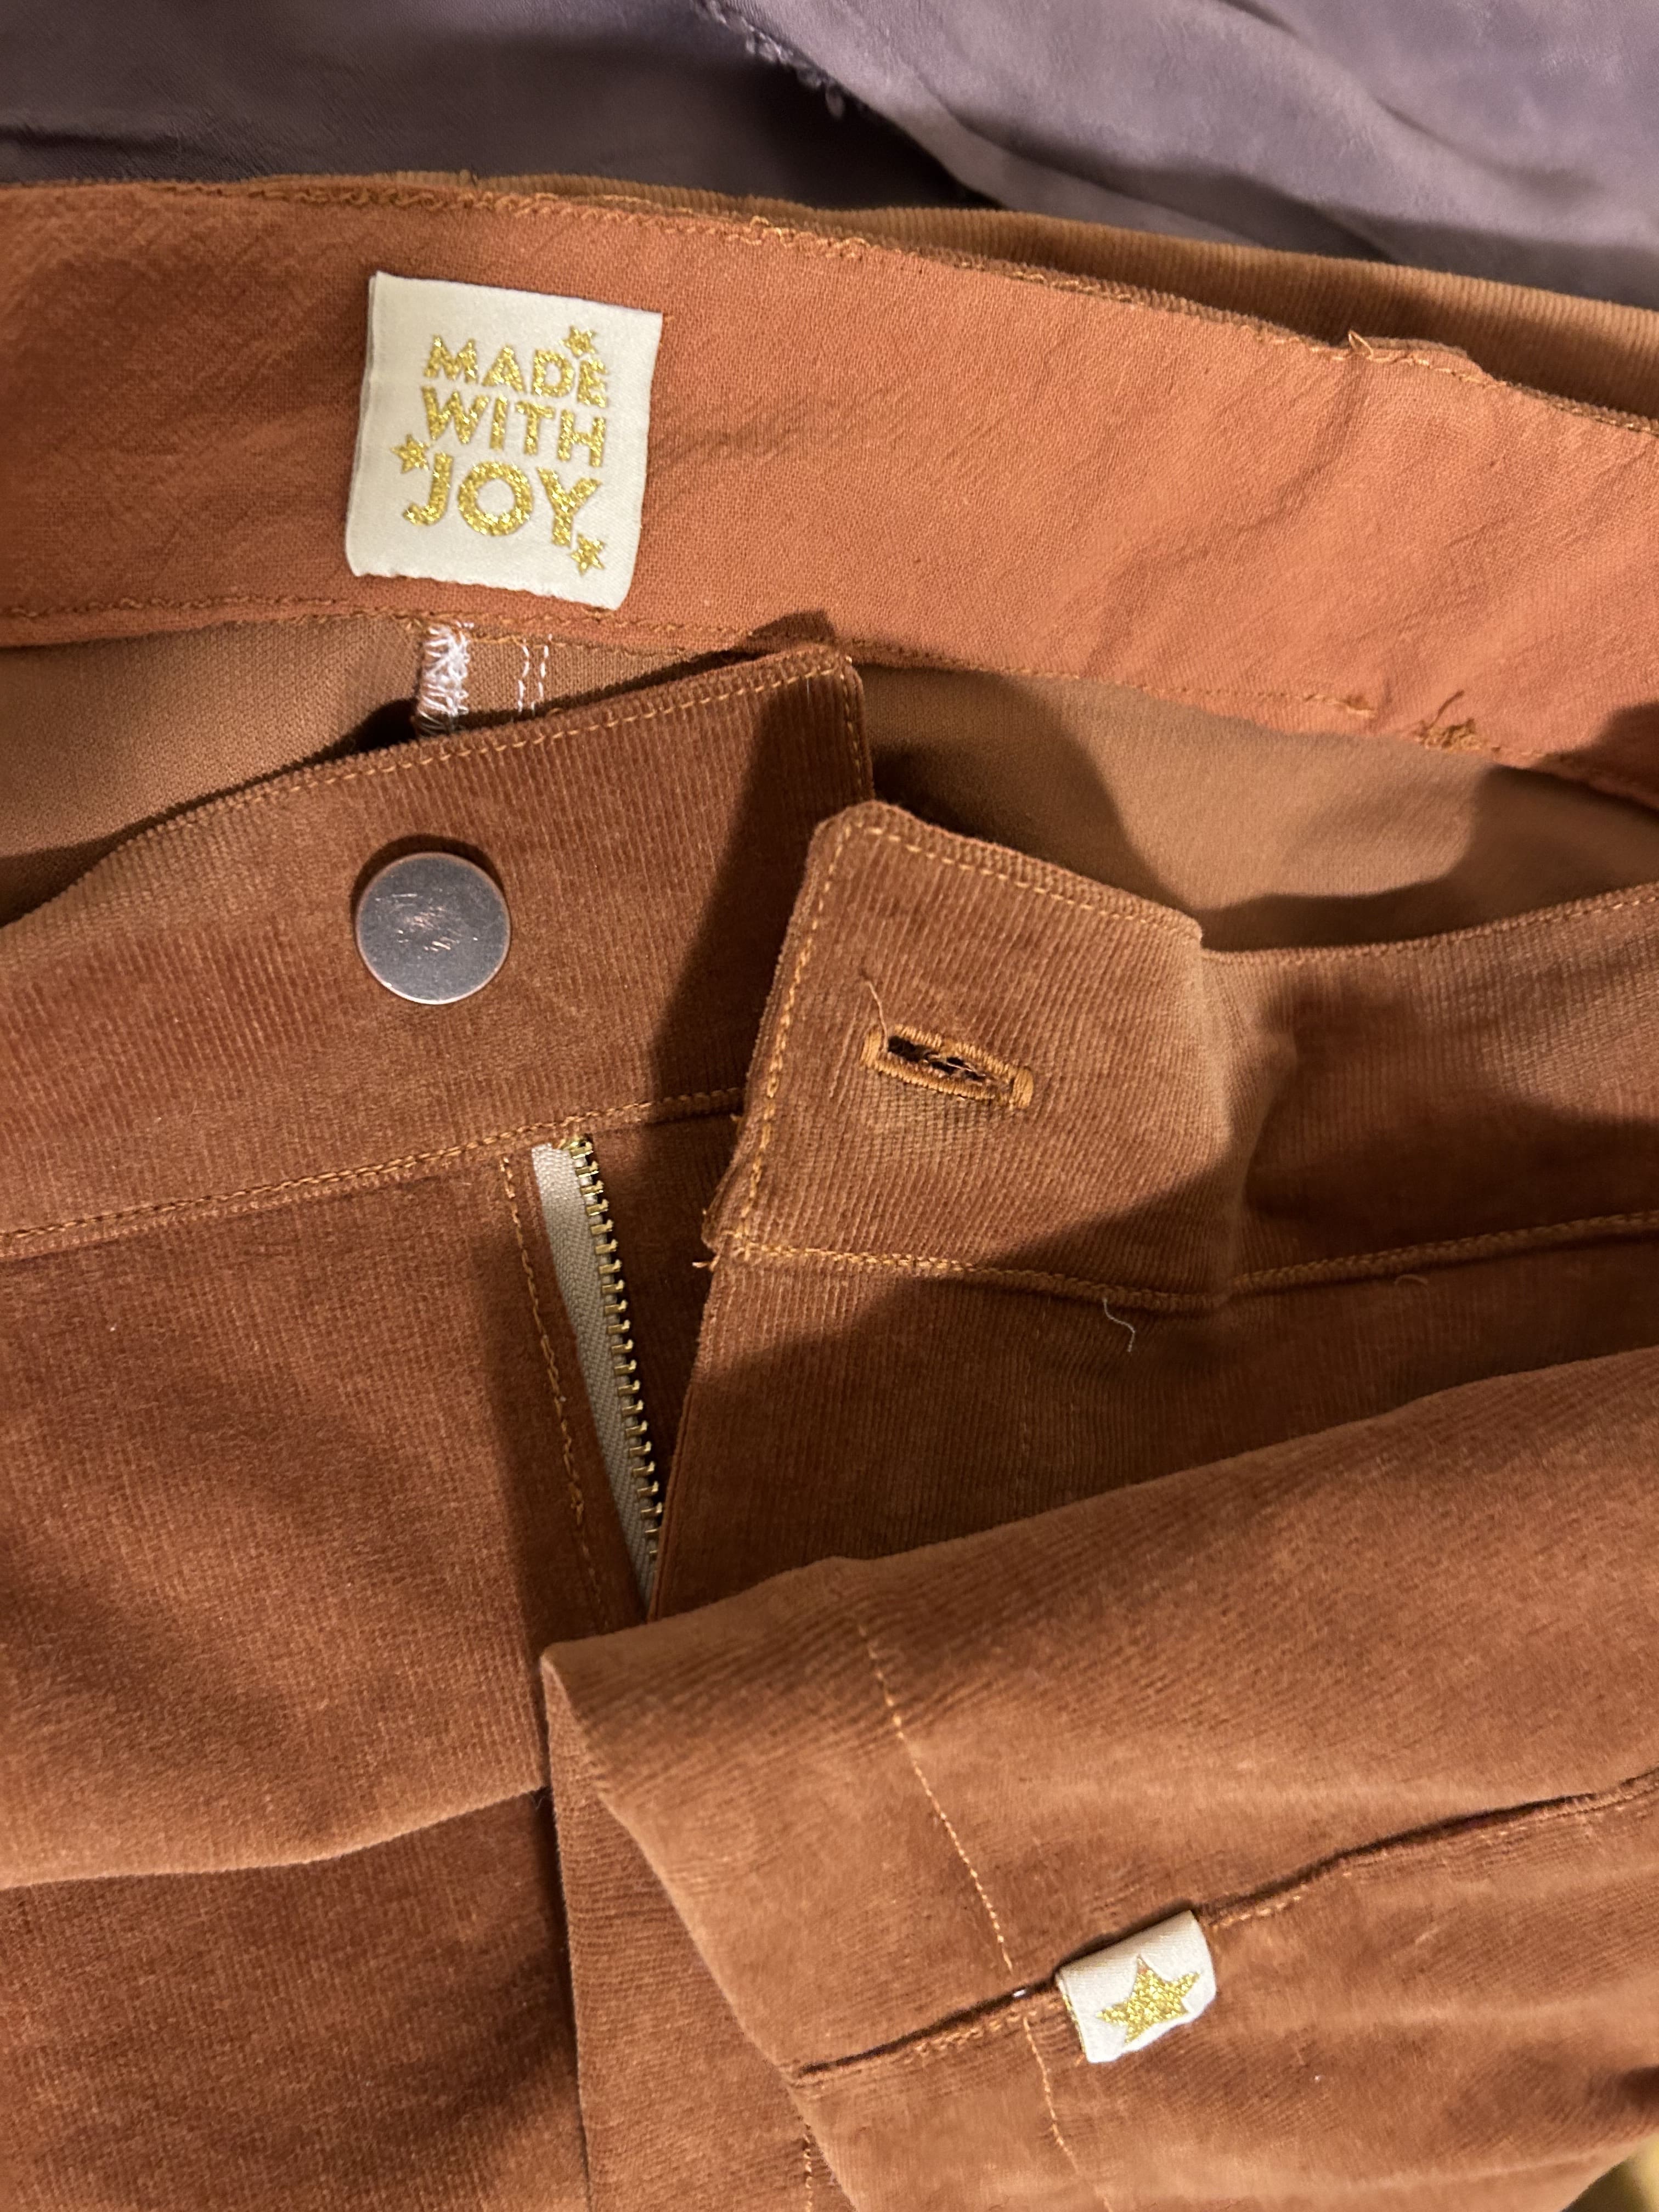
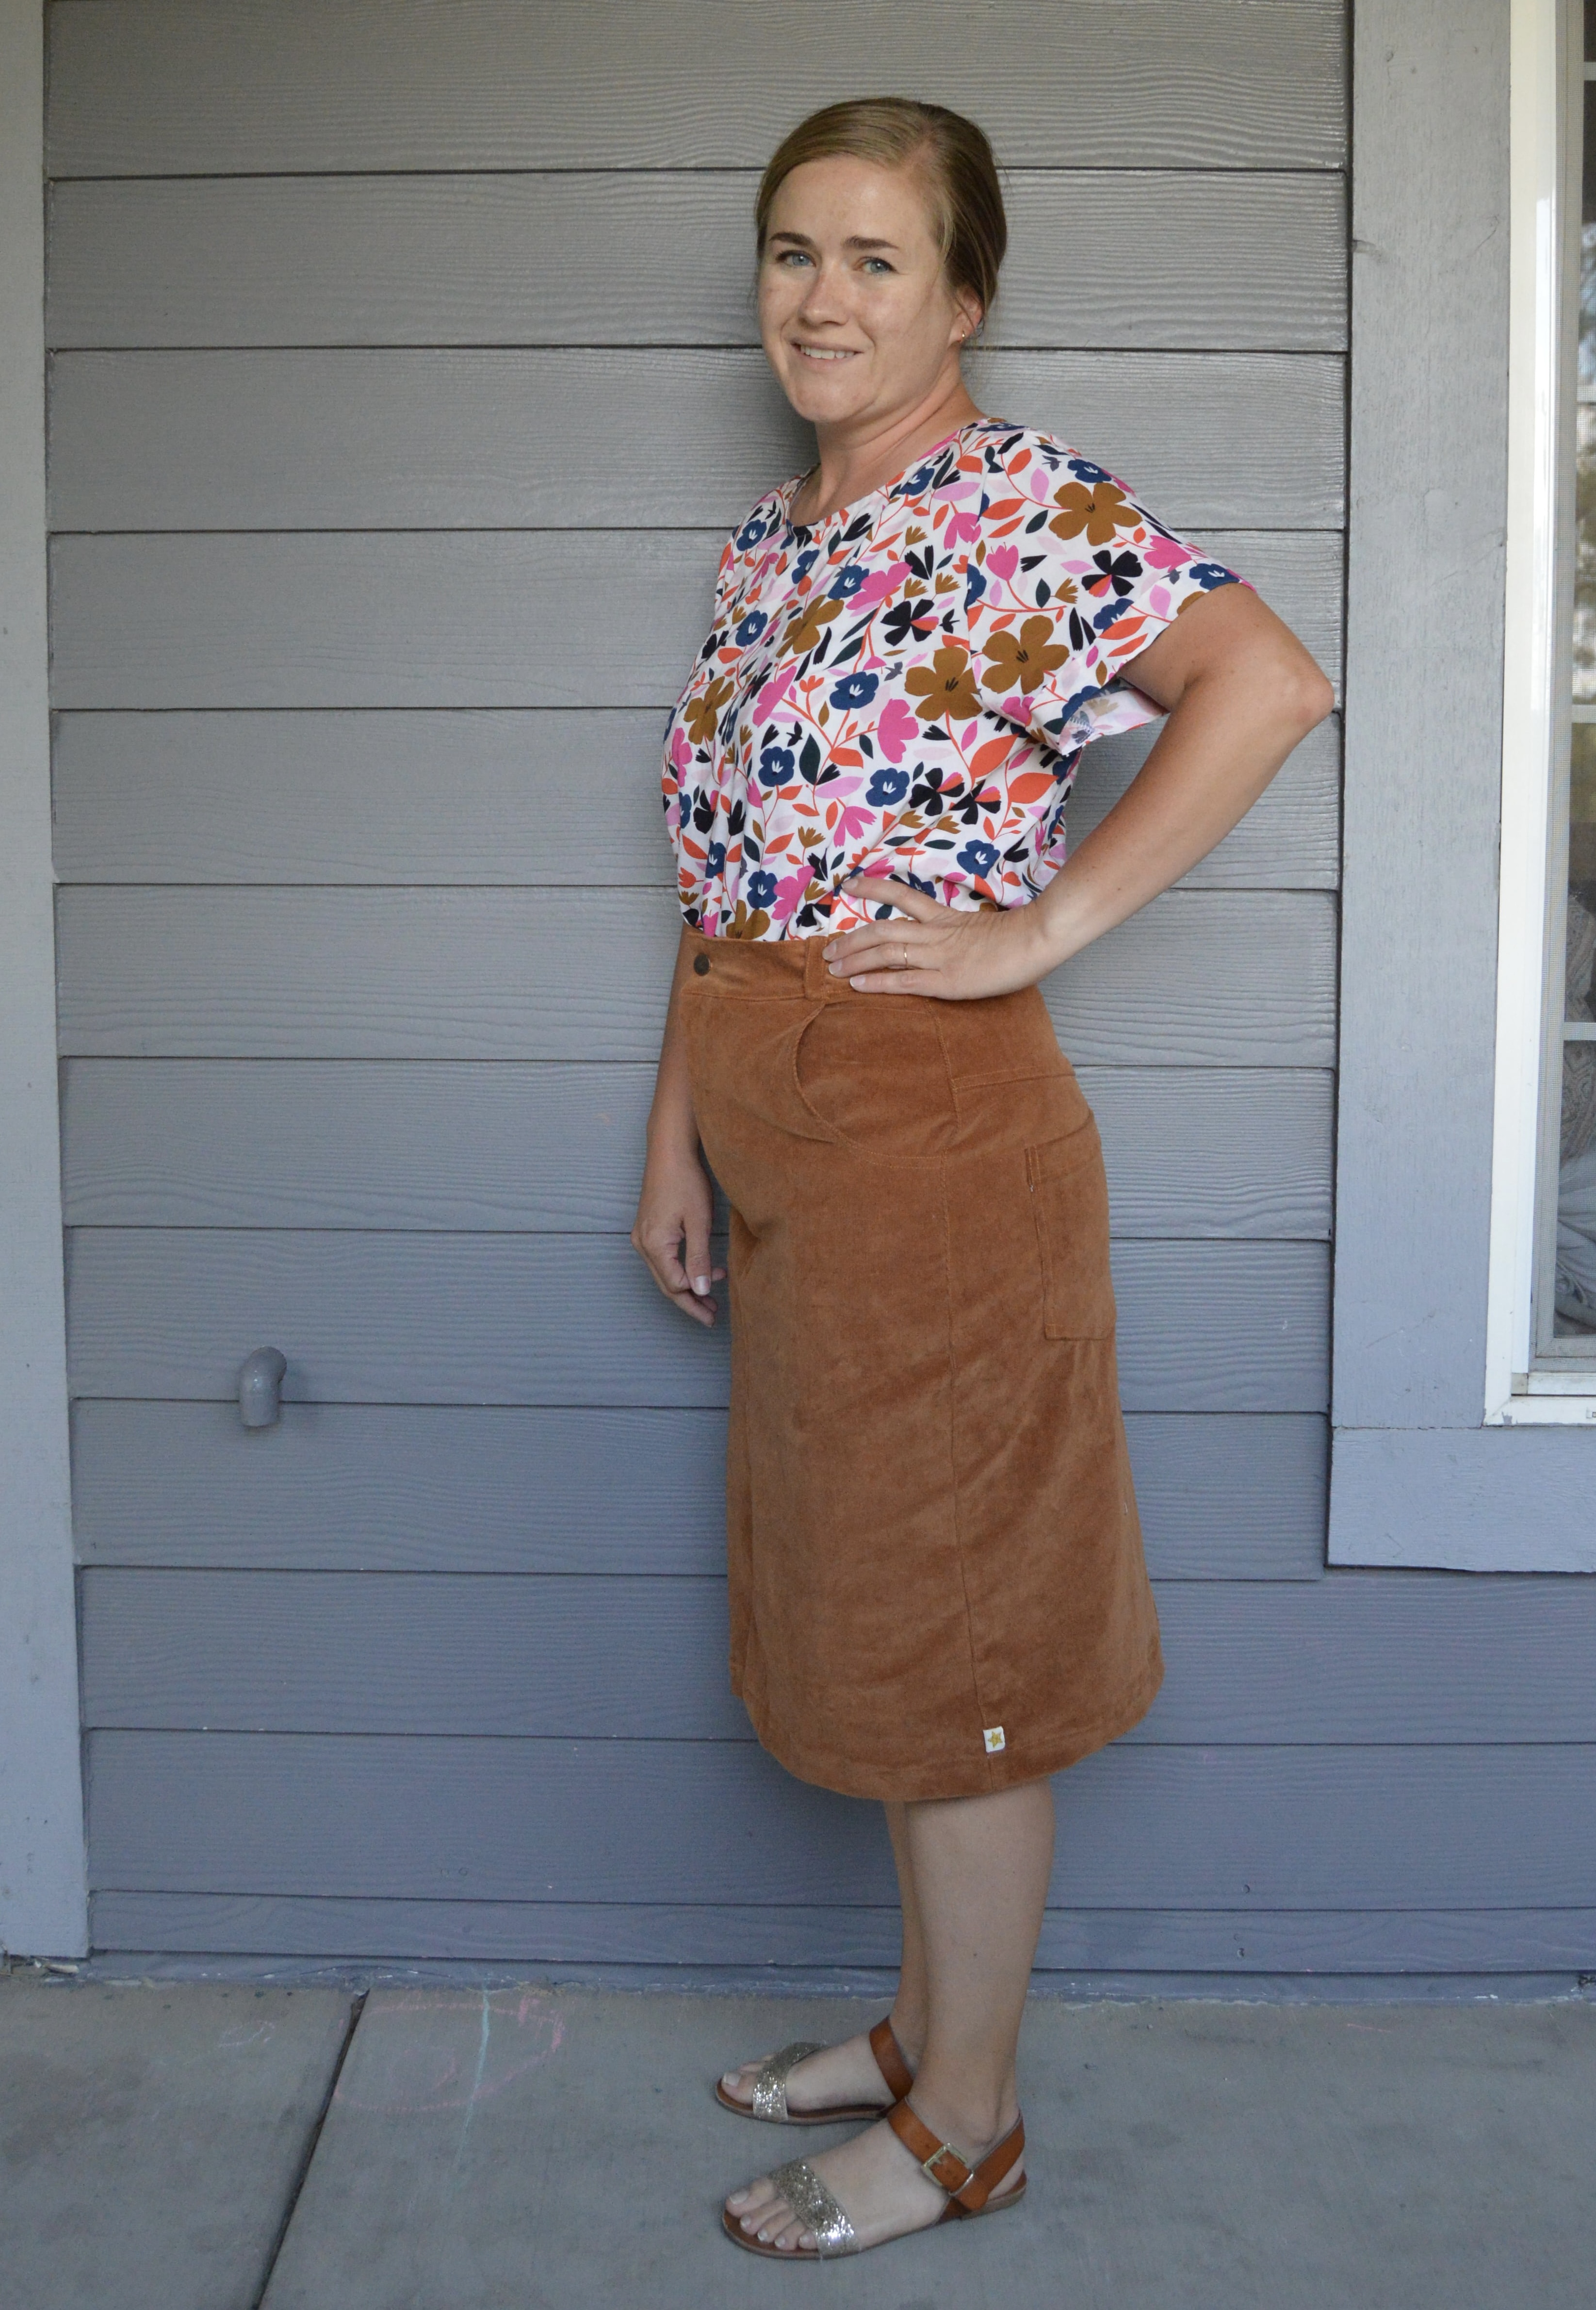
But check out the great match I had in my stash for that! It’s the fabric I used for my Tully Pants and I thought the color was perfect! Sometimes I like doing a fun contrasting color for the waistband but I couldn’t pass up one that matched so well! I was also excited about my tags which are from Sarah Hearts. I’ve been loving to add a small tag to the side seam or pockets when it makes sense and I liked how it looked so I added it here! I hand tacked each of the tags down on the fold so that they don’t flap.
Before putting in the waistband, I tried on my skirt to check fit and it was too loose because of the stretch of the fabric. So I started taking it in and I took in almost an inch on each side. In fact, there is supposed to be a coin pocket on the right side that I had to remove because taking in the seam was going to chop into it. I unpicked and removed the coin pocket and was going to reposition and resew it but then didn’t! Because it’s a coin pocket! And I don’t use those ever! So buh-bye, coin pocket! I think things lay a little weird because of the taking in that I did but I’d take that over something that doesn’t fit so it’s a trade that was worth it to me.
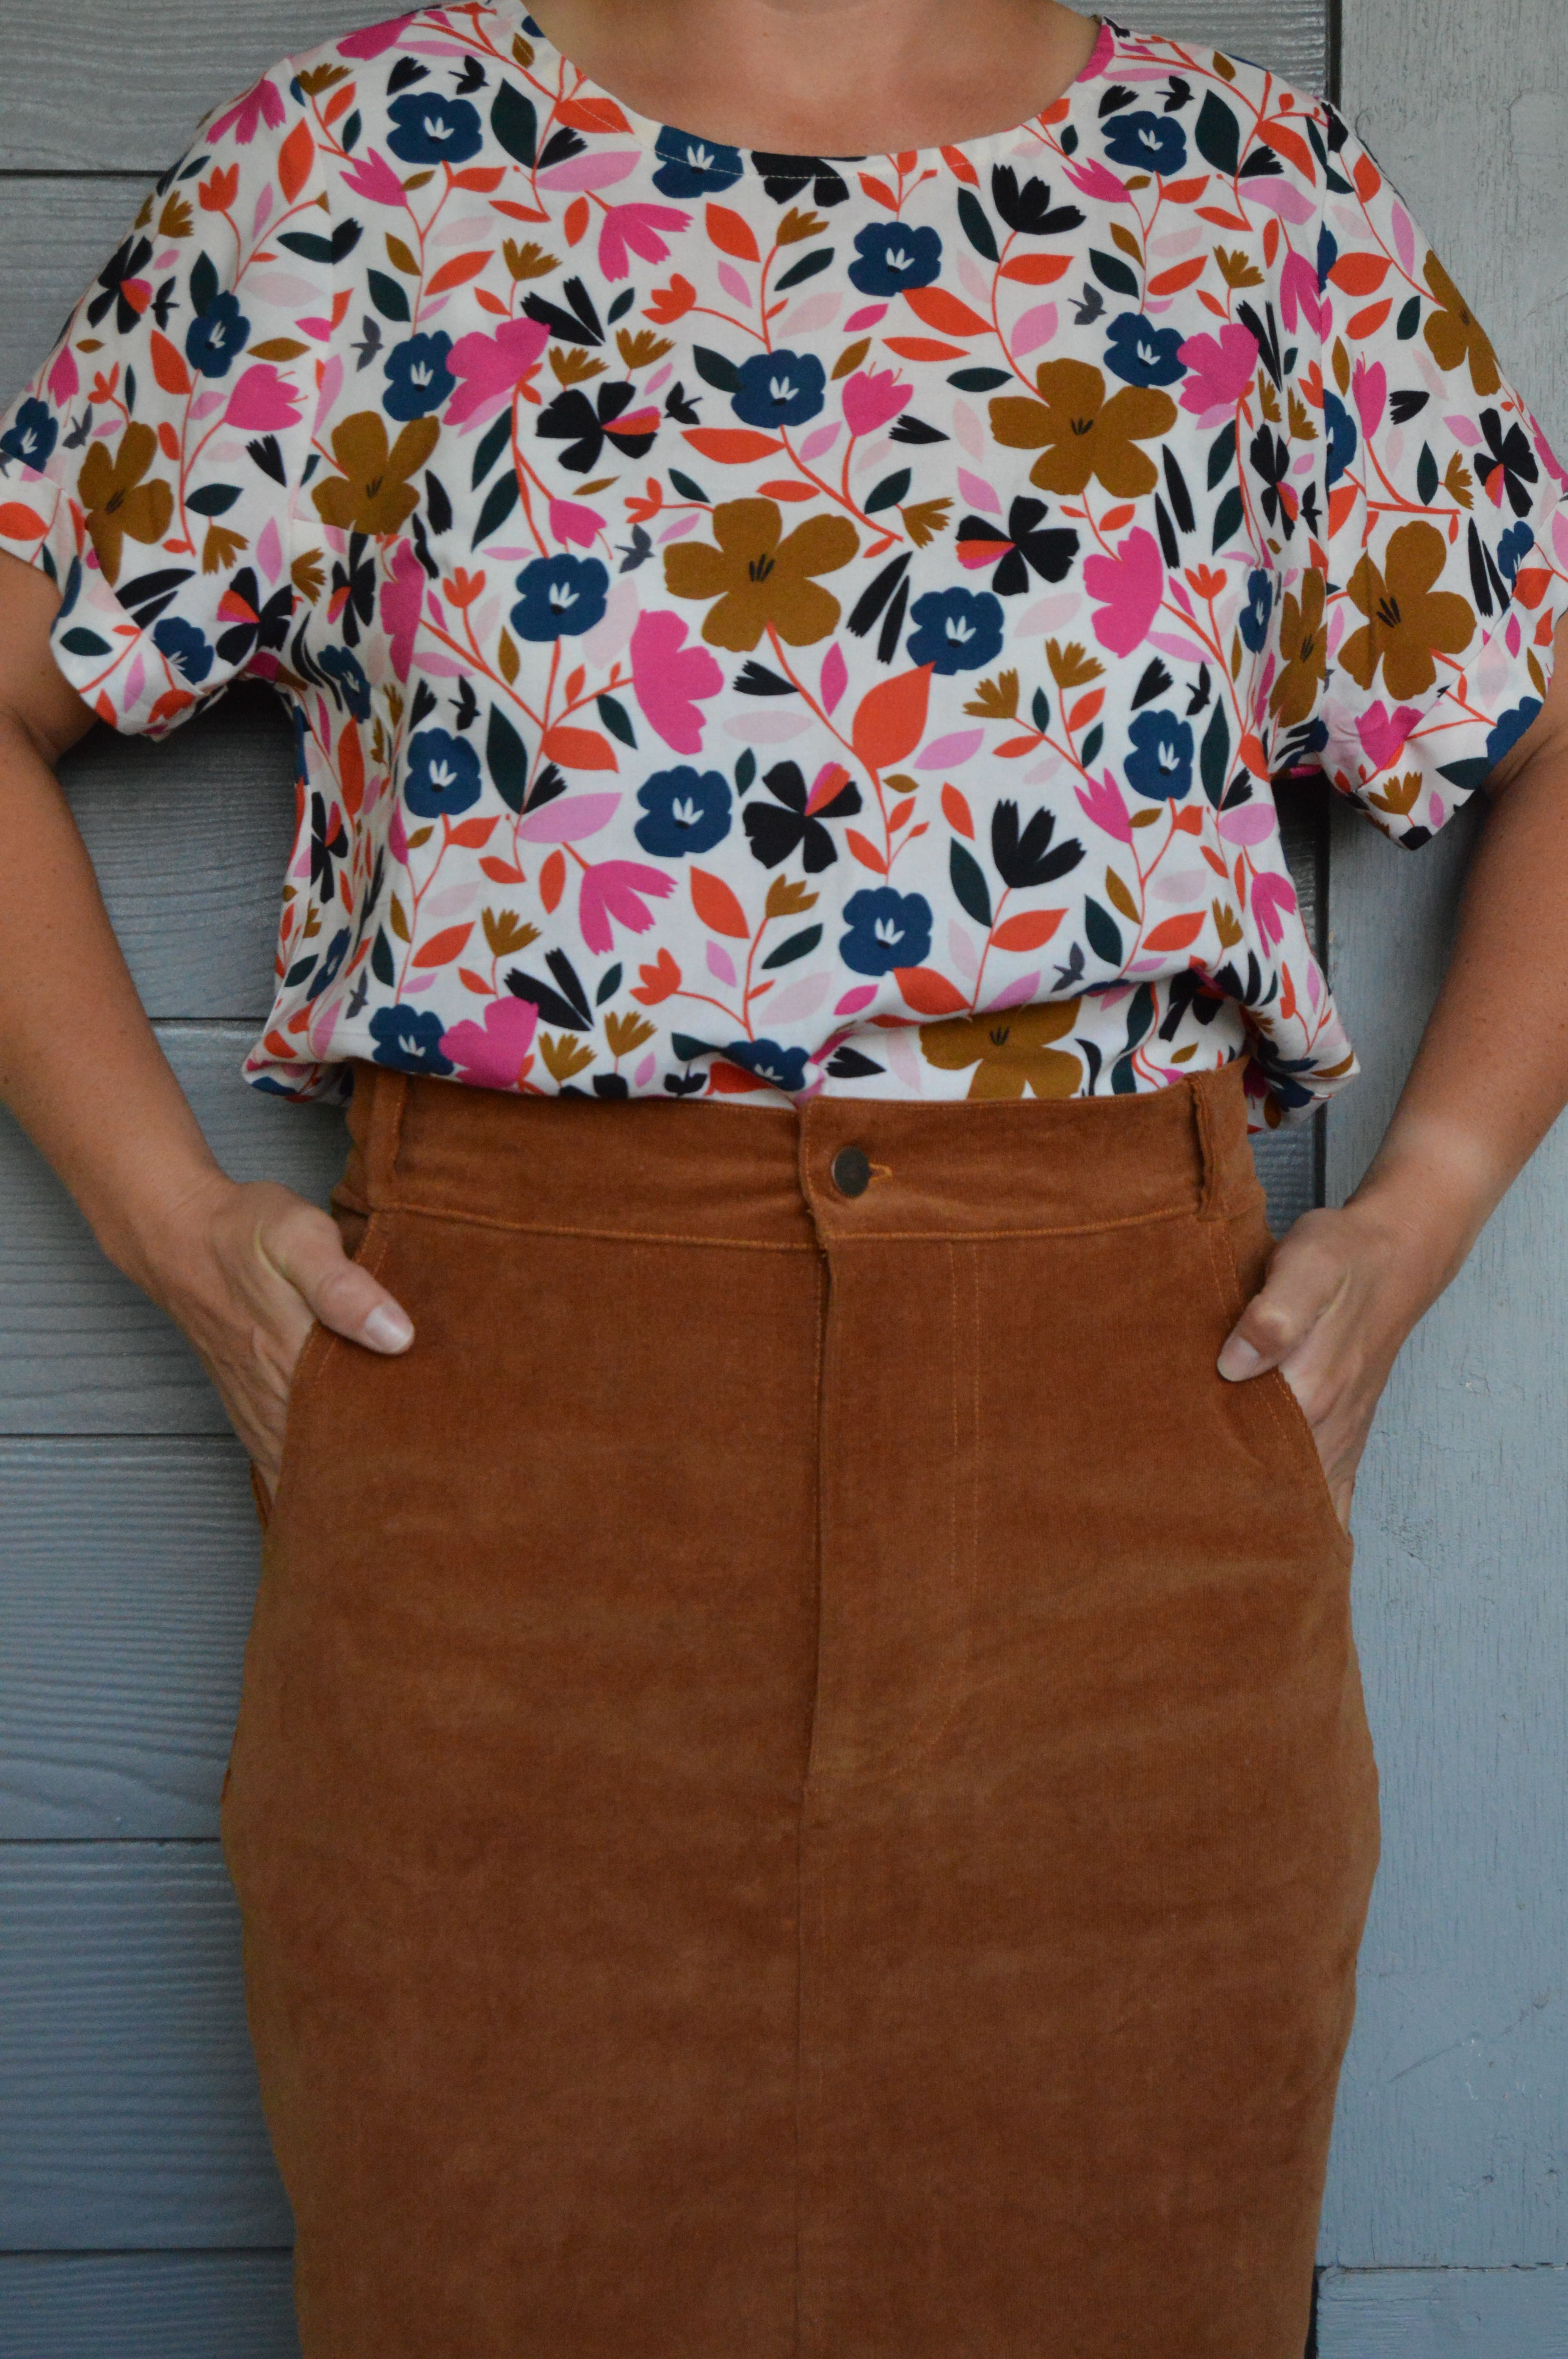
To put on the waistband, the instructions call for it to be slip stitched and I’ve often skipped that step but I’ve been trying to be more mindful and careful to make high quality clothes that will last a long time and that seemed like a spot to be a good little sewist and hand-sew that seam. I started out being very careful and taking tiny stitches. Then I realized it would all be topstitched in the end so security wasn’t really the sole goal. With that I felt less constrained by tiny and frequent stitches and just stitched every half inch or so to secure the waistband in place. It took no time at all but definitely kept all the right pieces in all the right places for when the topstitching did happen.
Unfortunately, the fabric stretched out a bit with topstitching. It’s nothing too horrible and steaming it does help it a bit. You can see the stretched out waistband well in this photo. It was likely due to trying to hop over the belt loops (called “carriers” in the instructions), but I also could have probably just been more mindful.
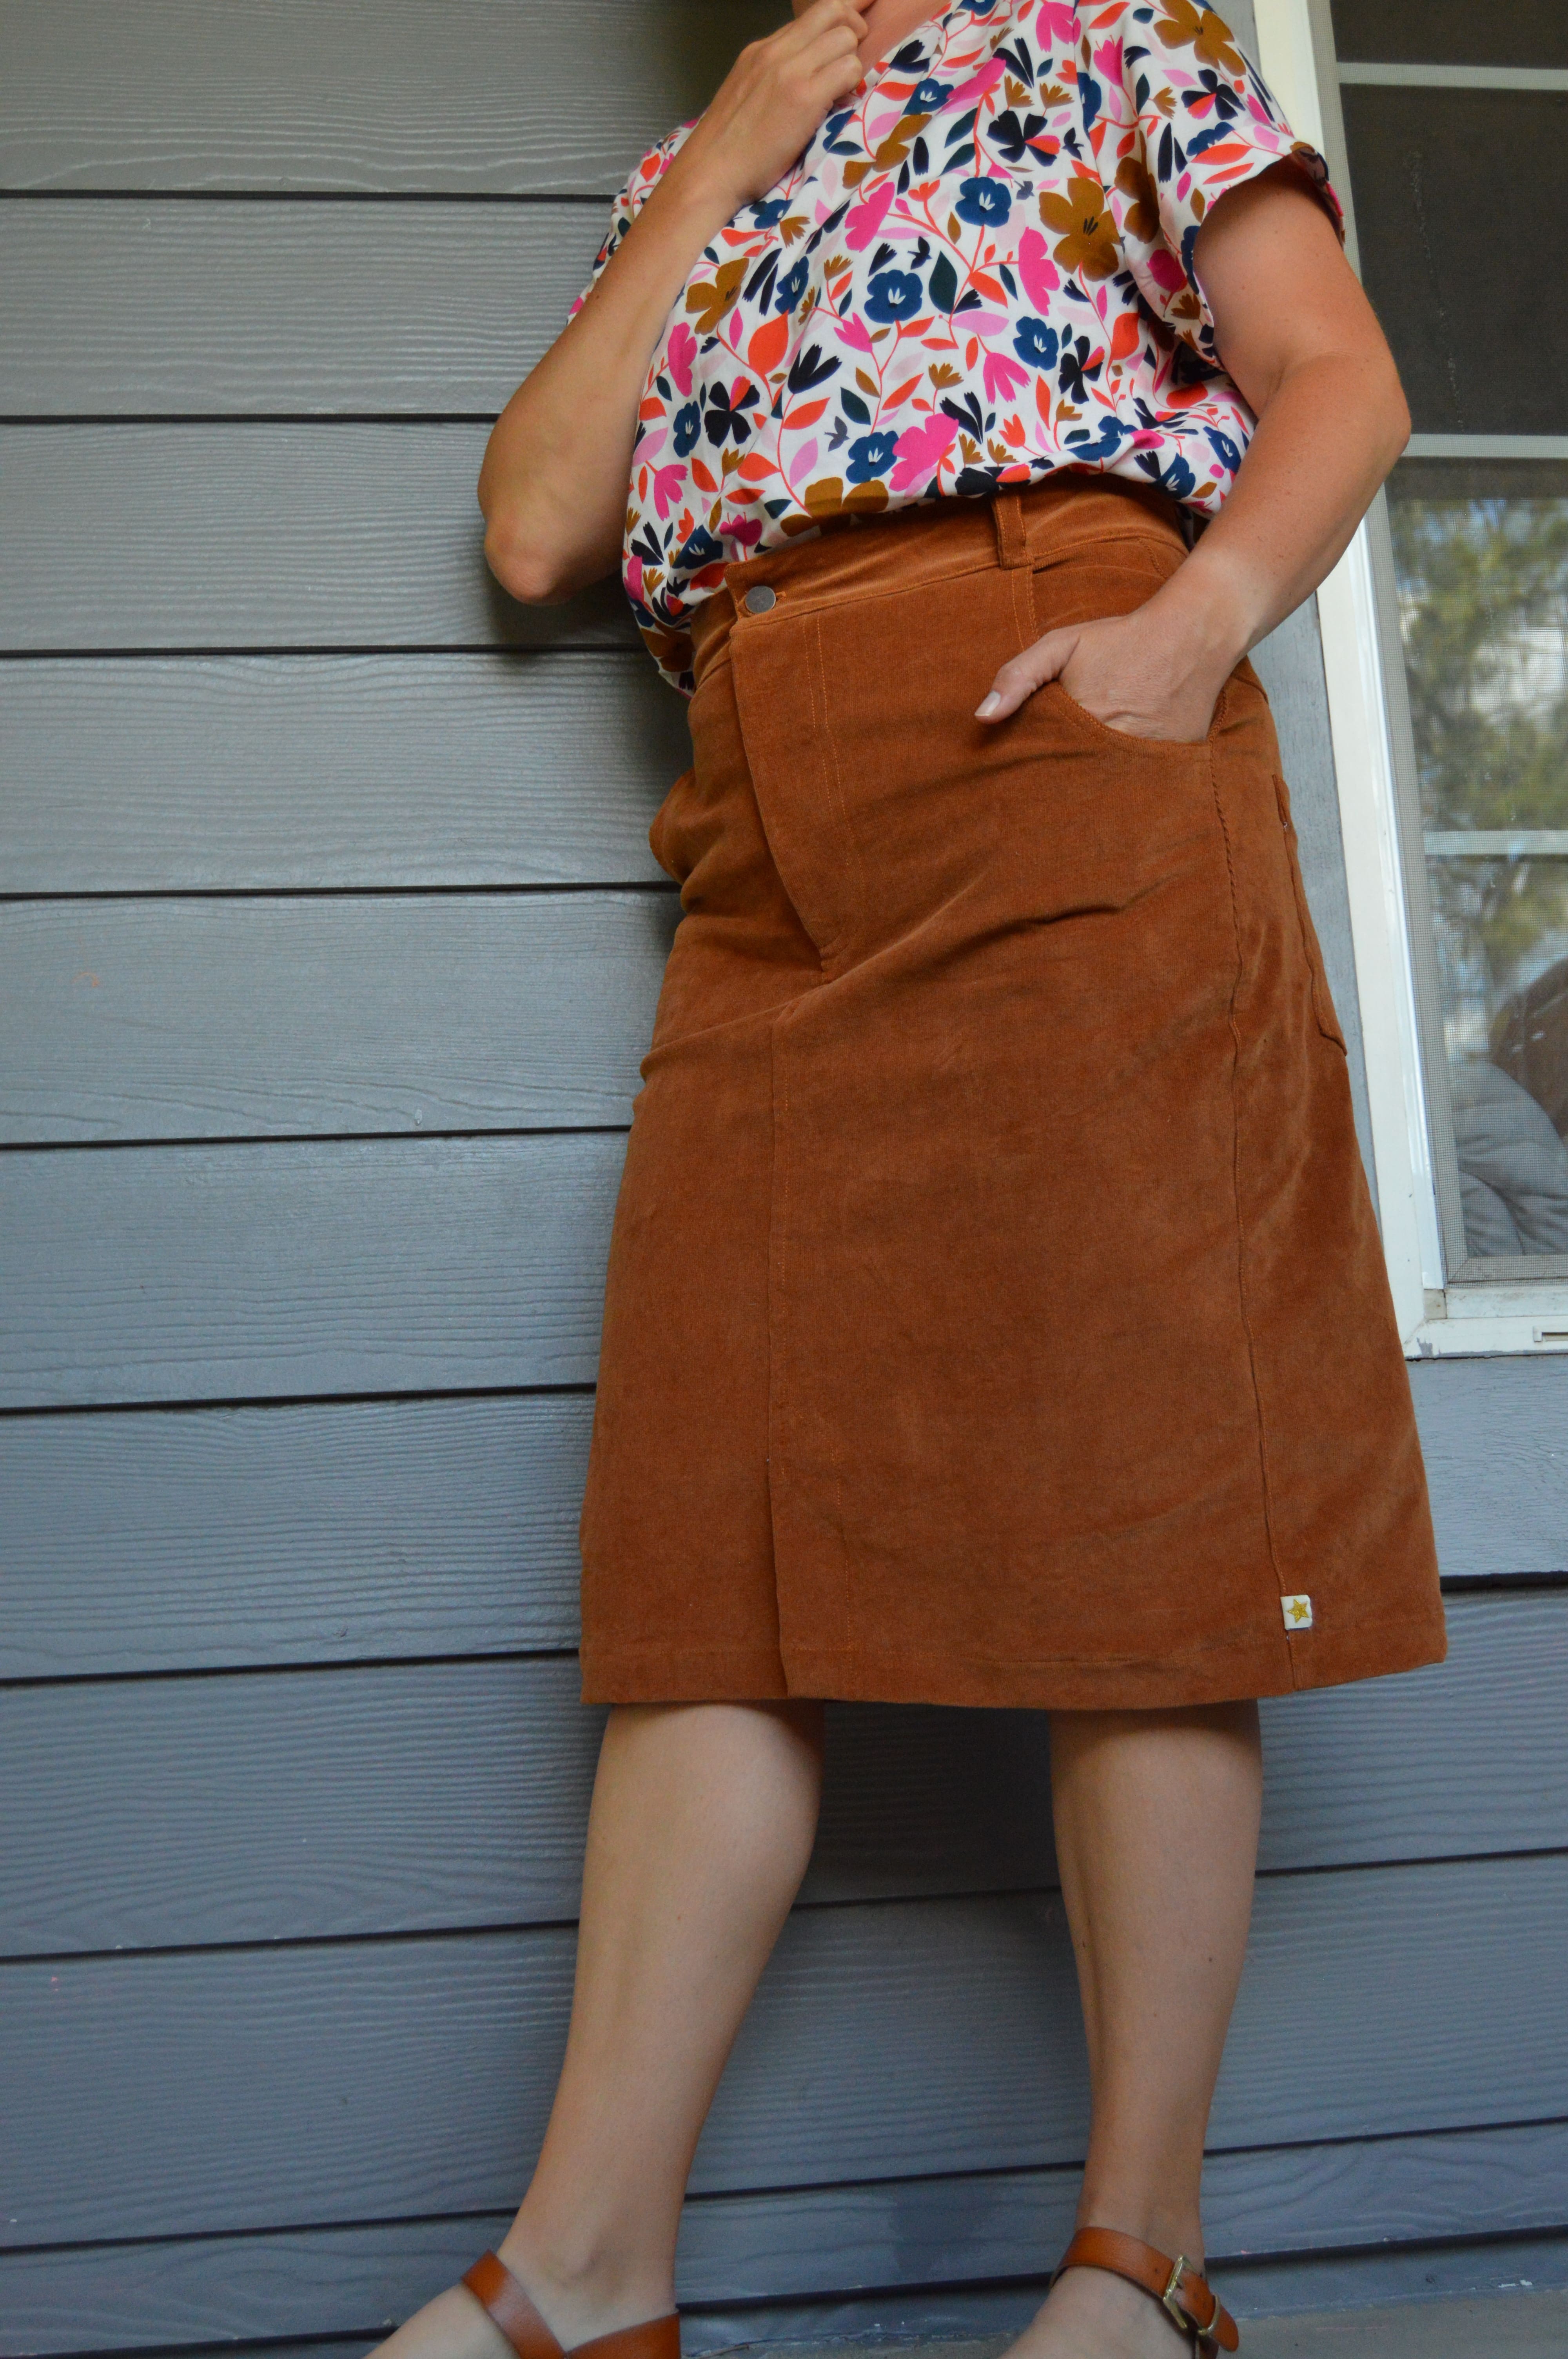
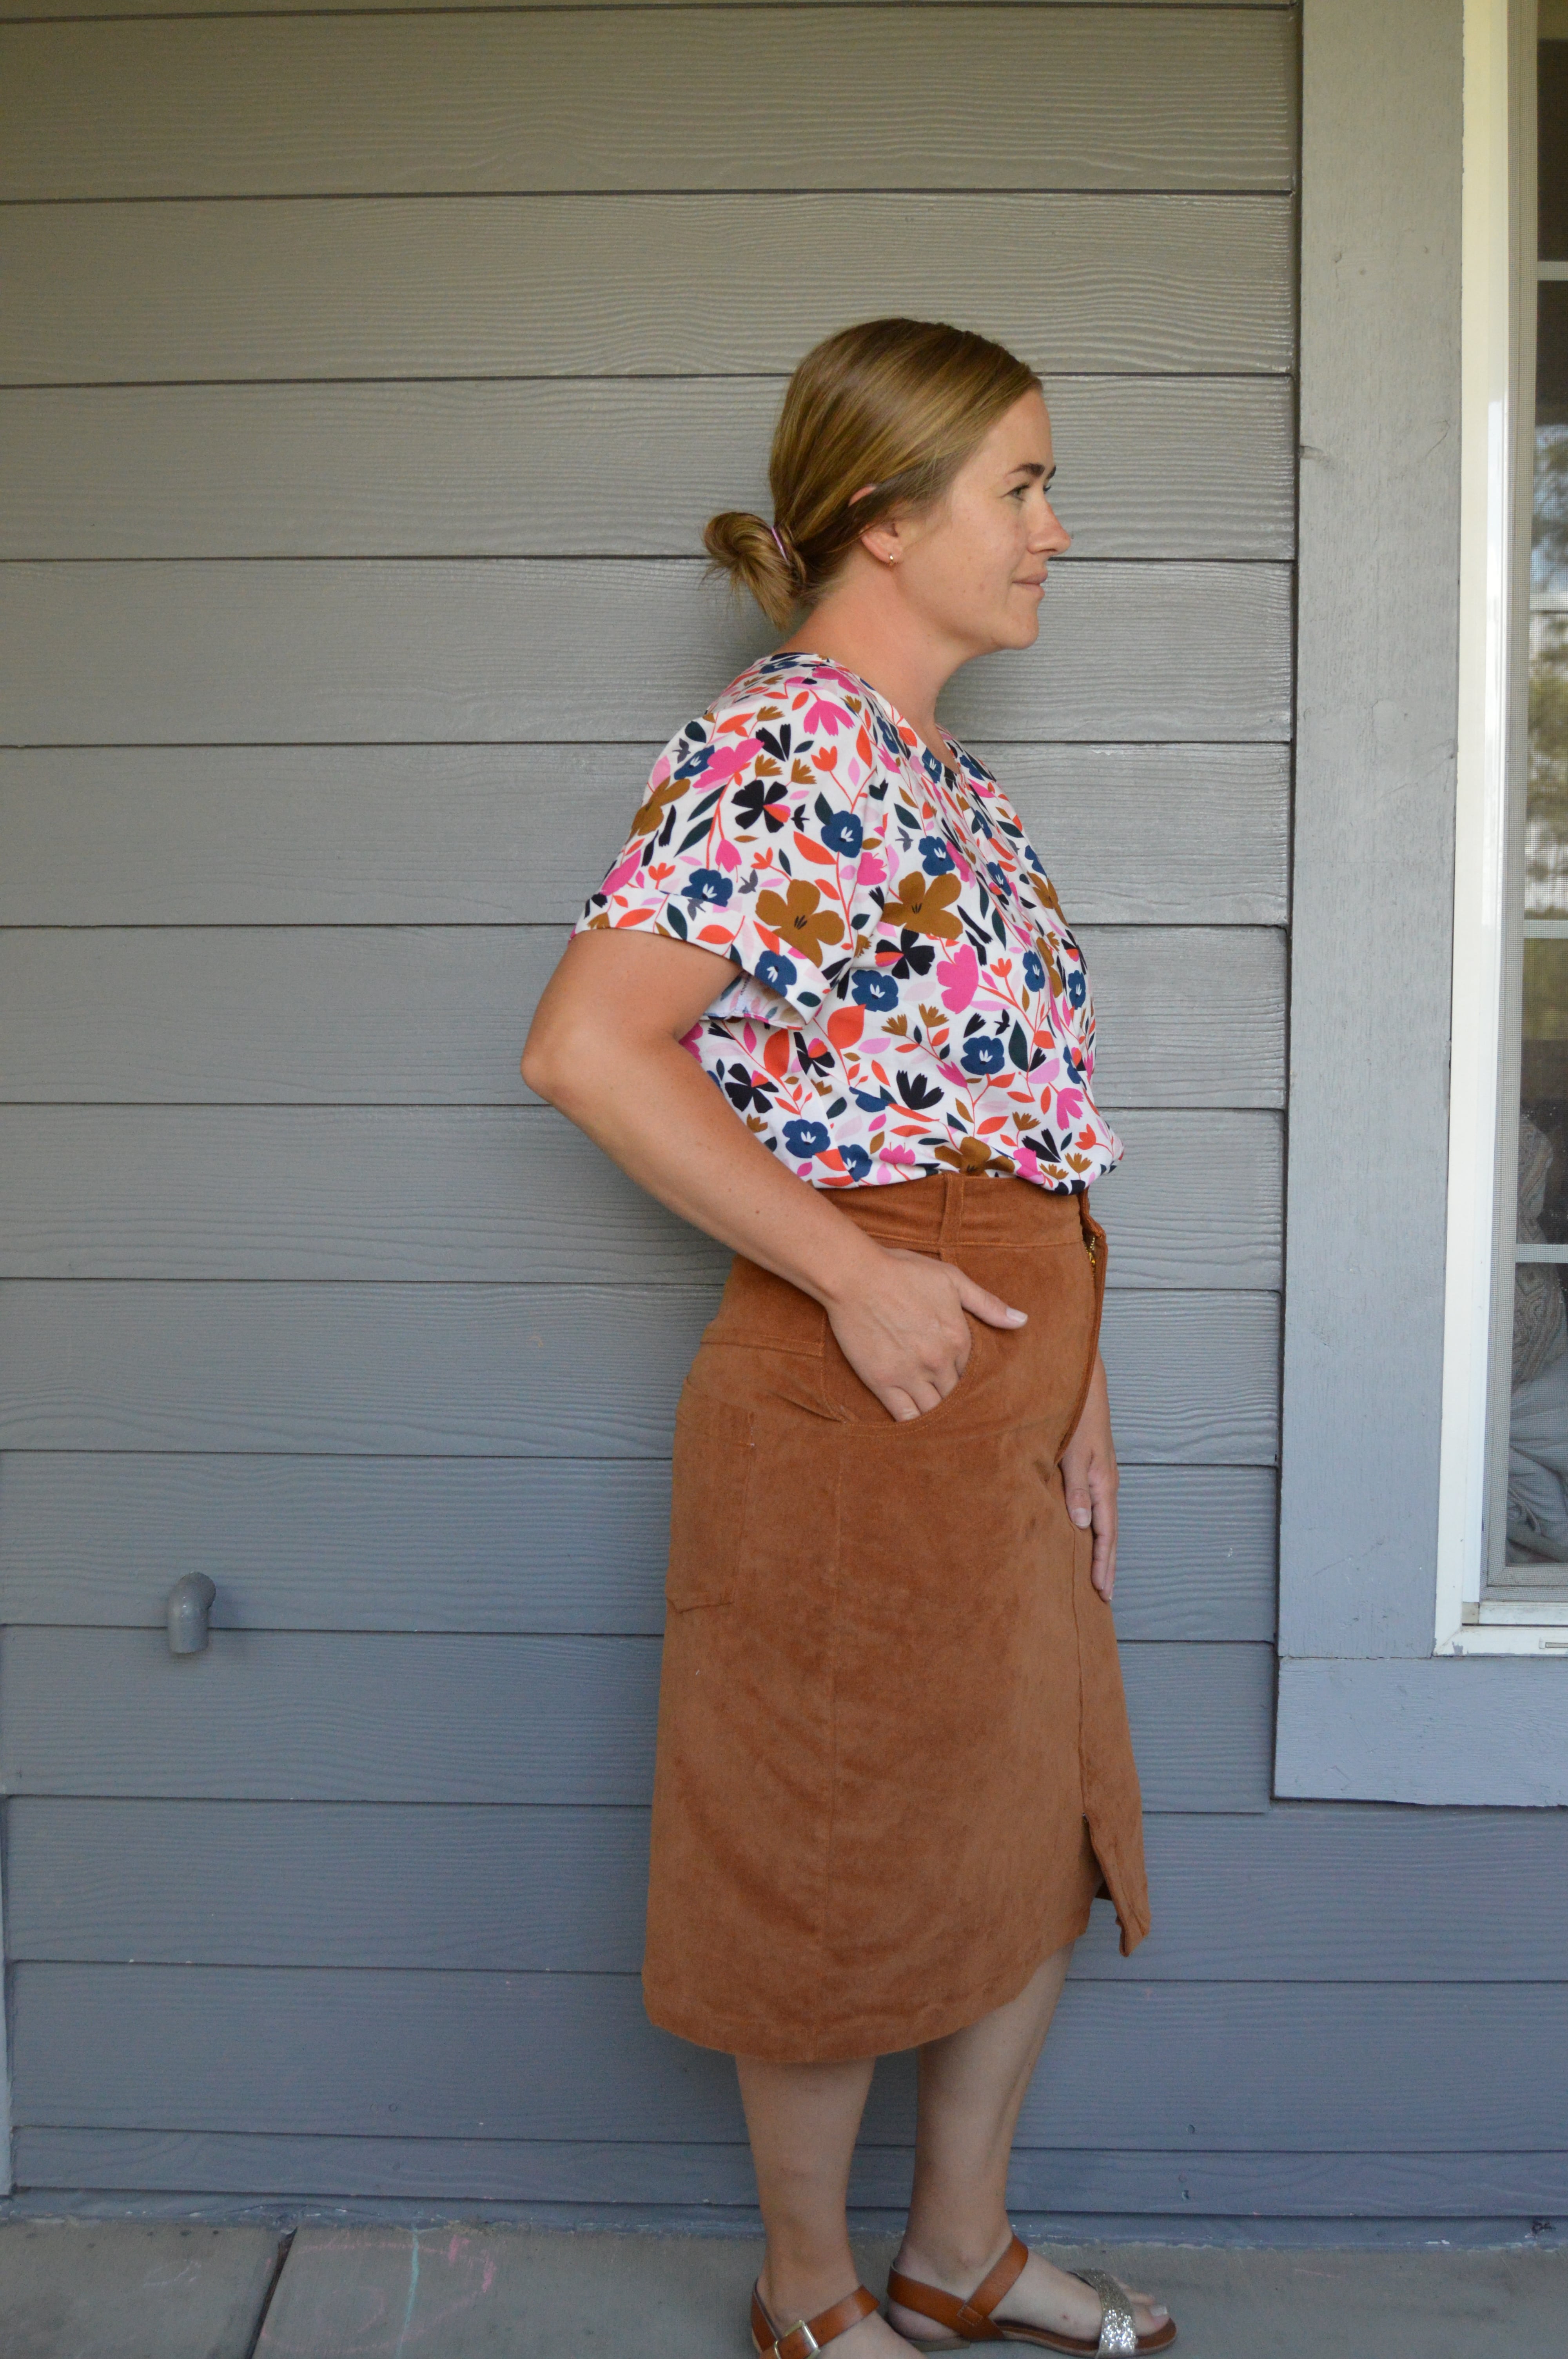
I know this is a funky view but I feel like my photos never accurately represent where the hem hits on my body (it always looks longer than it is), so I chose this view to try to give you a better idea of length. This hits just below my knees and is a pretty perfect length for my taste. I cut out the midi view but was forced to take off about an inch of length due to fabric constraints. If I make this skirt again, I’d likely keep the length as is but I’d adjust the front vent to be probably 1 1/2-2 inches higher. You can’t see it well in the photos but there is a front vent and it was hitting in a very odd place. It’s a grown-on flap that’s cut out with your skirt front pieces so once fabric is cut there really is no easy way to adjust where the top of the vent hits. I ended up unpicking the topstitching and just sewing a faux vent line 1 1/2 inches above the original one. It’s not the best fix but also not terribly noticeable either.
This photo also does a good job showing the things I’m not in love with on the skirt, the first being that the fly, zipper, pocket bags and whatnot are kind of bulky and end up puckering outward a bit, especially while sitting. I think this may also have to do with the taking in I did but I’m not certain about that. It may get less stiff with wear. We’ll see. The other thing that bothers me is that the waistband looks like it is straining but it’s not. I was very proud of how the waistband turned out but inserting the button created a pulling look. I may have placed the button too far but that’s where I wanted it for fit. You can’t win them all, I guess!
Overall, I ended up being really happy with this pattern and can definitely see myself making it again. The instructions were very thorough. The only thing I noticed was missing was direction for finishing seams (which has been true of every big 4 pattern I’ve made so far). I’ve made a few jeans now so the process of zips and flies is familiar, but I do think the instructions did a good job explaining everything. I never felt lost.
I’ve been in a bit of a getting dressed rut and I finally realized that a big part of the problem is that I’m missing lots of basic essentials. I’m not the type of person to follow trends religiously or spend a lot of time/energy on putting together a picture-perfect outfit. I need easy to match pieces that are a little bit basic and a little bit timeless and hopefully comfortable. I also have been trying to use up some of my stash fabric. And, thankfully, this project hit all of those points. Hopefully this skirt is something I can wear for years to come.
Pattern: McCalls 8149 or #sterlingmccalls
Size: 18W
Adjustments: Took in the sides quite a bit, especially along the hip; and my usual adjustment of taking in the yoke
Fabric: 1 1/8 yd. stretch micro wale corduroy in “spice” from StyleMaker (remnant)
Cost: fabric $18; zipper $1; patterns $4; interfacing, interior fabric, button and thread from stash
Would I make this again?: Definitely!

What a great, classic skirt you’ve made. It looks so good on you and the fit seems wonderful.
LikeLike
Thanks so much, Alison! I hope to get some good wear out of it!
LikeLike
I occasionally use Big 4 patterns and always check other people’s experience on pattern review if possible. Also, check the finished measurements, usually listed on the pattern pieces somewhere. That gives you a good idea of how much ease is built in!It’s usually a lot roomier than indie patterns.
LikeLike
I agree! Researching others’ experiences is something I usually do before anything else with my pattern making—if it’s possible. I am still getting used to big 4 sizing for sure!
LikeLike