

Over the summer, we were able to go on a trip to visit family. Of course, that put me within a 7 mile radius of Harmony Provo, an adorable little shop that sells quality fabric, yarn and knick-knacks. Obviously, visiting Harmony was toward the top of my To-Do list. Somehow, though, it kept getting put off until almost the end of our visit. When we finally went, we happened to be there on the day of their birthday sale and were able to get 20% off anything we purchased, so it all worked out!
I saw this fabric and loved it. I didn’t have a plan for it- I just let my creativity lead the way. My end product isn’t the most polished thing I’ve made, but I’m pretty happy with it, regardless.
I try not to buy fabric unless I can actually think of a couple things I could make out of it. That way I can guess about how much fabric I need and, hopefully, I can avoid buying things that sit in my stash for years. When I bought this fabric, I thought I would just make a Mave skirt out of it. I’ve made many Maves and they all get worn, plus I’d like another maxi length one, so that was my plan. But once I was home and got the fabric washed, I started thinking what else it could be.
What would this fabric look good as?

My thoughts kept coming back around to some type of slip dress, but I wanted one that I would actually have a chance of wearing. For me, this meant I wanted something more casual and, hopefully, something with a waist tie.
In my brainstorming, I remembered the Orchard Dress that Helen’s Closet came out with a summer or two ago (I think?). It’s a cute, billowy, spaghetti strap tank or dress that seems comfortable and flowy. It is a FREE pattern if you sign up for their newsletter.
Free patterns are often pretty bare bones, but that worked in my favor here! A simple silhouette meant adding on was easy to do.

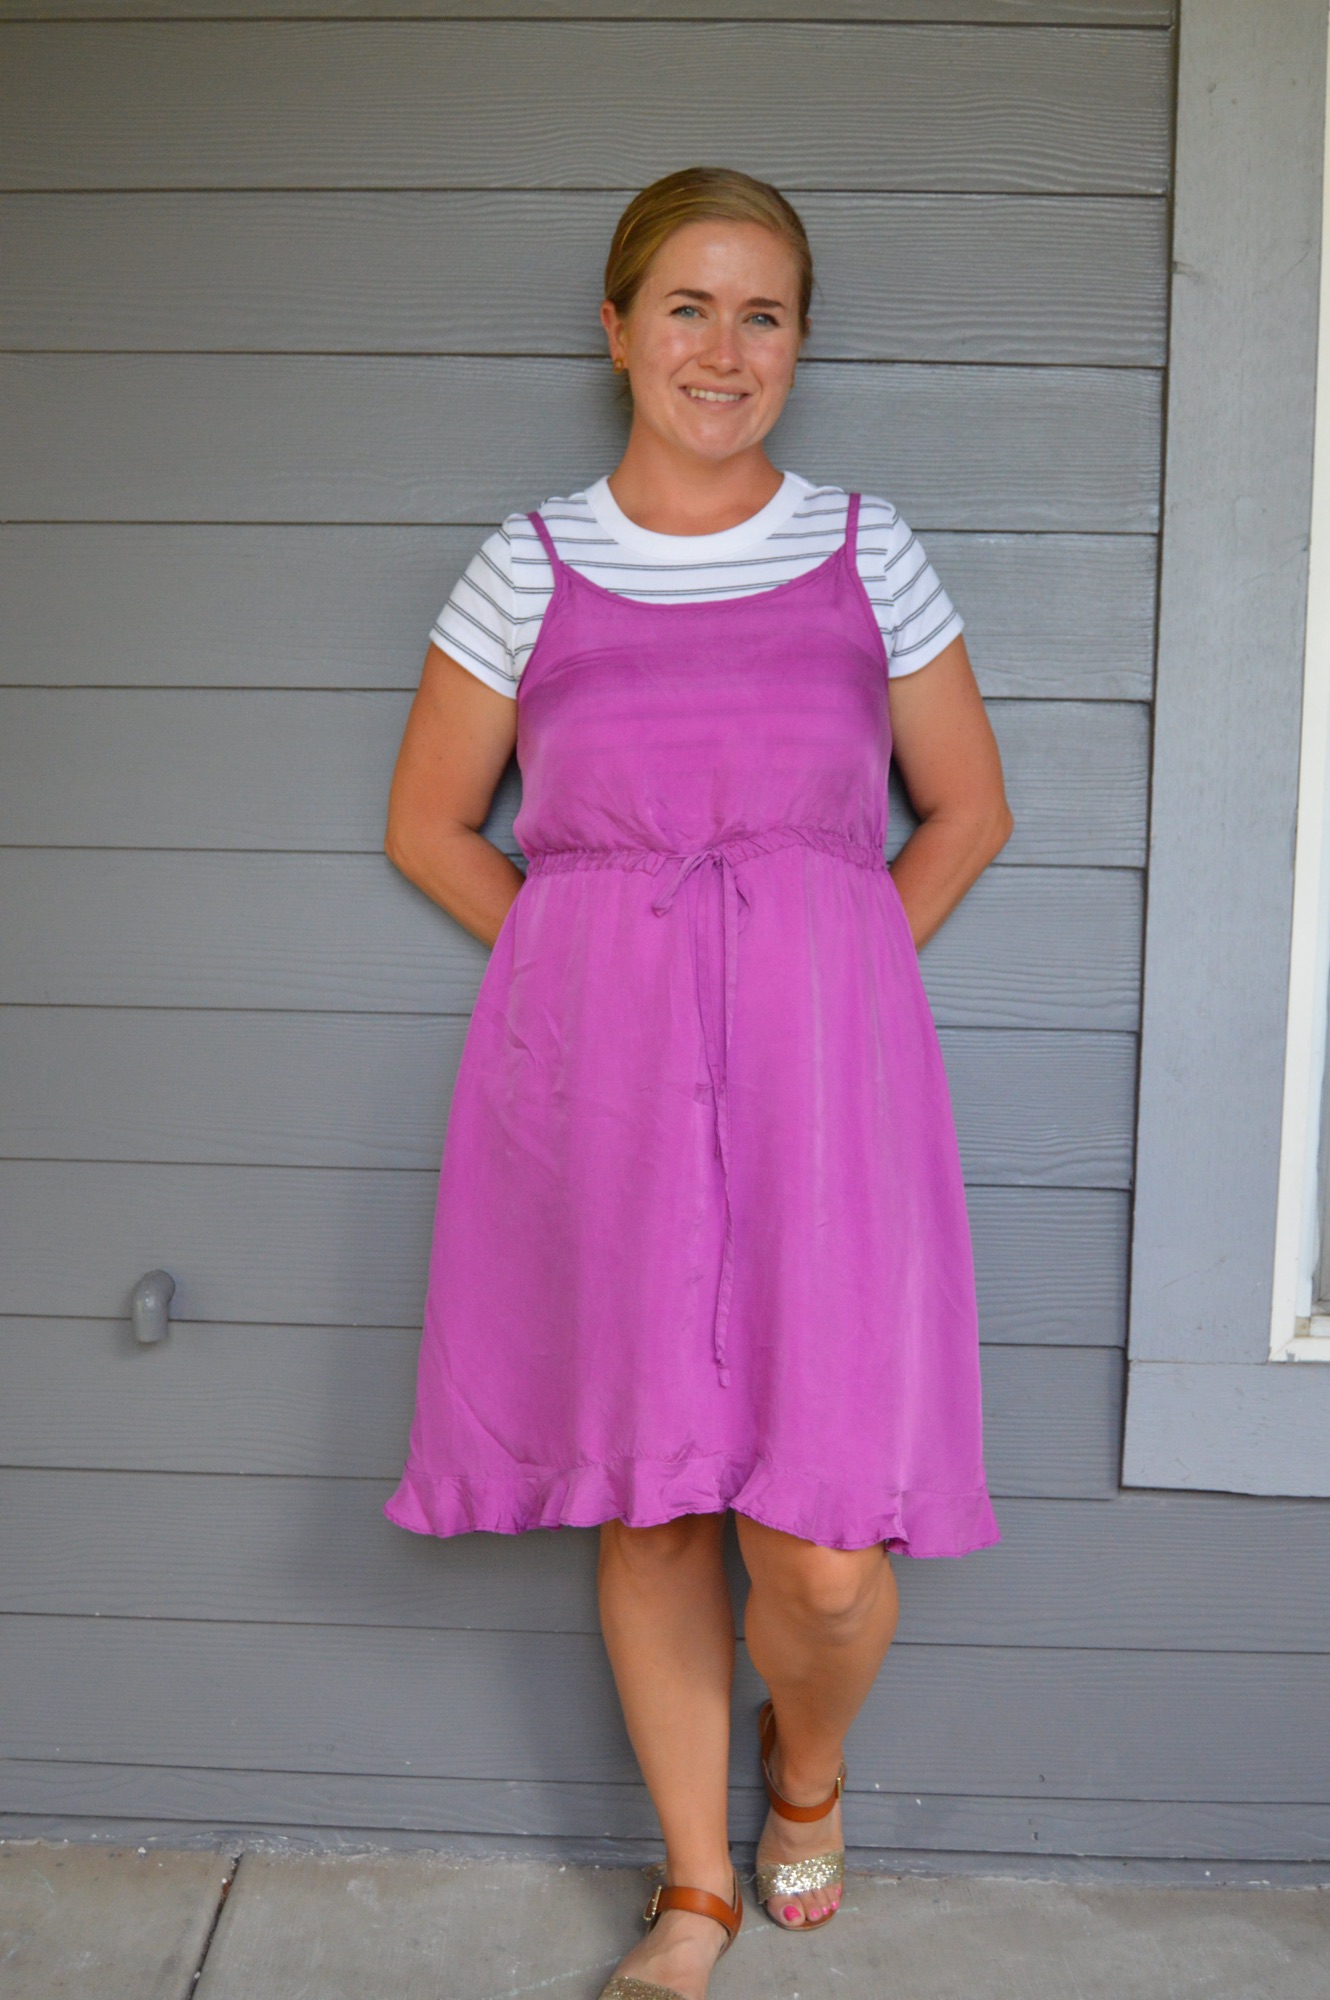
I was slightly in between sizes and I rounded down with a size 10. The bust area is a bit tight, but it’s not a very big deal. I wanted to make the midi-length of the dress, but I had only bought 2 yards of fabric so I had to stick to making the knee length version.
Sewing on spaghetti straps is something I’ve never done before! The instructions were great for this part and, although my execution of this wasn’t very exact, it was a very satisfying task to accomplish.
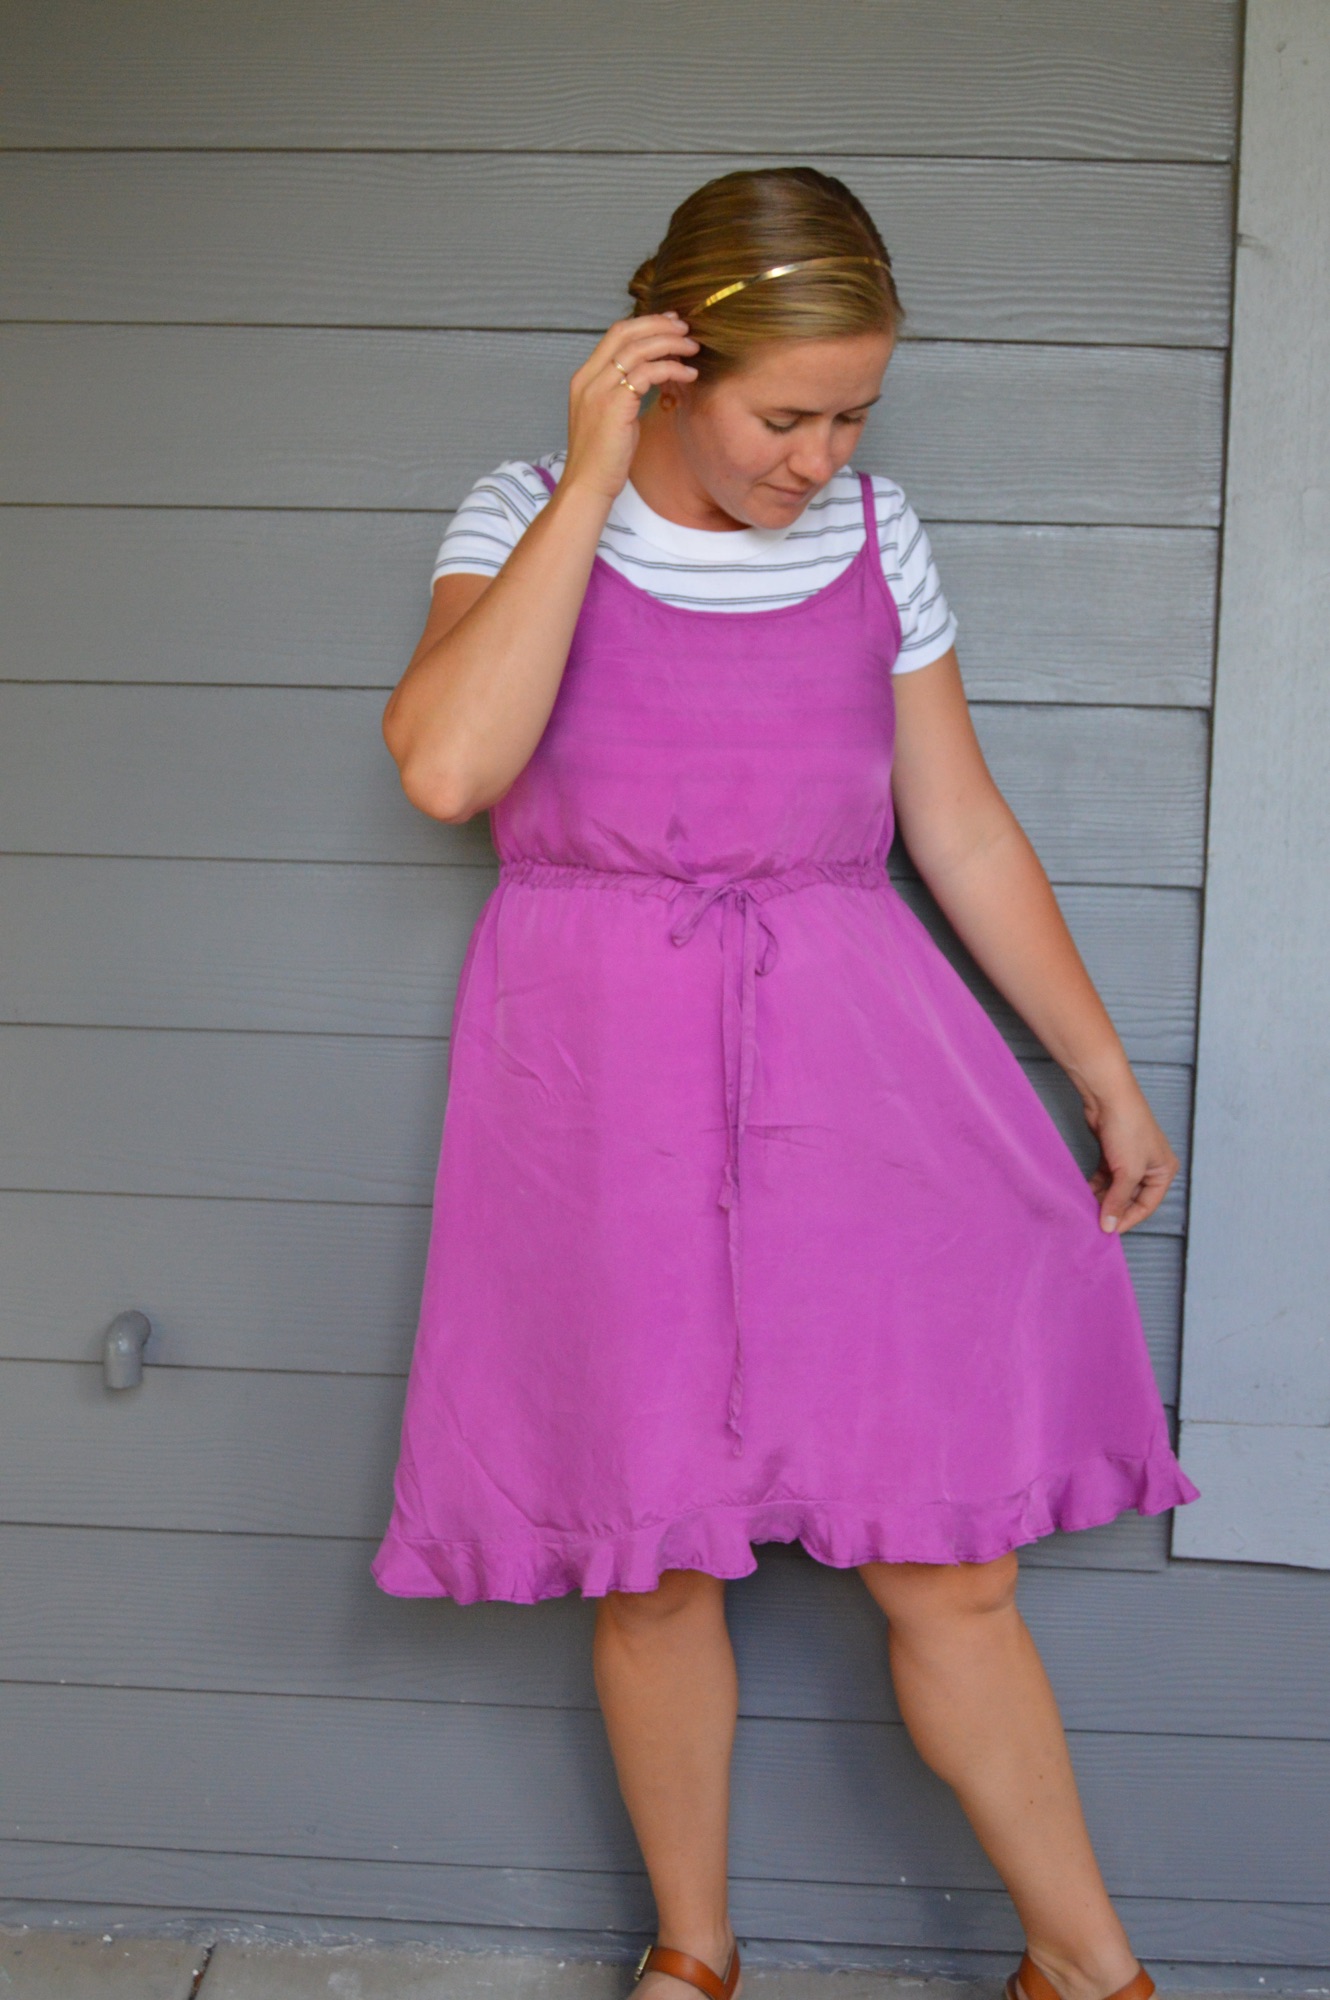
My first adjustment was to add the waist casing and tie. I did this the same way I added a casing and tie to my Jesse Tee dress hack, although I have to admit I was a lot more sloppy on this dress (and also, the fabric is more slippery…so maybe I should just blame that). It’s not hard to see how wonky it turned out in the above picture, but it honestly doesn’t bother me too much (in the picture below, you can hardly tell). It was difficult keeping the casing from slipping. If I were going to do it again I would definitely 1) cut the casing fabric on the bias and 2) use way more pins!!! Lesson learned.

My other adjustment was to add the flounce at the bottom. Somehow, the dress felt just the tiniest bit too short for my taste. I have to chase children around so something that is a little bit too short can easily become waaaaay too short in a matter of seconds. I didn’t have a lot of leftover fabric to work with, just an oddly shaped corner, but I wanted to see if I couldn’t finagle something that would make the dress just a bit longer. A ruffle would have been the most economical choice for what little fabric I had to work with, but I really wanted a flounce, not a ruffle.
I found this amazing article on flounces at The Shapes of Fabric (this blog has some seriously invaluable sewing/patternmaking information!).
I didn’t have enough fabric to make a properly calibrated flounce, but the article did guide me in the right direction. I ended up using a plate and bowl from the cupboard to make circular strips, about 2 inches wide. I was hoping this would maximize my flounce factor, but having no experience in this field, I can’t say that another way wouldn’t have been better. My way was tedious, but it did produce a flounce.

Up to this point in my making process, I had French seamed everything. I rarely use French seams for finishing, but since the dress was only meant to have two seams, I figured I could make an exception. Adding the flounce complicated this a bit but I stayed true to the French seams for putting all my little flounces together. But when attaching the finished flounce, I threw in the towel and just sewed and serged as per my usual.
The flounce is small and a little silly…but I am grateful for the extra length. Even though it’s not much, it does make a big difference for comfort levels so I’ll take it!
I should also mention that I omitted the pockets-I know-the audacity! I love being able to add pockets to anything I make and I love having pockets but I don’t think every garment is suited to have pockets. Sometimes the presence of pockets is bulky or pulls the fabric down. In hindsight, I actually think pockets would have been fine here and wouldn’t have warped the dress in anyway.

I haven’t yet talked about the fabric!
The fabric is a gorgeous Cuprotex Twill in “dahlia.” The weave is a definite twill pattern and the texture of the fabric is velvety-almost like a suede. It’s a bit sheer, as you can see. It’s beautiful! In fact, if I had been shopping online I can say with certainty that I wouldn’t have thrown this into my cart. On screen it doesn’t look like much, but in person it’s interesting and unique. I don’t love impulse buys, but I don’t regret this one at all!

Whoops, I took pictures after wearing this a few hours and it definitely wrinkles!
I’m pretty happy with my dress, in the end. It’s not at all perfect, but I like that I did something a bit different from my norm.
With the cost of fabric (and everything else) rising, I sometimes think about whether I would have been willing to pay for the item I made if I had seen it in a store. This dress cost $36 in materials (and I’m not even going to get into the cost of labor here). Would I have purchased it for $36 if I had tried it on in a store? Honestly, in this case, I don’t think so. I probably would have put it back on the rack because I’m cheap and the dress is a bit risky in terms of my personal style. However, I didn’t just get a dress. I got hours of working on an enjoyable project. I got a chance to be creative, to practice my skills, to learn something new, and to face some problem solving challenges. I’m not trying to be cheesy or sentimental but it was a joy making this. I might not have been willing to spend $36 on the dress alone, but $36 on the entirety of the making process plus a new dress seems like money well spent in my opinion!
Pattern: Helen’s Closet Orchard Dress
Size: 10
Adjustments: Adding casing at waist with waist tie; adding a flounce at the bottom
Fabric: Cuprotex twill in dahlia from Harmony Provo
Cost: fabric $36 (for 2 yards); thread from stash; pattern FREE
Would I make this pattern again?: I would! It’s an easy but enjoyable project. I kind of want to make one in velvet (although it’d probably be best to do the straps in something less bulky like a matching silk)!

Thank you for teaching me the difference between a flounce and a ruffle! I love to pet cupro but it’s sooo wobbly to sew, you are brave. Also, velvet would be so pretty!
LikeLiked by 1 person
Cupro can be so wobbly! This one was less tricky than others I’ve worked with but spraying it with starch really helped tame it!
LikeLike