

La Passacaglia (la pass-uh-cal-yuh). A.k.a. My sewing project. A.k.a. My sewing project that just might take me 10 years to complete.
But I’m loving it!
Truthfully 🙂
**Long Post Warning: scroll through if you just want to see the pics:)

I first saw the La Passacaglia quilt on Pinterest and I totally fell in love 😍. Seriously! My mom is a master quilter and an incredible seamstress so when I saw it, I immediately called her up and had her look it up online. We oohed and aaahed over it. It was obvious it was going to be a difficult project as well as kind of expensive and very time consuming, so I bookmarked it to do “someday.”
Lucky for me, a good start for the project came up sooner rather than later. When we signed on for the bush, I knew that I’d have some extra time to fill. Ben and I spent 4 months teaching in China and the hardest part for me during that experience was filling all the extra time we had. I wasn’t prepared and hadn’t taken many projects to work on or things to do and I really struggled with boredom.
Lesson learned. I packed pretty light this time around and dedicated half of my suitcase to sewing stuff.
La Passa (that’s what I’m going to call it, because it’s easier to type) is quite a project. It is from a book called Millefiori Quilts by Dutch quilter Willyne Hammerstein. The projects in her book are gorgeous…and they all use a method called English Paper Piecing-everything is done by hand!
Since this is such an intensive project, I knew I needed a plan of action!

I started by choosing a color palette. The first picture in the post is Hammerstein’s original La Passa. The La Passa (I know I’m saying the the) I fell in love with on Pinterest had brighter colors, which is more my style.

The quilt is made of 5 different shapes. The metal cutouts in the middle of the above picture weren’t totally necessary but I saw someone selling them on Etsy and I thought it’d be a good idea to have them (I use the inside to trace paper and the outside-for seam allowance-to trace the fabric I cut). Lucky for me, my brother has a metal cutting machine and was willing to cut them out for me (it turned into like a 3hour project as he tried to get the dimensions right. Thanks, Eric! I still owe you one…). My mom and I copied all the shapes onto card stock and my mom’s fancy Cut and Sew/Cricut type machine cut out all the big hexagon papers. Unfortunately, it jammed with the smaller ones, so I’ve just been cutting those out by hand. But the machine still saved me a TON of time! (You can purchase all the paper pieces for the project but it’s more than $100 and I just chose the cheaper albeit more time intensive route).

I enlisted the help of my mom and sisters in choosing a big selection of fabric. I just got 1/4 yard of how ever many fabrics are up there. When I finish the project, I’ll let you know if this was a good call or not. I think the ladies at the cutting counter kind of hated me 😁…

So… The process! This isn’t meant to be a tutorial or anything-it’s just meant to give an idea of the process for anyone who’s not familiar with English Paper Piecing. First (following the pattern), I choose a fabric and trace my metal shape on the back side (again, on the outside of the shape to give room for seam allowance). And then I cut my shapes out.

Then I put a card stock shape on the back side of the fabric and finger press around the edges. I use a basting stitch to secure the fabric around the shape. You can see in the background an already basted shape-when the shapes are all sewn together, the basting stitch is taken out and the card stock is removed…so, you know, the finished product won’t have random ugly thread and crunchy paper pieces throughout ;).

Then the pieces are placed right sides together and I stitch them up as best I can. The process requires a lot of snipping and knotting thread-much like embroidery-but it will make for a more secure top when it’s finished.

Many can attest that I have some OCD tendencies (like, I can’t stop playing the piano in the middle of a song-it must be finished!). I love that on the La Passa, each row is kind of like a miniature finish. And each rosette is too! It makes this very long process feel like it has a pace and is moving along.
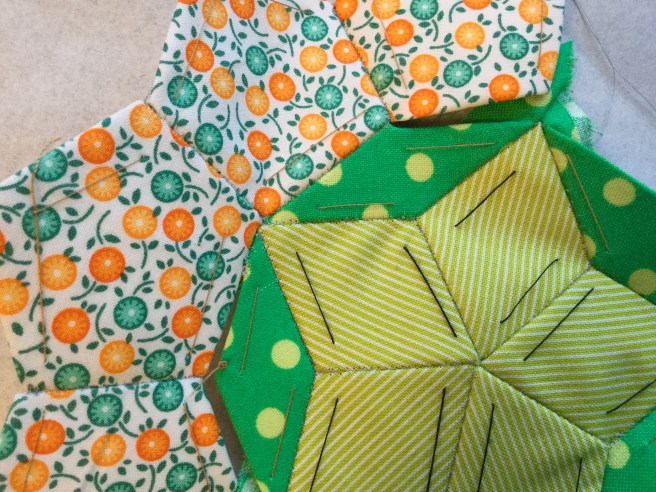
Here’s a close up where you can see that I’m not the best seamstress (hello, very obvious stitches!) but I’m coming along (hello, seams that look almost stitchless:)!
And now, some of the finished rosettes (yes, I’ve been in the bush 15 weeks and I only have 3 rosettes to show for it)!

Small gray for a neutral.
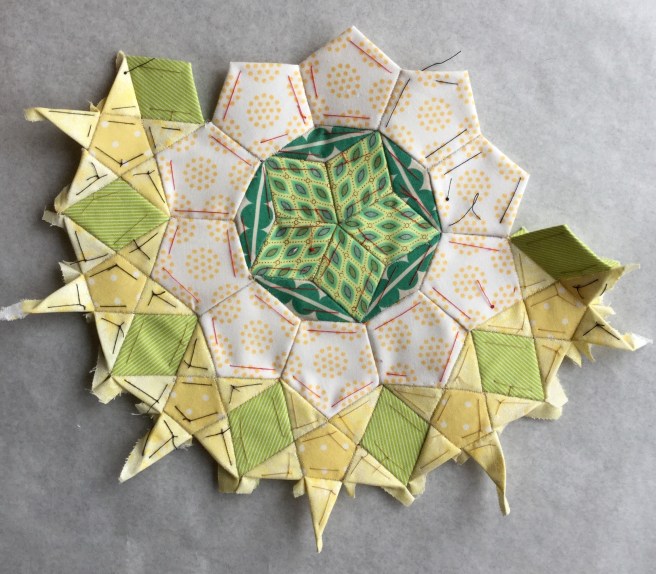
Yellow. Lots of people who make the La Passa go ga-ga over fussy cutting (cutting a specific pattern out of each fabric) and make it look super cool. I have not found my fussy cutting niche but you can see my attempts in the middle of this rosette.
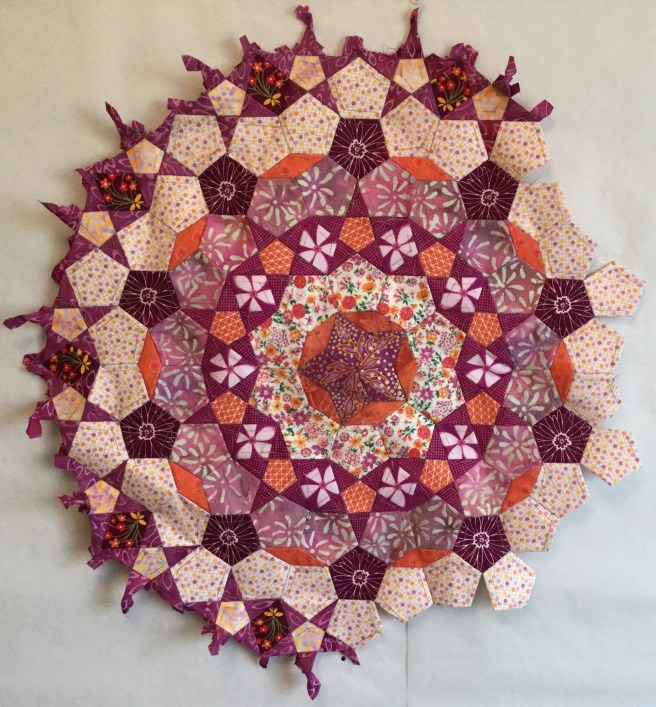
And the huge purple one! The quilt consists of 4 large rosettes and let me just say that this one took forever for me to finish! It’s about 2 feet across and each row just took more and more time. But I do love how it turned out.
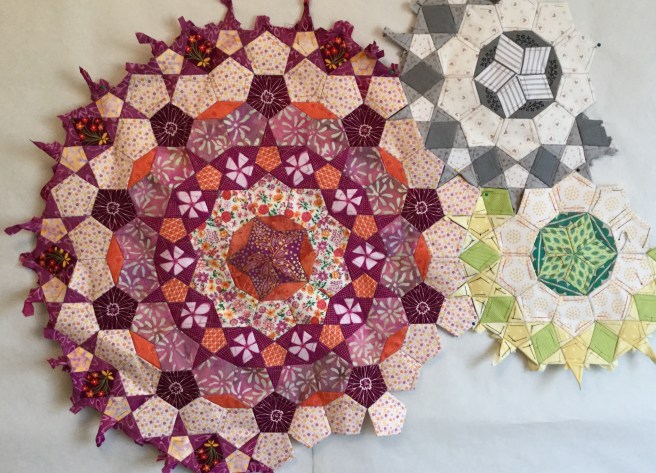
This is not how I’ll arrange them in the finished quilt, but I just thought you guys might want an idea of how all the rosettes are pieced together.
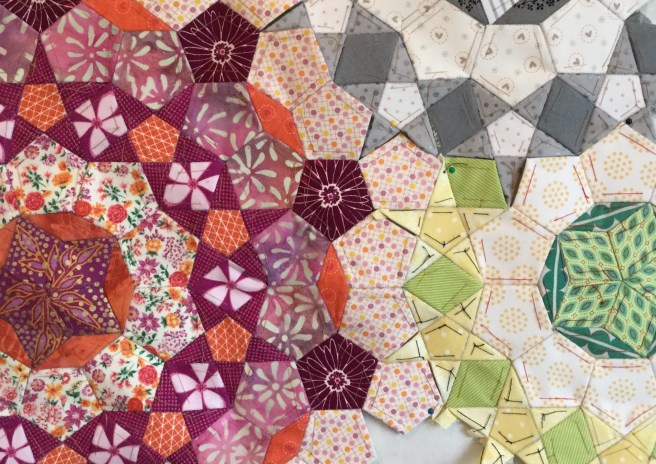
And a close up of where the rosettes meet.
In the introduction of her book, Hammerstein talks about how she finds no joy in rushing through a project just to complete it-she enjoys every step of the process. I really loved this. When it comes to sewing, I always think, “Okay, I’m going to finish this today!” And then when it takes longer than I anticipate, I get frustrated and quit. With hand sewing, I’ve found that I enjoy the process more and am not just antsy to see the finished product. I think it’s because I know right from the start that it’s going to take me a long time to finish and I’m able to just take it one piece at a time.
I’m not saying I’m giving up my sewing machine, but I totally love the English Paper Piecing!
Now when I finish 3 more rosettes in about a year, I’ll post some more pictures 😉.

Wow! I love this! This may possibly be the most amazing project I’ve ever seen. I can’t wait to see the finished product.
LikeLike
This is awesome. I am impressed. The rosettes that you have look great. I’m no seamstress, but I think that your doing an amazing job. On a side note, I love looking at it from a mathematical/engineering perspective – I love the geometry that is going on here. Keep up the great work!
LikeLike
This looks awesome!!!!
LikeLike
Kim! You are AMAZING!!
Mom B.
LikeLike
I don’t know how I missed this post before. You are AMAZING!!! I can’t even imagine. That’s just so cool! I’d love to see more progress pictures!
LikeLike