


I finally finally got around to making some string art! I’ve seen it around for quite awhile now and I only recently got on board to make some of my own. Turns out it is so so easy. With a little bit of planning anyone can make string art. Serious. It does take some time-especially if you need to treat your wood. But it’s the kind of project where it’d be pretty hard to completely mess everything up. I even think that with some supervision (and maybe some help with the drilling) it’d be a great project for older kids.
So.
Here’s what you need:
- Wood (I used inch and a half thick pine that was left over from the table Ben made us. Scrap wood is great, just make sure it’s thick enough that your nails won’t pop through to the other side and still be in far enough to not wobble).
- Picture/Outline of desired image
- Tape
- Wood Stain and Sealer (optional)
- Drill (optional-but it sure makes life easier. I used a 1/16 drill bit)
- Hammer (I’ll be honest, I bought myself my own hammer for this project. I tried doing string art with Ben’s hammer and after many curse words and bruised thumbs, I quit. This time I went with one much lighter and it was a dream)
- Nails (Mine were 1 1/2 inch #16 nails. Choose whatever you want, just make sure the head is big enough to keep the string from slipping off. WalMart’s nails were the cheapest I found which is good to know because you need A LOT)
- Yarn or Sturdy String in desired colors (I used Sugar ‘n Cream cotton yarn. They’re like $2-$3 each)
First, find, print or draw the image that you want to create.
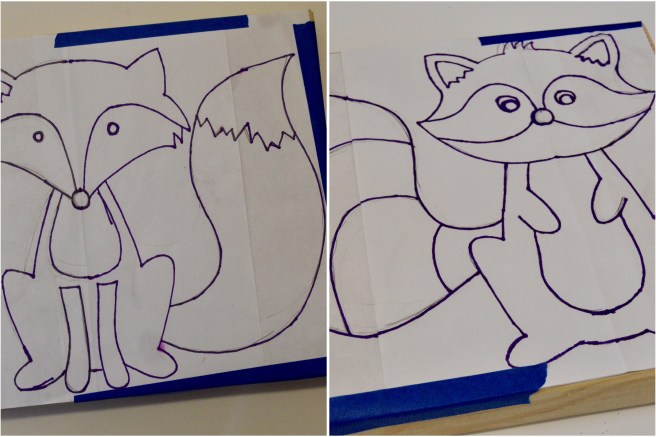
I looked online for ideas and then just free handed the drawings onto paper to make it the right size. Choose something simple that doesn’t have super close detailing. For example, the eyes on my raccoon ended up being a bit of a headache. They turned out okay but I’d keep them like the fox’s eyes if I ever repeated this project.
Next cut and sand your wood to the right size. My wood pieces were roughly 1 foot squares. I made my images to fit that size of wood…not the other way around.
Tape your image to your wood.

Use your drill to drill holes along the outline about every half inch or so. You could definitely mark where you want to drill before hand, but I just eyeballed it. Also, Ben recommended putting a piece of tape on your drill bit marking how deep you want to drill, so that your holes are consistent. Try to keep your drill upright and at a 90 degree angle to your wood.
Also, personal preference, but if you come to spot where you could fit 3 closer together holes or 2 farther apart holes…go with the 2 farther apart holes. Trust me.


Drill all the way around your outline and then remove your paper.
If you are staining your wood, follow the instructions on the packaging of the stain. Follow the stain with a sealer, again, following the instructions on your sealer. The picture above right is after my wood was stained and sealed. This is what takes the longest with this project! But I LOVED how the stained turned out!
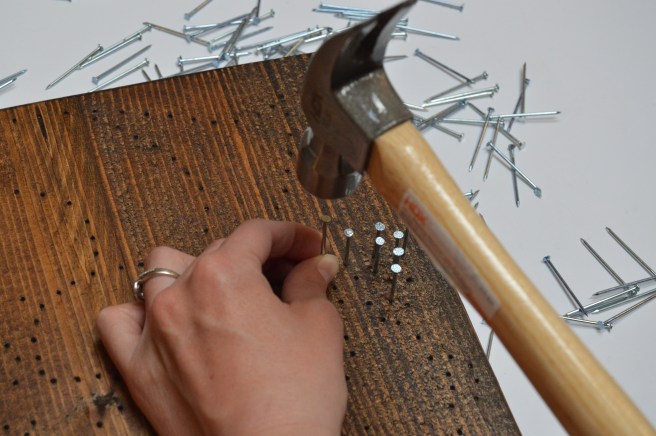
Once your sealer has completely set, start nailing! If you didn’t pre-drill your holes, bless you! You’ve got your work cut out!
Every so often, tug on your nails to make sure they are firmly set into the wood and aren’t going to pop out when you start stringing.

Nailed it! (sorrynotsorry) This guy’s ready to go!
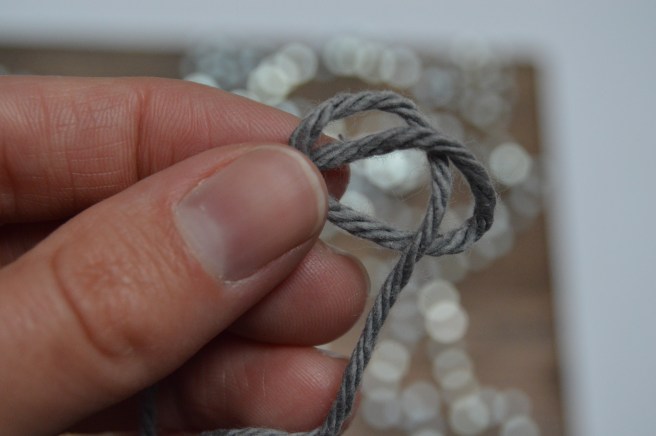


To start stringing, tie your string into a knot, but before tightening it, slip it onto one of your nails. Tighten really well then tie one more knot on the same nail. Snip the loose tail off the yarn.

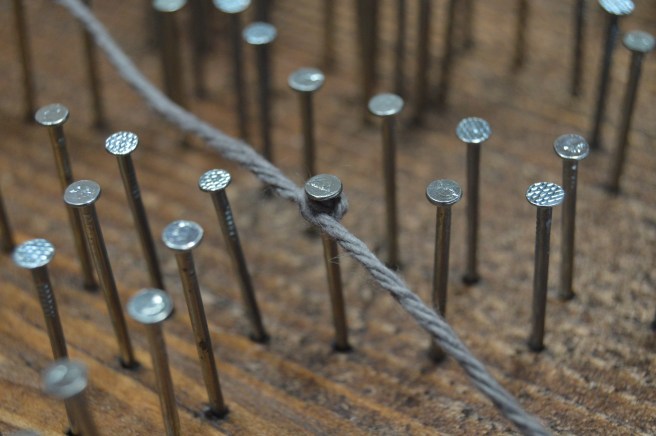
Then have it! Lead your string to a random nail, wrap it around once and then lead it to the next random nail. Make sure your string is taut. Try to always cover a new area (don’t just go over the same spot again and again) by using every nail at least once.
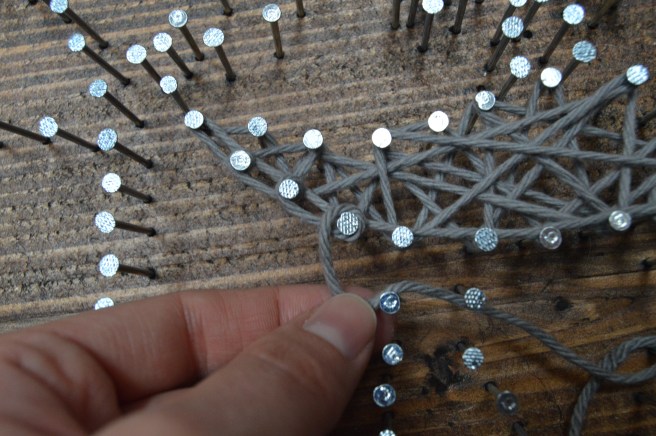
I wanted to “outline” my images, so I looped around each nail (like a dot to dot) on the inside and then on the outside.


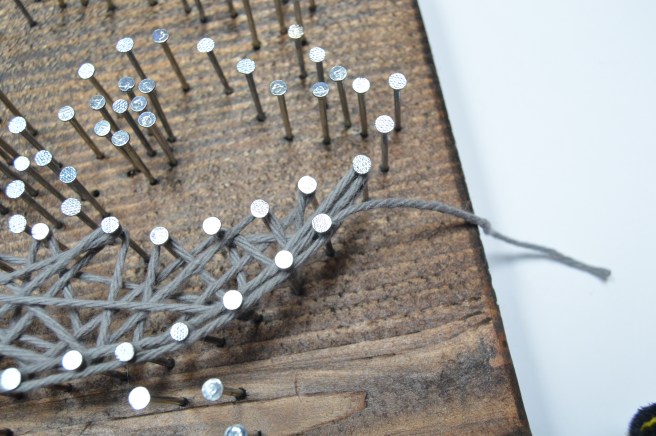
To finish, you do basically what you did to start. Give yourself several inches to work with and cut the yarn. Tie yarn into a knot and slip onto your final nail before tightening. Tighten really well and then tie one more knot on the same nail. Tighten again then snip off the excess yarn as close to your knot as possible.
I’ve seen other people use glue to hide their ends, but the knot method worked perfectly well for me.

Complete each area with its corresponding color. You can see above that I only outlined where it would be seen. I knew I wanted the mask etc. outlined but in it’s own color.
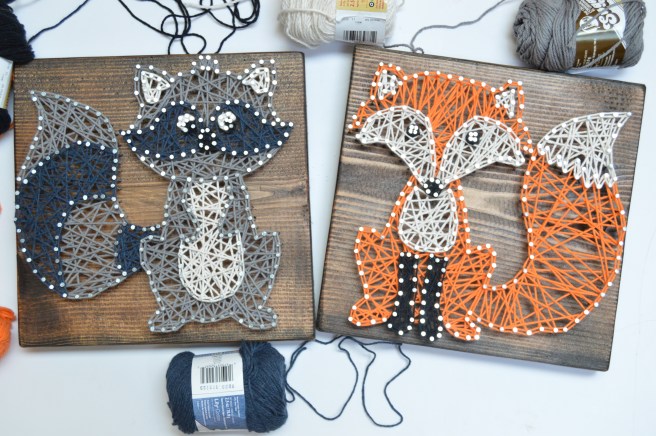
Ta-Da! You’re done! Cute and affordable! These little critters went to my brother and sister-in-law in anticipation for their new baby…but now I’m trying to think of what to do next…for ME!

These were so cute! I am glad you posted the tutorial because I was so curious
LikeLike
This are adorable. I know a lady who sells these and yours are excellent quality. I tried making one once but I wasn’t happy with how it turned out. You’ve inspired me to try again.
LikeLike
So, so cute! The kids love string art. I’m pretty sure Oak on up have done it in school at one time or another 🙂
LikeLike
Great pictures Kim! These are so cute! I can’t wait to see how they look hanging up in that Nursery. And I need to do some more home decor…keep posting!
LikeLike