
")

Did I lose you all with the title?? Haha sorry it was so ridiculously long. I knew I could create completely separate posts for each of these items…but I didn’t want to, so I mashed them all together.
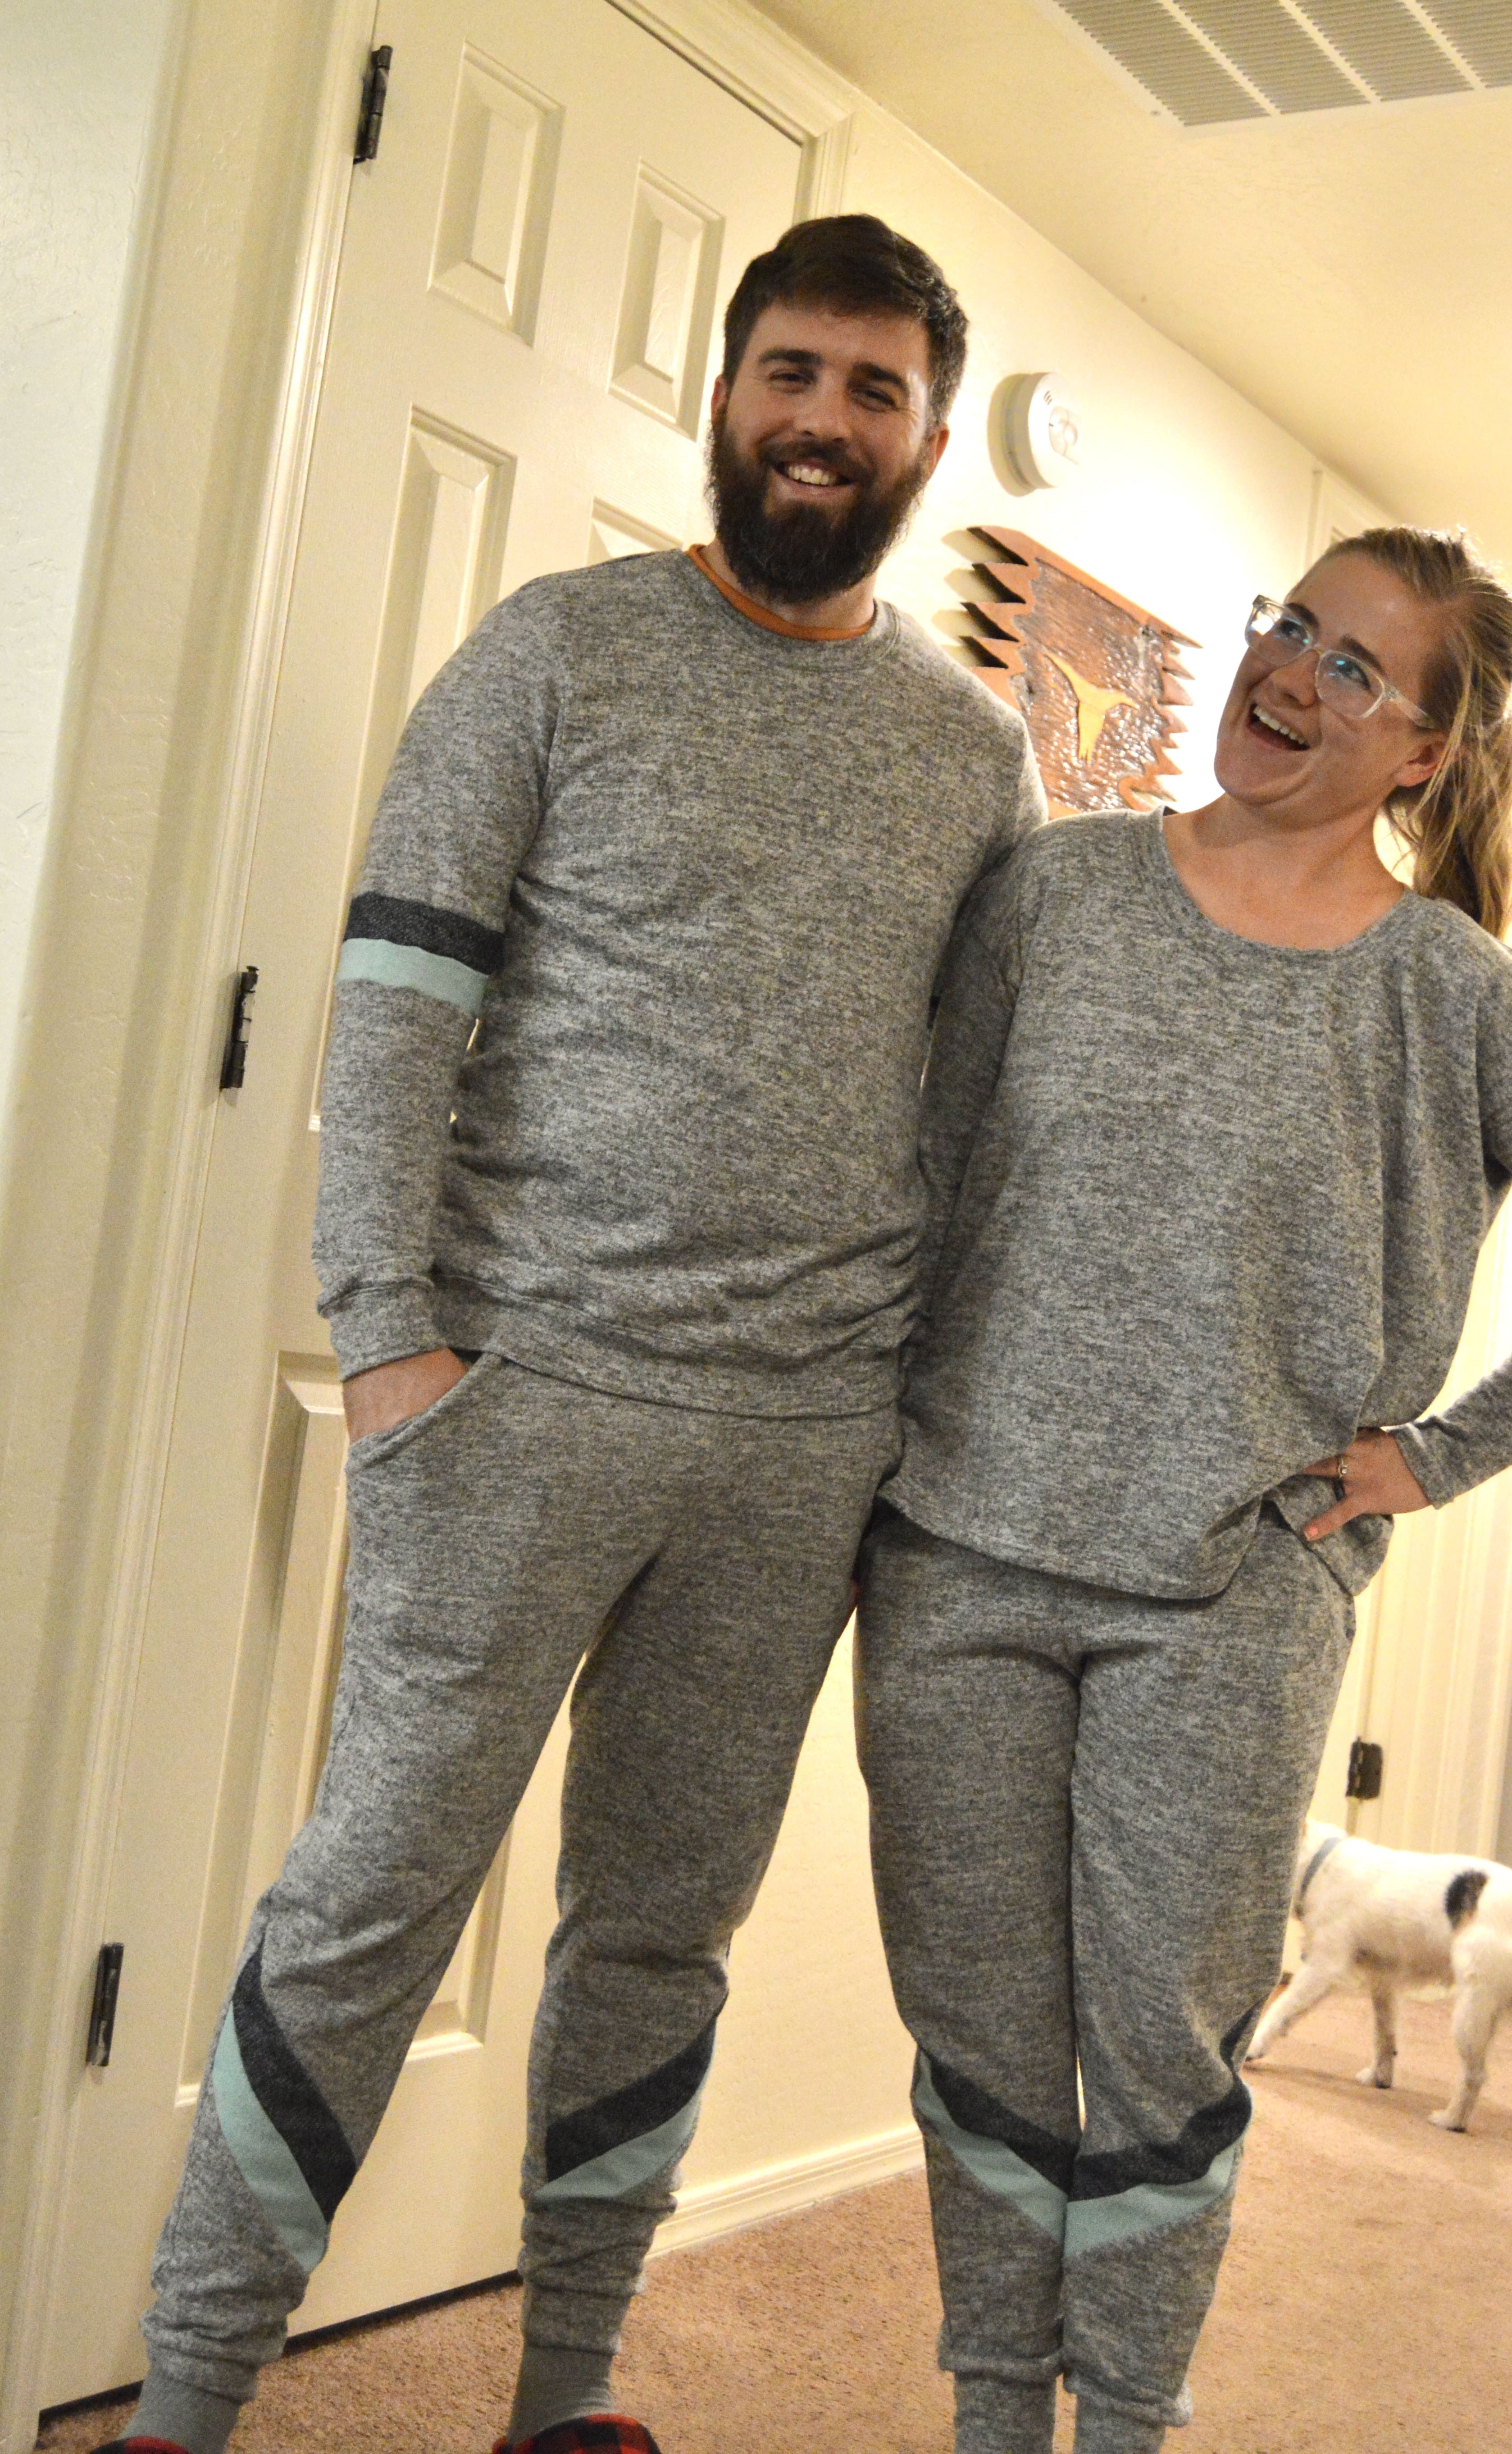
I did make pajamas for myself and for Ben this year and I made complete sets: tops and bottoms for each of us. It really worked out so well and I’m very pleased with the results!
These pajamas included a bit of a Christmas miracle: I really wanted to buy fabric in person so that I didn’t have to wait for fabric to ship. I wanted to get started on sewing as soon as possible. So I checked out fabric at the very few shops here in town that sell fabric and in the end I decided to just go back to Hobby Lobby and pick up the heathered gray fabric (which is like a Hacci sweater knit). When I got around to going to Hobby Lobby, I discovered that the very fabric I had in mind was on super sale, 80% off and just over 2 dollars a yard! Hooray! I got 6 and a half yards of it for around $15, and even after making our jammies I still have enough left over to make a cardigan or something. I was, and still am, so grateful for this little blessing!
I’ll apologize now for the little number of photos I have to show you these jammies. Ben’s not wild about picture taking so I snap quickly and take what I can get!
Let’s start with the pants, which really was the starting point to dream up the sets we ended up with. If you recall, last year I made Ben and I Hudson Pants for Christmas and this year I thought, “Why mess with a good thing?” So I made some more (it’s the Hudson Pants pattern from True Bias; the women’s pattern is here and the men’s pattern is here). But before I cut into the fabric I thought it would be kind of fun to do some color blocking on our Hudsons. I wanted diagonal lines that fell lower on the leg. Adjusting the pattern for this addition really wasn’t too big of a deal. I didn’t even cut the original pattern piece. I drew the stripes in where I wanted them. Each stripe is 1 1/2 inches wide. Then I added in seam allowances and just folded the leg pattern along the top stripe (plus seam allowance) mark to cut the top of the leg. And then did the same along the bottom stripe (plus seam allowance) mark to cut the bottom portion of the leg out of my main fabric. I did create a separate pattern for each stripe, making sure to include seam allowances, but I did this simply by laying some paper on top of my printed pattern and tracing the lines I had already drawn. For the stripes, I used the leftover fabric from last year’s Hudson Pants (I never know if saving scraps is worth it, but times like these make me think it’s totally worth it!). Drafting these pieces and cutting them out was fairly simple, but sewing those angled pieces together was a bit tricky. For me, the trick was to line up seams, but have the piece on top overhang the bottom piece’s edge by whatever measurement the seam allowance is. I don’t know if that makes complete sense…but play around with it and you’ll figure it out!
I seriously love our pants! I suppose I can’t speak for Ben, but mine are the comfiest Hudsons I’ve made yet. I wear them all the time. Maybe that leftover fabric will make me another pair of Hudsons…hmmm…
{P.S. When I made the Arenite Pants, Meg recommended using Dritz 2″ Soft Waistband Elastic and it is so awesome! I only use that now and highly recommend it!}

Moving right along to Ben’s sweatshirt! This one proved to be the most involved pajama piece of all. I’ve only made Ben one t-shirt (the free Sage Tee from Elbe Textiles) and, in truth, it didn’t really work out for him. I used more expensive fabric and tried to do it well, but the fit just isn’t right for his body (which isn’t to say the pattern’s not good, just not good for him). Knowing that it might be tricky to get the right fit, I didn’t want to spend money on a pattern that I’d just have to tweak (it is so very hard to find reviews of basic men’s patterns). So I ended up downloading the free Anything But Basic (ABB) Men’s Tee from Do It Better Yourself (DIBY) Club. I actually did make a muslin this time, which proved to be worth it because the fit was, again, just so wonky! It pulled in weird places and had extra fabric pooling at the top of the sleeve. It was not pretty.
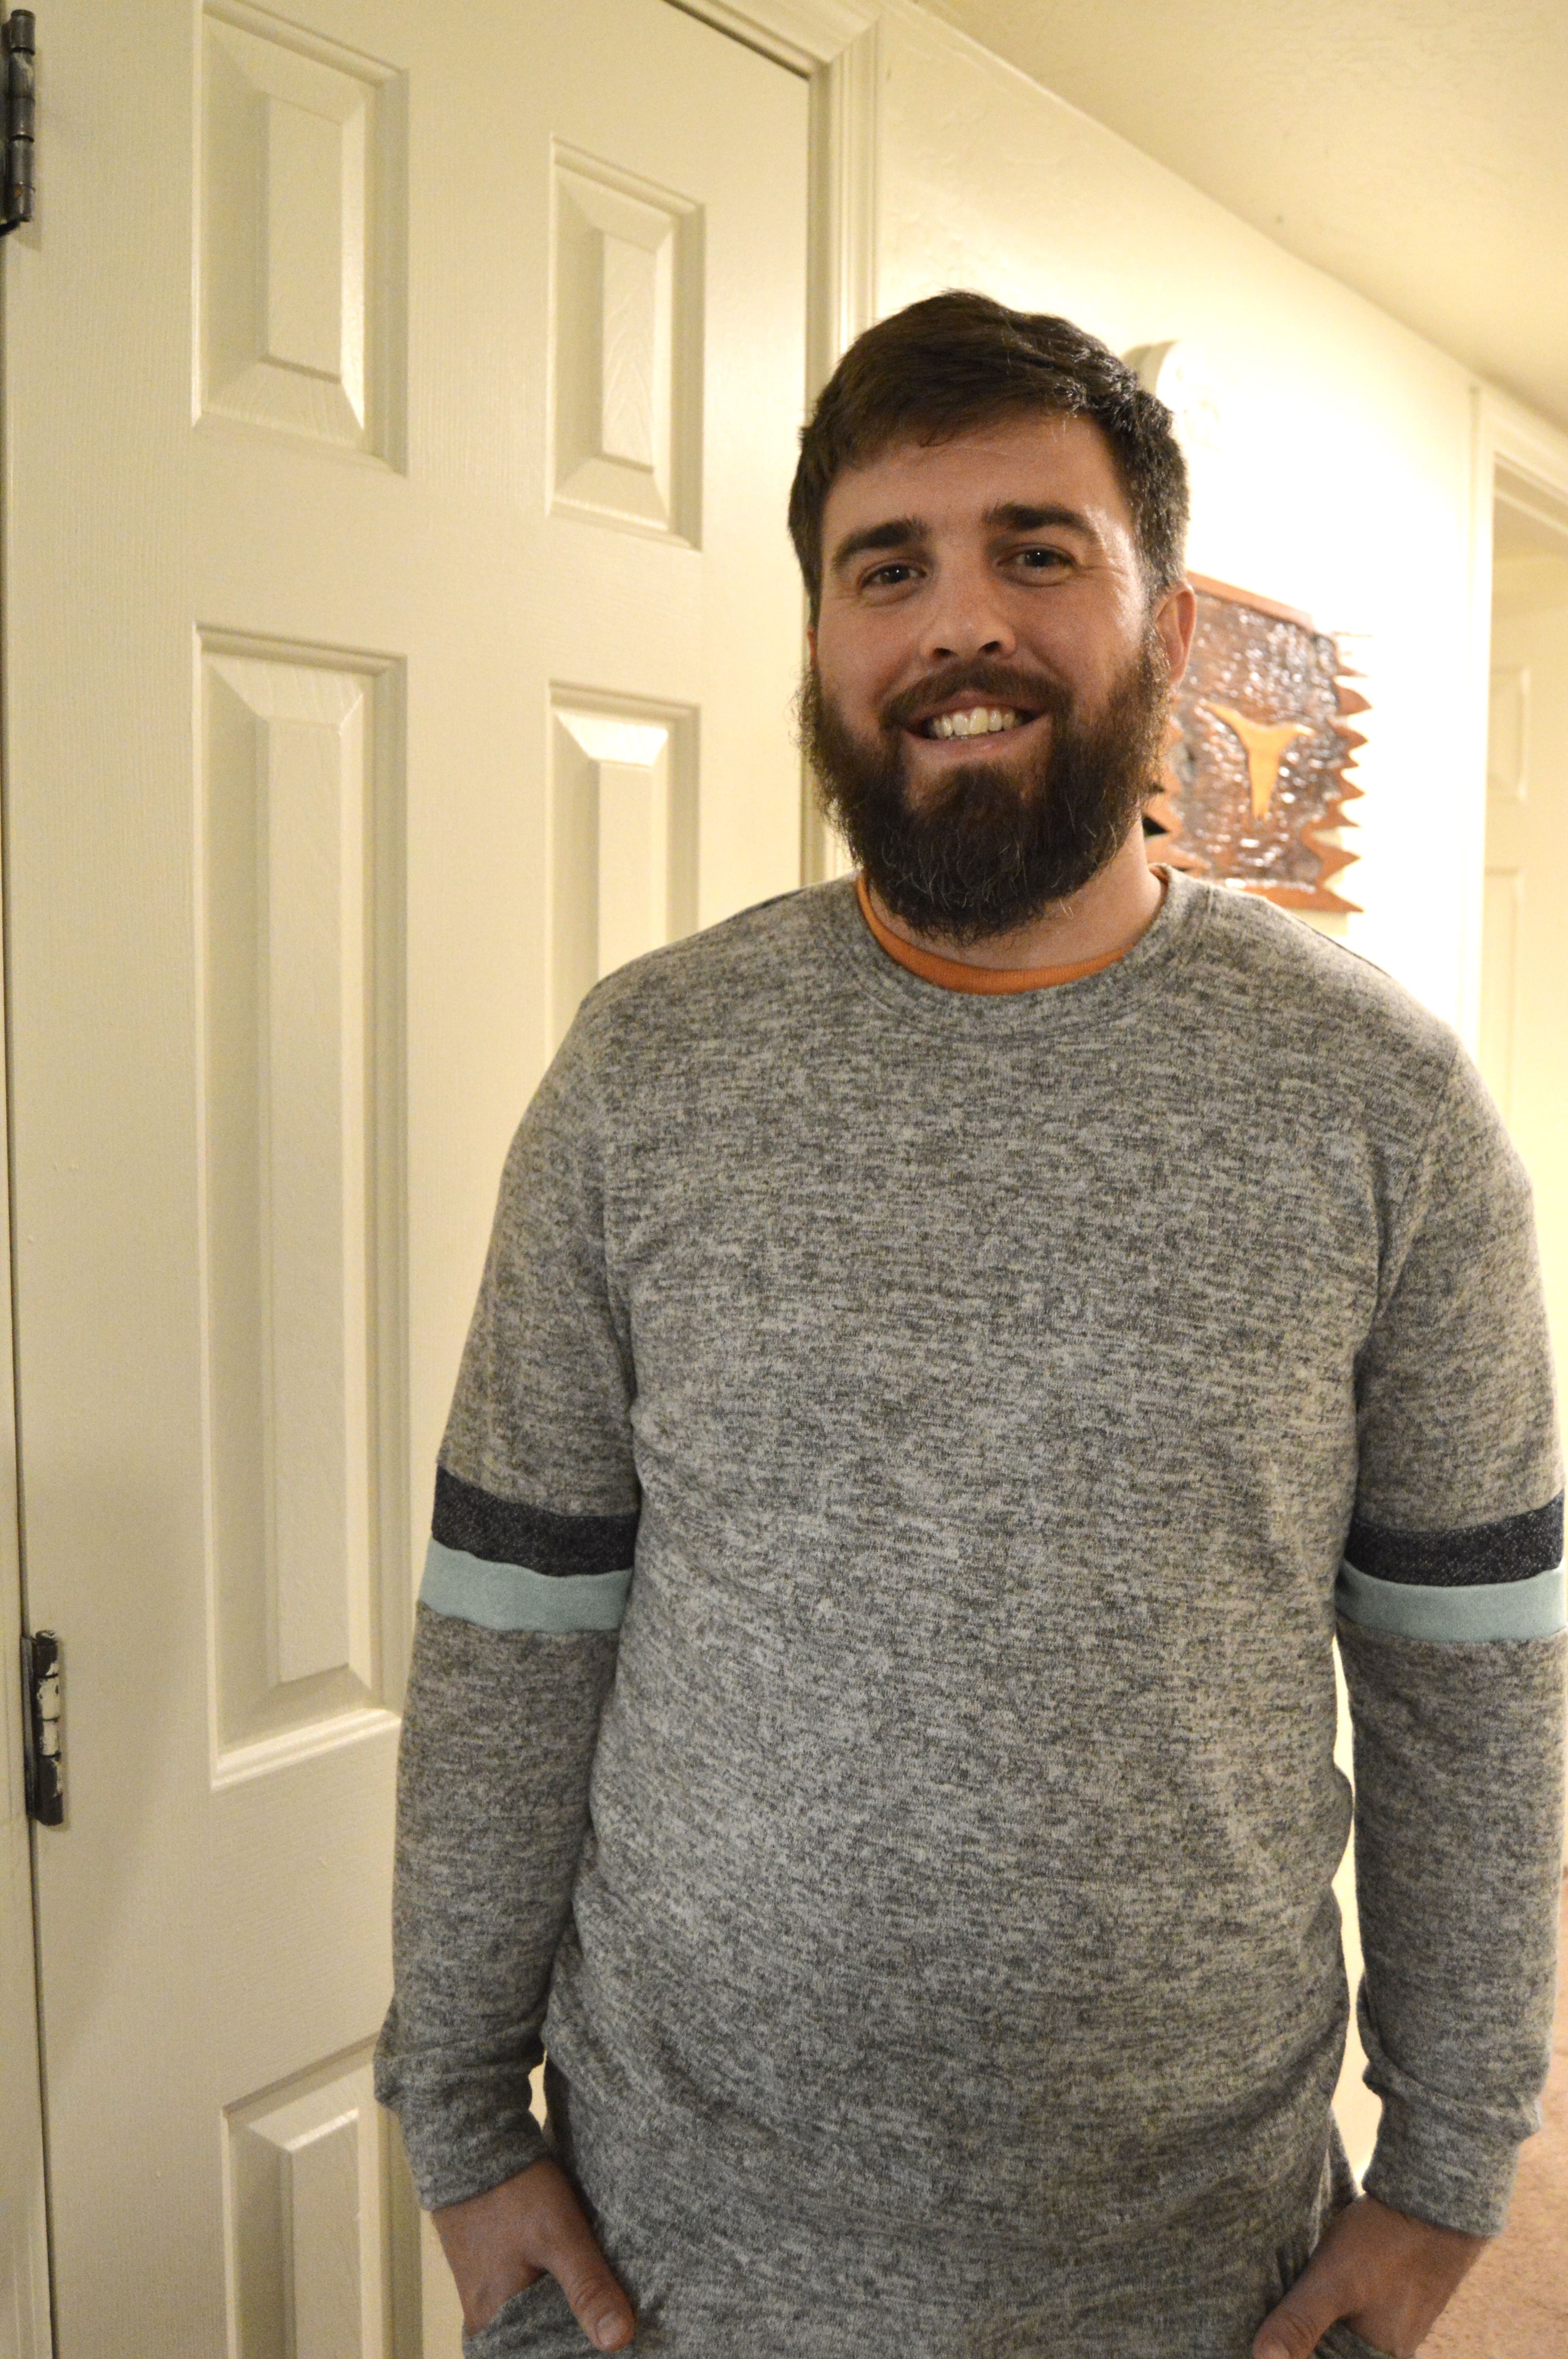
I was pretty discouraged because this was supposed to be a quick project, and I had really been hoping that the muslin would have turned out. I let things simmer for a few days before I came back to the shirt and did what I had to do! I reprinted the pattern, this time including 3 sizes. Then I got a shirt from Ben’s dresser that Ben said fits him the best. I folded it in half and compared his finished shirt to the lines of the pattern. They were way different! There were two major differences. The first was that the angle of the slope on the shoulder was way more pronounced on his RTW shirt. I kept the top point (where the shoulder connects with the neckband) the same, but dropped the bottom point (where the shoulder connects with the sleeve) down about 1 inch. The bottom of the armscye was also, accordingly, dropped one inch (I didn’t adjust the sleeve pattern, and this worked for me; thank goodness for knits!). The second major difference was that the ABB bodice pattern was very curved. In fact, when I made the muslin I thought, “Are mens’ waists typically this curvy?” It may work for some, but it certainly didn’t work for Ben. The RTW shirt had a very subtle amount of curve to the waist, but it was much more straight. I redrew the line from the bottom of the armscye to the waist to make it significantly straighter. I don’t know that what I did is technically accurate but I did much prefer to use an existing pattern (plus a trusty RTW tee) to create something that worked for us, rather than starting from scratch. I didn’t make a muslin of this new and improved pattern, but I think we all breathed a sigh of relief when he tried the sweatshirt on the first time. The fit is pretty near perfect. I did make it a bit larger since I planned on adding cuffs to the arms and waist. But again, I think it looks great and about a billion times better than that first muslin! I’ll definitely keep this adjusted pattern for future shirts for Ben.

Ben calls this his “track suit” and was disappointed that I made everything so early but still wanted him to wait until Christmas to start wearing them. Oh, and he wanted the stripes to be included on his top, so I added them in using pretty much the same method as the pants, except it was much easier because it was a straight line, rather than angled.

And sorry, just one picture for me. I wanted something loose and comfortable so I decided on the Mandy Boat Tee. But the Mandy’s original neckline doesn’t really scream “comfort” to me, so I used the scoop neck line and neck band pattern from my Union St. Tee. The first neckband I sewed on made the neck too wide for my taste. So I picked it out and cut another band that was twice as wide. I really wasn’t sure if it would look nice and lay flat, but I was pleasantly surprised that it did work. It lays fairly flat and fixed the problem of the neck being too wide. The result is great. I probably don’t love my top as much as I love my pants, but I am still really liking it and I wear it often, especially when it’s chilly. The combo is comfy cozy and I know I’ll wear both for as long as they’ll last me!
I didn’t include stripes on my top because I didn’t think Ben would be into having stripes on top and on bottom. I made my top first and I was surprised when Ben specifically asked to have stripes on his top too. I was happy to add his in but also disappointed I didn’t make some in mine. Darn it! Oh well, at least one of us is looking fly.

So there you have it! Our family jammies! I know I was on the fence about making them but I’m so happy I did! I’m ecstatic that everything worked out so well, that we got some great deals on fabric, and that I was able to use some great patterns in the process! The Hudson Pants will be made again and again and I’m excited to make some more of those Zipper Jams for my girls.

Nice work! I personally love when I walk into some awesome clearance fabric at HL. I just got some great nylon spandex for leggings for $2 a yard! Makes my day, and then I feel happy about it every time I use the fabric or wear the finished garment.
LikeLike
Wow, such a steal! Yes, it is like the gift that keeps on giving 🙂
LikeLike