

I’m back! This time to talk about sewing stuff, which is my favorite. The first trimester of this pregnancy really took things out of me. I had hardly any energy so I took to sitting/laying on the couch and perusing sewing blogs. Which just made me miss sewing…but didn’t replace any of my lost energy so there I stayed. I probably wouldn’t have even had the umph to get these Easter dresses sewn save for the fact that it’s tradition! And I bought the fabric for them thinking I’d surely be feeling better by the time I had to get to sewing them. Which was marginally true; I was feeling a bit better but even now I’m not what I would call 100% (or even 75% for that matter). Anyway…
As mentioned, and as you might remember if you’ve been reading here for a long time, I’ve made it a tradition to make Easter dresses for me and my girls every year, as well as a tie for Ben. I did make Ben a tie this year, but it hasn’t made it into any photos because…he hasn’t worn it. So, undocumented, but taken care of. For some reason this sewing tradition is my favorite. I’m alway hesitant to do Christmas pajamas, but Easter dresses and a tie are really fun for me to plan out and make. I’ll keep this tradition going as long as my people let me!
I chose to do the Waterfall Raglan from Chalk+Notch for a couple of reasons. The biggest reason is that I’ve had my eye on this pattern for awhile. I’ve almost bought it about a dozen times but ultimately shied away from it because it’s just so darn voluminous. I’d choose volume over something tight-fitting any day of the week, but I’m also pretty short (5′ 3 1/2″) so things can turn south pretty quickly when it seems like I’m drowning in fabric instead of being chicly comfortable. Being pregnant only worked in my favor here as I knew the volume-and the fact that its sewn up in knit-would allow my growing belly to, well, grow. No modifications necessary. I’m not currently interested in buying maternity specific patterns, but I’ll happily buy patterns that will work through pregnancy, post-partum and beyond.

Another reason I was happy to buy this pattern is that there is a Mini version that works for kids 12 months through 12 years! I think the kid version is perhaps even more adorable (have you seen the mini in velvet?? So, so cute!!). I’ll have another post talking about the dresses I made for my gals, but the spoiler/end result is that I’m very happy with both the adult and mini versions of the Waterfall Raglan.

I have a very hard time finding knit fabric that I’m attracted to. I mean solid knits, sure, I’ll take almost any color. But as far as printed knits go, I just struggle to find anything that speaks to me. They often seem either too juvenile or too mature. It’s very possible that I need to expand my source pool (I only have a few small online shops I regularly check). I know I also often have something too specific in mind. For this project though, I felt pretty open to whatever. I had nothing my heart was set on. I checked a few of my favorite places and I also checked Raspberry Creek Fabrics as well. I have bought from them before and been happy with their fabric, but sometimes it can take awhile for their fabric to ship (especially if you’re buying during one of their sales) and I wasn’t quite sure I had the extra time in this case. But I found this double brushed poly knit and I really loved it. I’ve bought their poly knit before and so I knew it was great quality, very soft and very drapey (which I felt would work well with this pattern). A bonus is that I really like the animal print trend but have been nervous to give it a go. I feel like this was a subtle enough iteration of leopard print that someone like me could pull it off. Plus I love the color. Obviously I decided to go for it and I received it in plenty of time to make our dresses.

If you can believe it, this was my first time sewing a raglan top/dress (the joy jacket is also raglan style…but seems a world apart from a raglan top made from knit). Truthfully I’m not at all scared of sewing a set-in sleeve, but this was a fun departure from the norm. Someday I might make something that plays that feature up a little more (like with contrasting sleeves), but for this dress/fabric I’m happy with the subtlety.
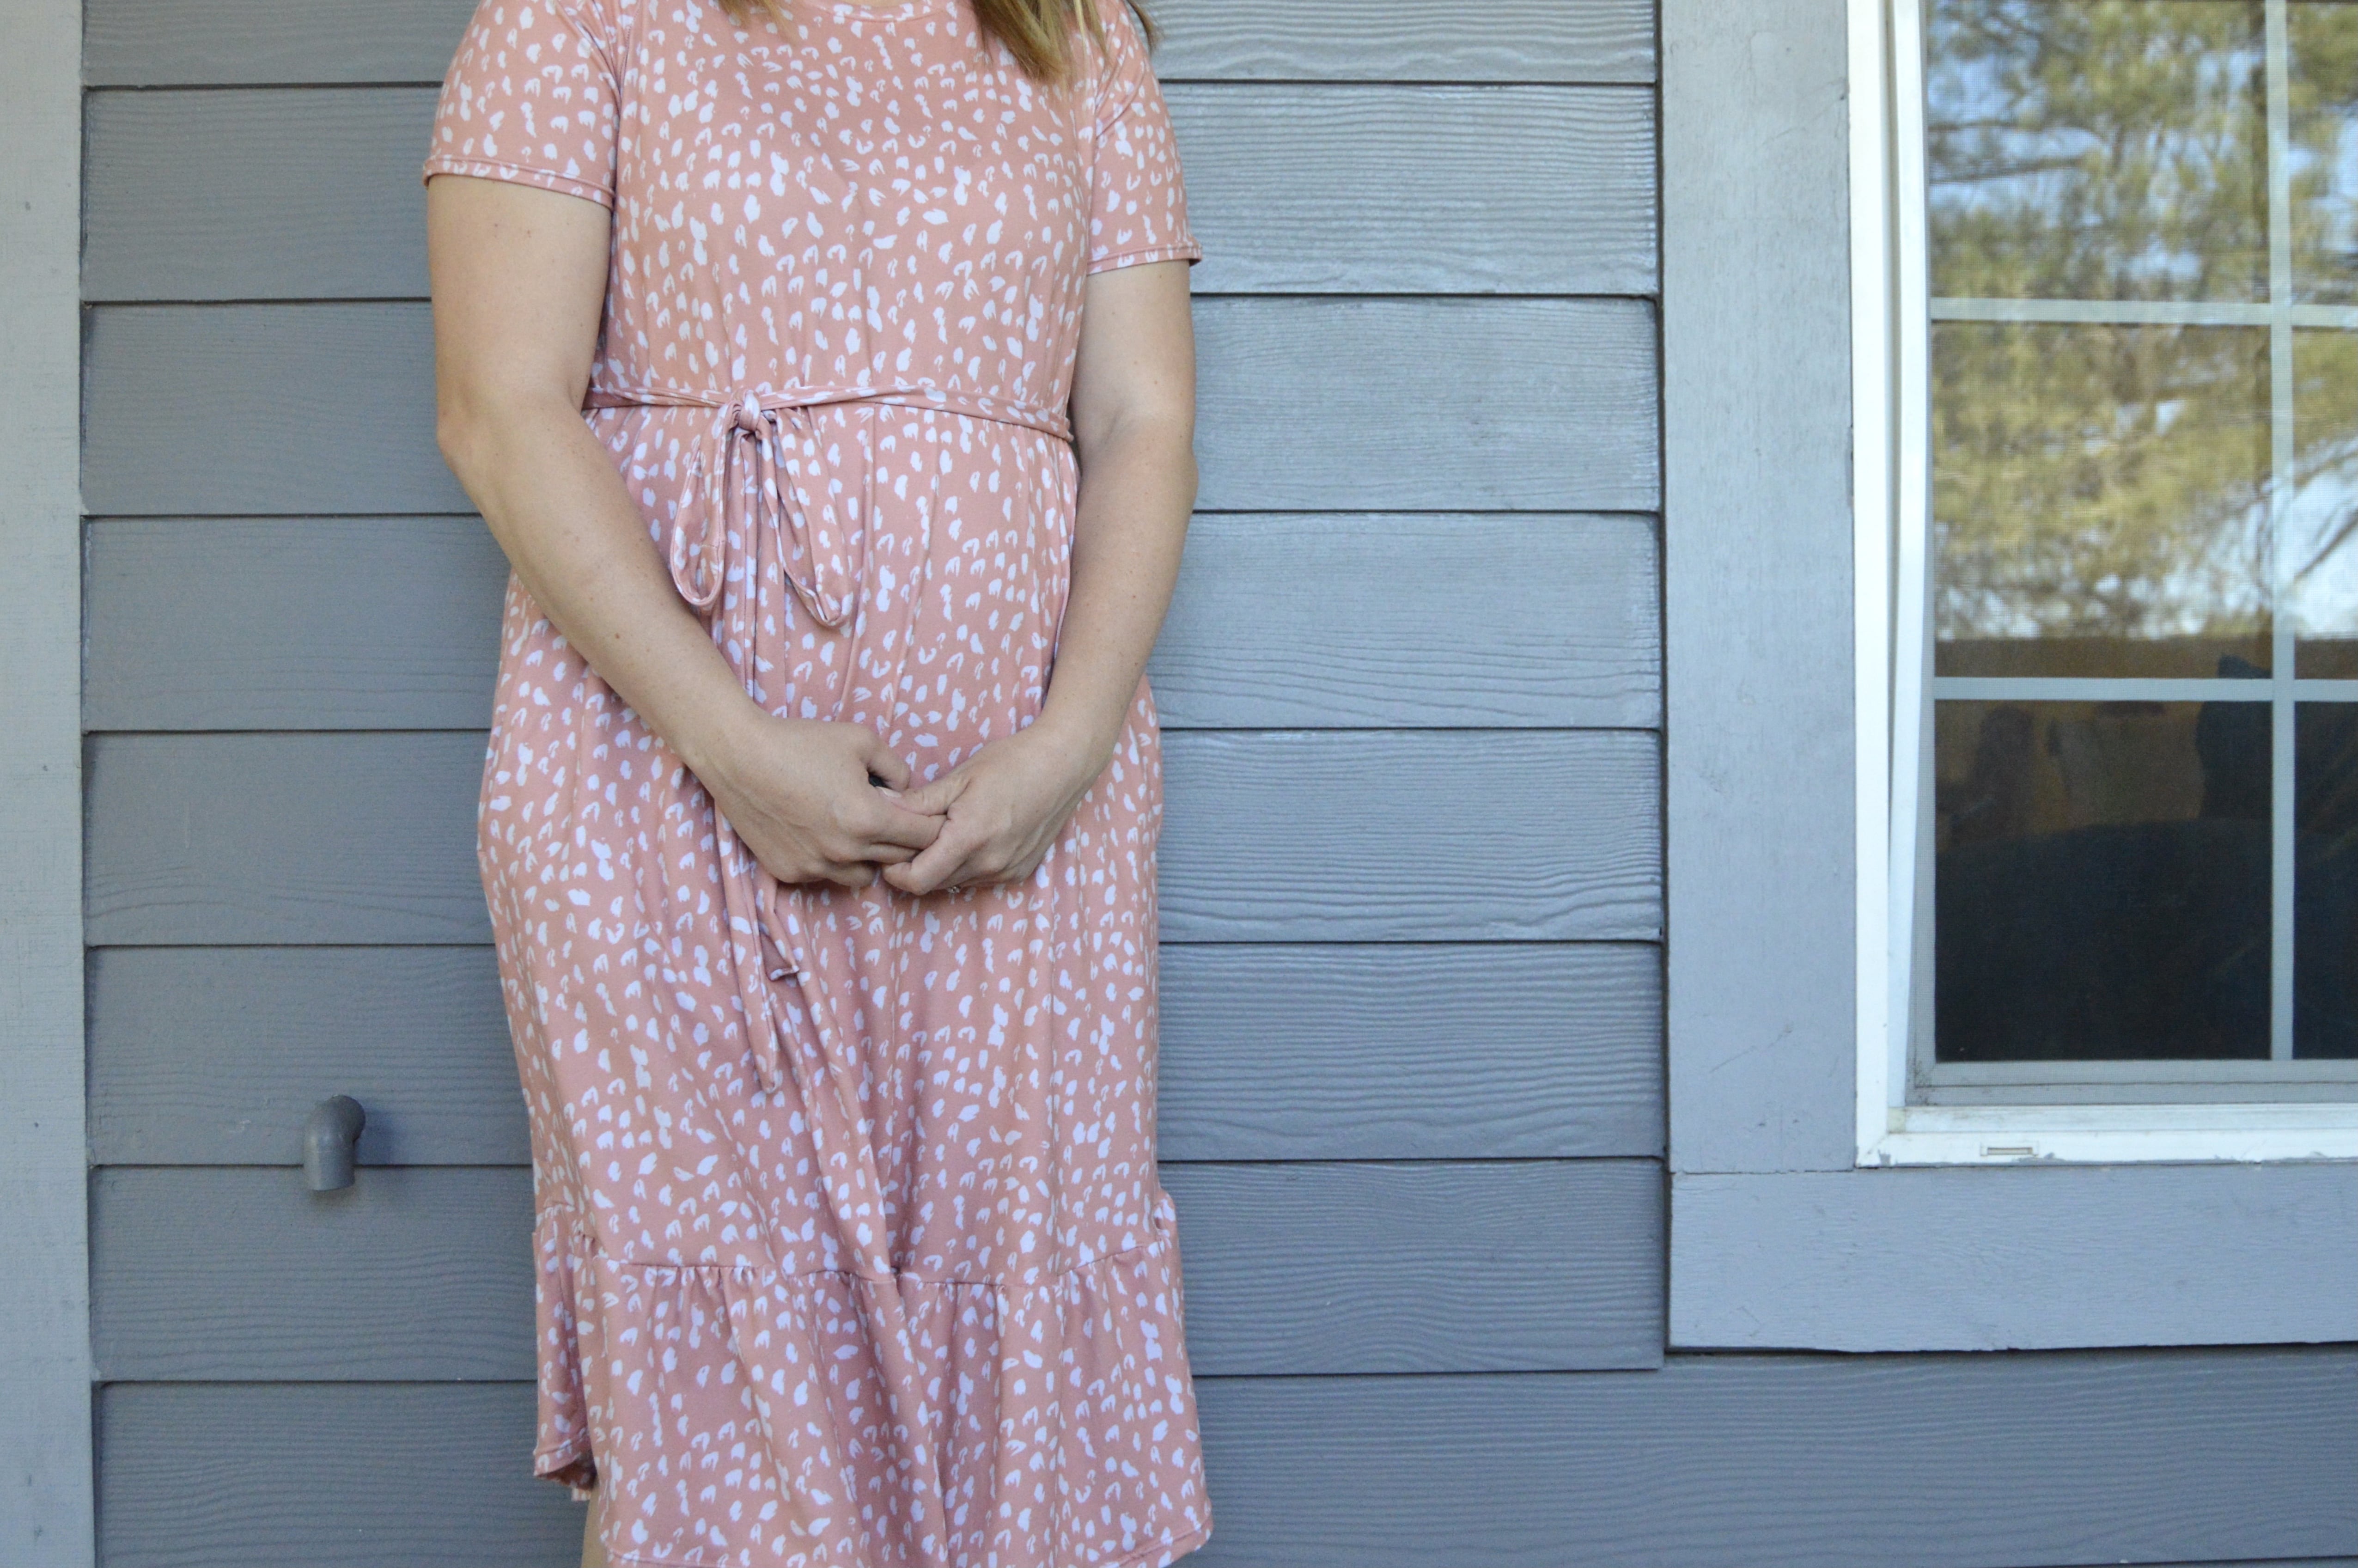
I did make two minor alterations for this dress. One was adding pockets. I was this close to not adding pockets (they aren’t exactly a quick change), but I decided to keep with my original plan of adding them specifically because none of my maternity dresses have pockets so here’s at least one dress that has them! I used the pocket pattern piece from the Chalk+Notch Fringe dress pattern, which is honestly the pocket pattern I use when I add pockets to any dress. It works very well and seems not to discriminate between knit fabric and woven, so that’s a plus. But again, pockets take time. I finish all the edges, pin them in place, sew them to the side pieces, iron, understitch, sew the side seams and then add a bar tack at the top and the bottom of the pocket so that it stays in place and doesn’t bubble out to make faux huge hips. So it’s time consuming but in the end you have pockets which is pretty much always a plus.

The other alteration I made is that I sewed in a zipper to each side seam so that if I get hot, I can just unzip and let the air in! Just kidding! It’s so that the dress will also work as a nursing dress. I saw this idea on The Doing Things Blog and I thought it was genius. It’s simple, straightforward and effective. This dress in particular seemed like it would be a great dress to try the zippers on because it is so loose and flowy. I don’t know about anybody else but loose and flowy is about all I feel comfortable wearing the first few months after having a baby (mostly because I’m self conscious about my body, but also because…comfort). I just used some regular old 7 inch zippers from my stash. If I end up using this hack again, I will invest in some invisible zippers. These work fine and don’t bother me too much, but they do rub on my arm a bit. Not enough to irritate, but enough that I notice. I think I’d also choose something a touch longer, maybe 9 inches. Again, the 7 inch works just fine for me, but a little more give wouldn’t be a bad thing. And hey, I’m short and maybe within a smaller range of sizing, so if you want to try this hack, make sure to consider your own frame and size up that zipper if needed. I placed the pockets just about 2 inches under the zipper for reference. I can’t attest to the functionality of these nursing zippers yet, but I’ll update you when I can (if I remember ha).
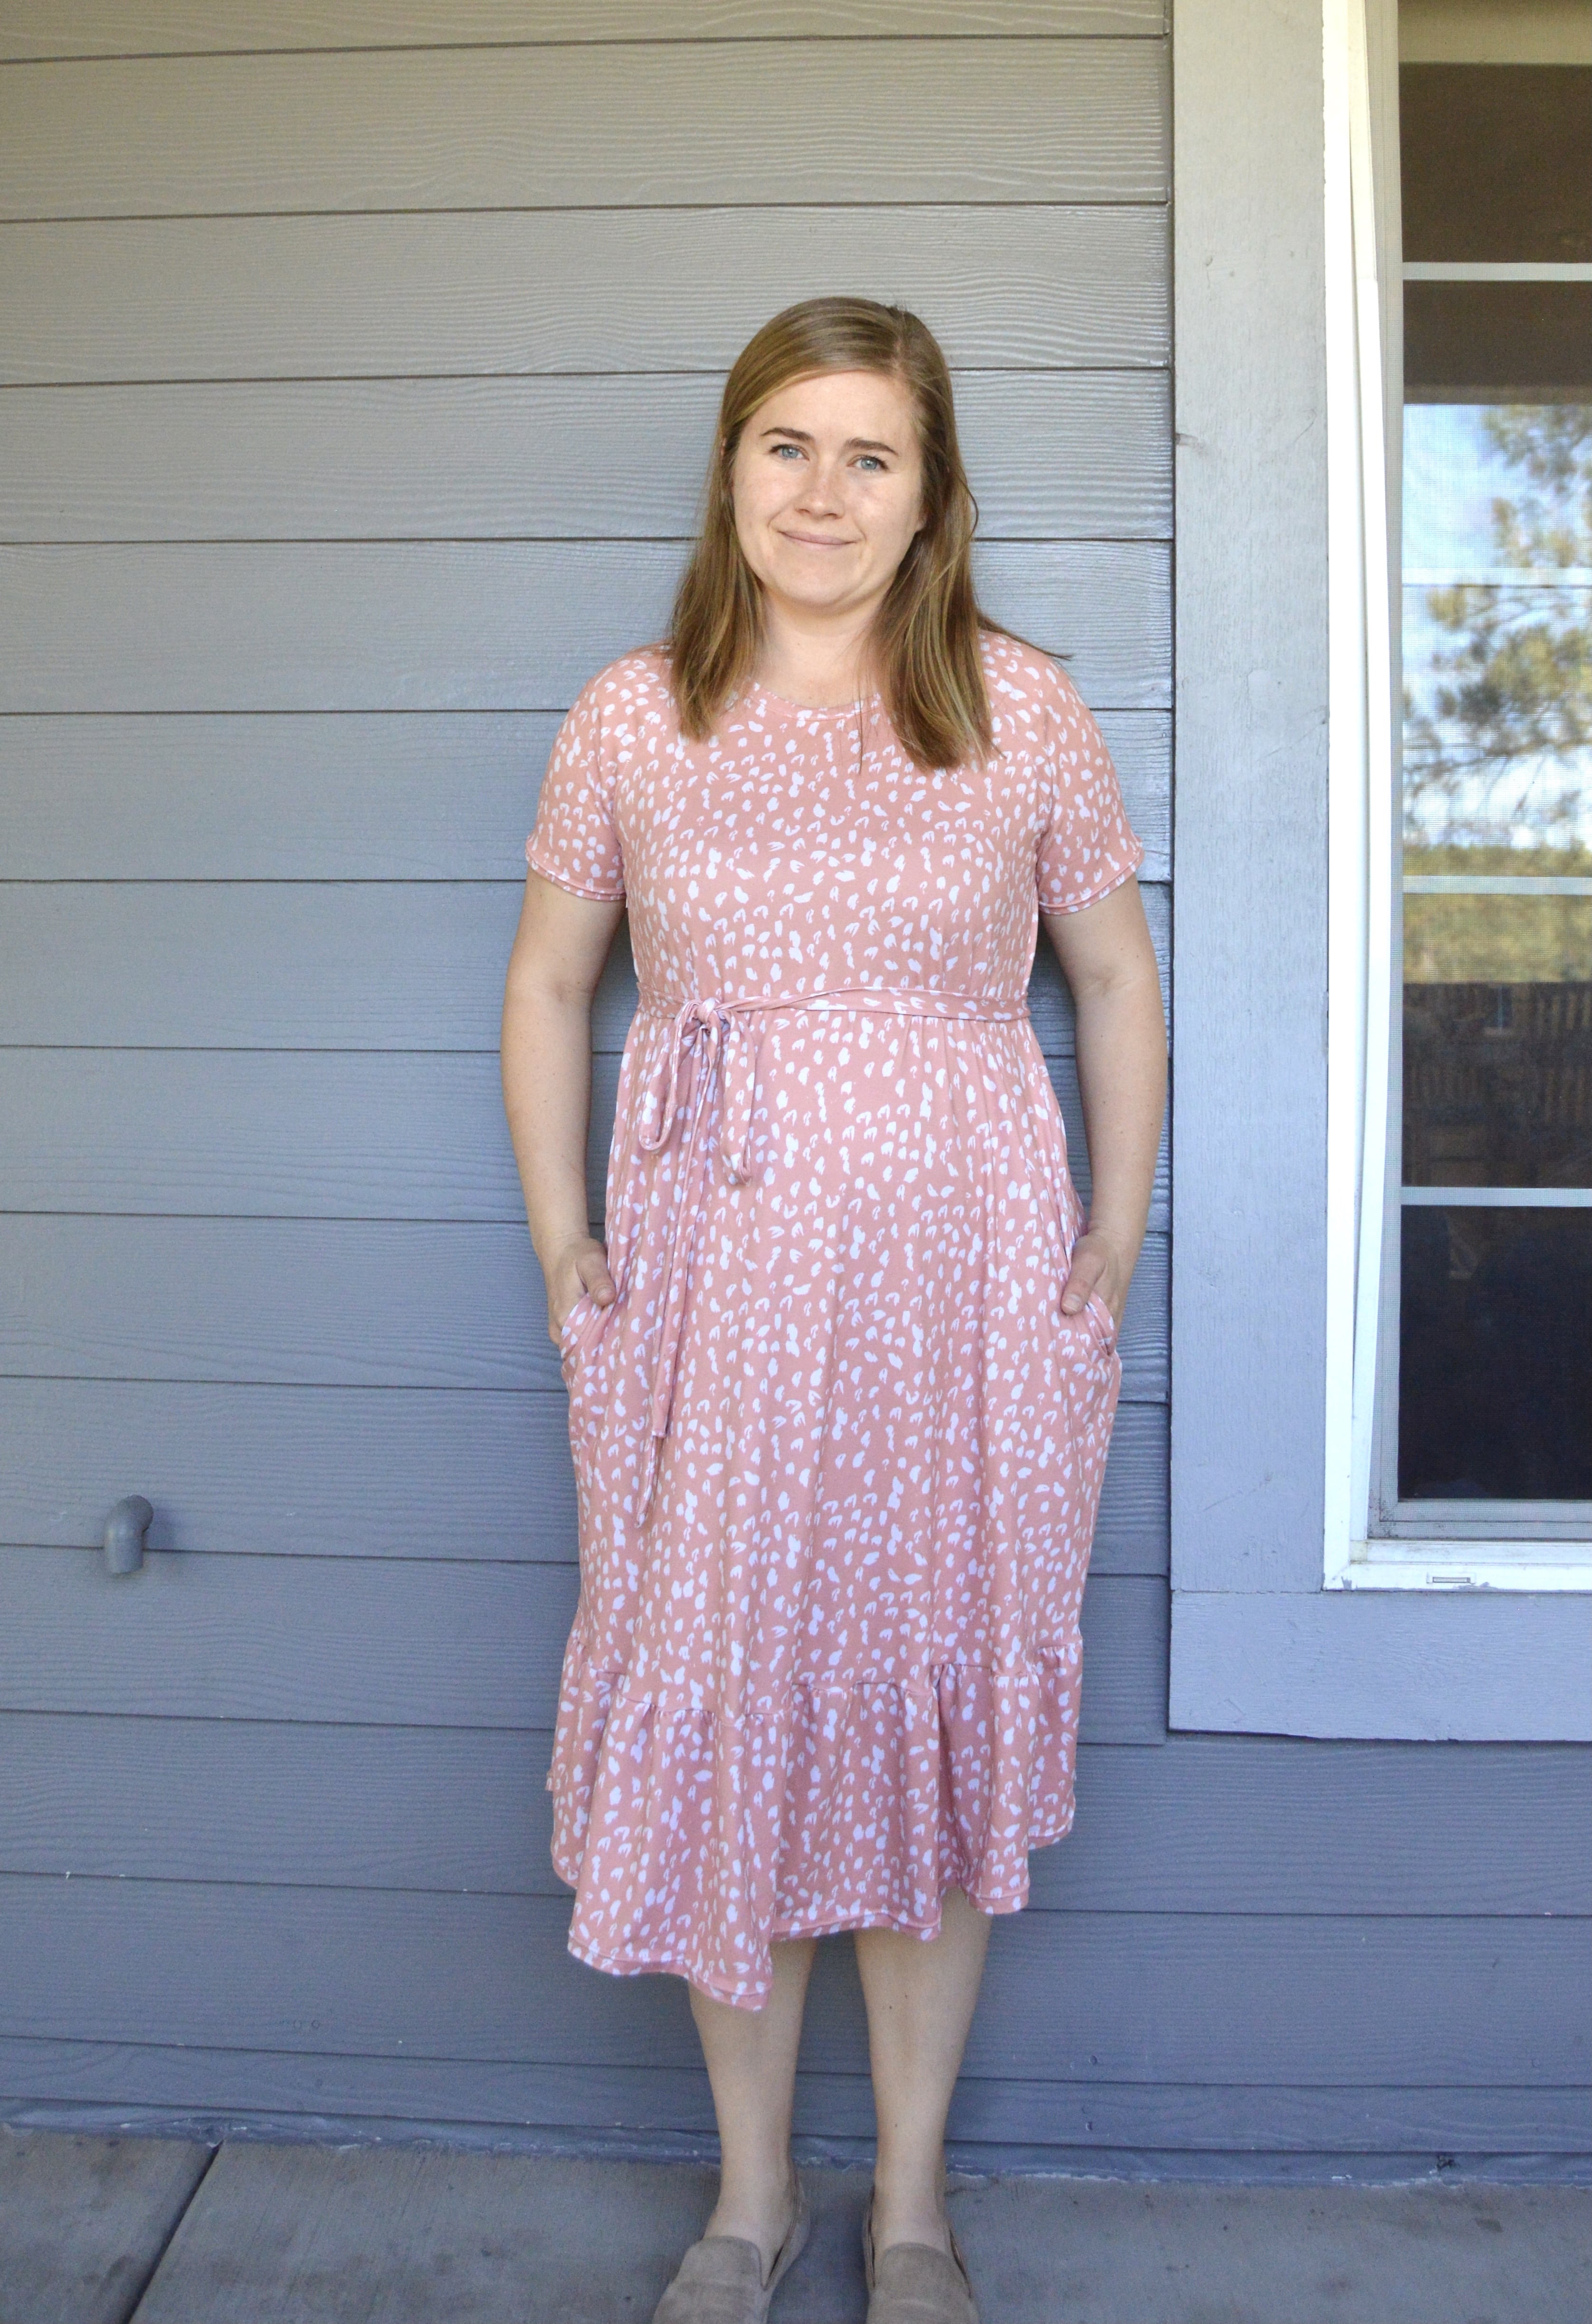
Oddly, I didn’t mess with the length of this dress at all. I had been under the impression that the dress was meant to hit mid calf or so, but upon closer inspection of the photos on the product page, I realized that all of the photos are taken from an angle that’s looking down on the models in a way where you can’t really see where the hem of the dress hits. At first glance it looks mid-calf like I first thought but adding in that odd angle and I have no idea. Knee? Above knee? Dunno, but I do know that the dress is drafted for someone who’s 5’9″ which I most assuredly am not and it hits me a few inches below my knee. So…yeah? Works for me! The hem is curved so the shortest point is at the side seams, and there the hem hits just about at my knee. As a gal who prefers knee length dresses (and doesn’t want to have to tug at the hem to achieve this), this dress length is perfect with just the right amount of leeway.
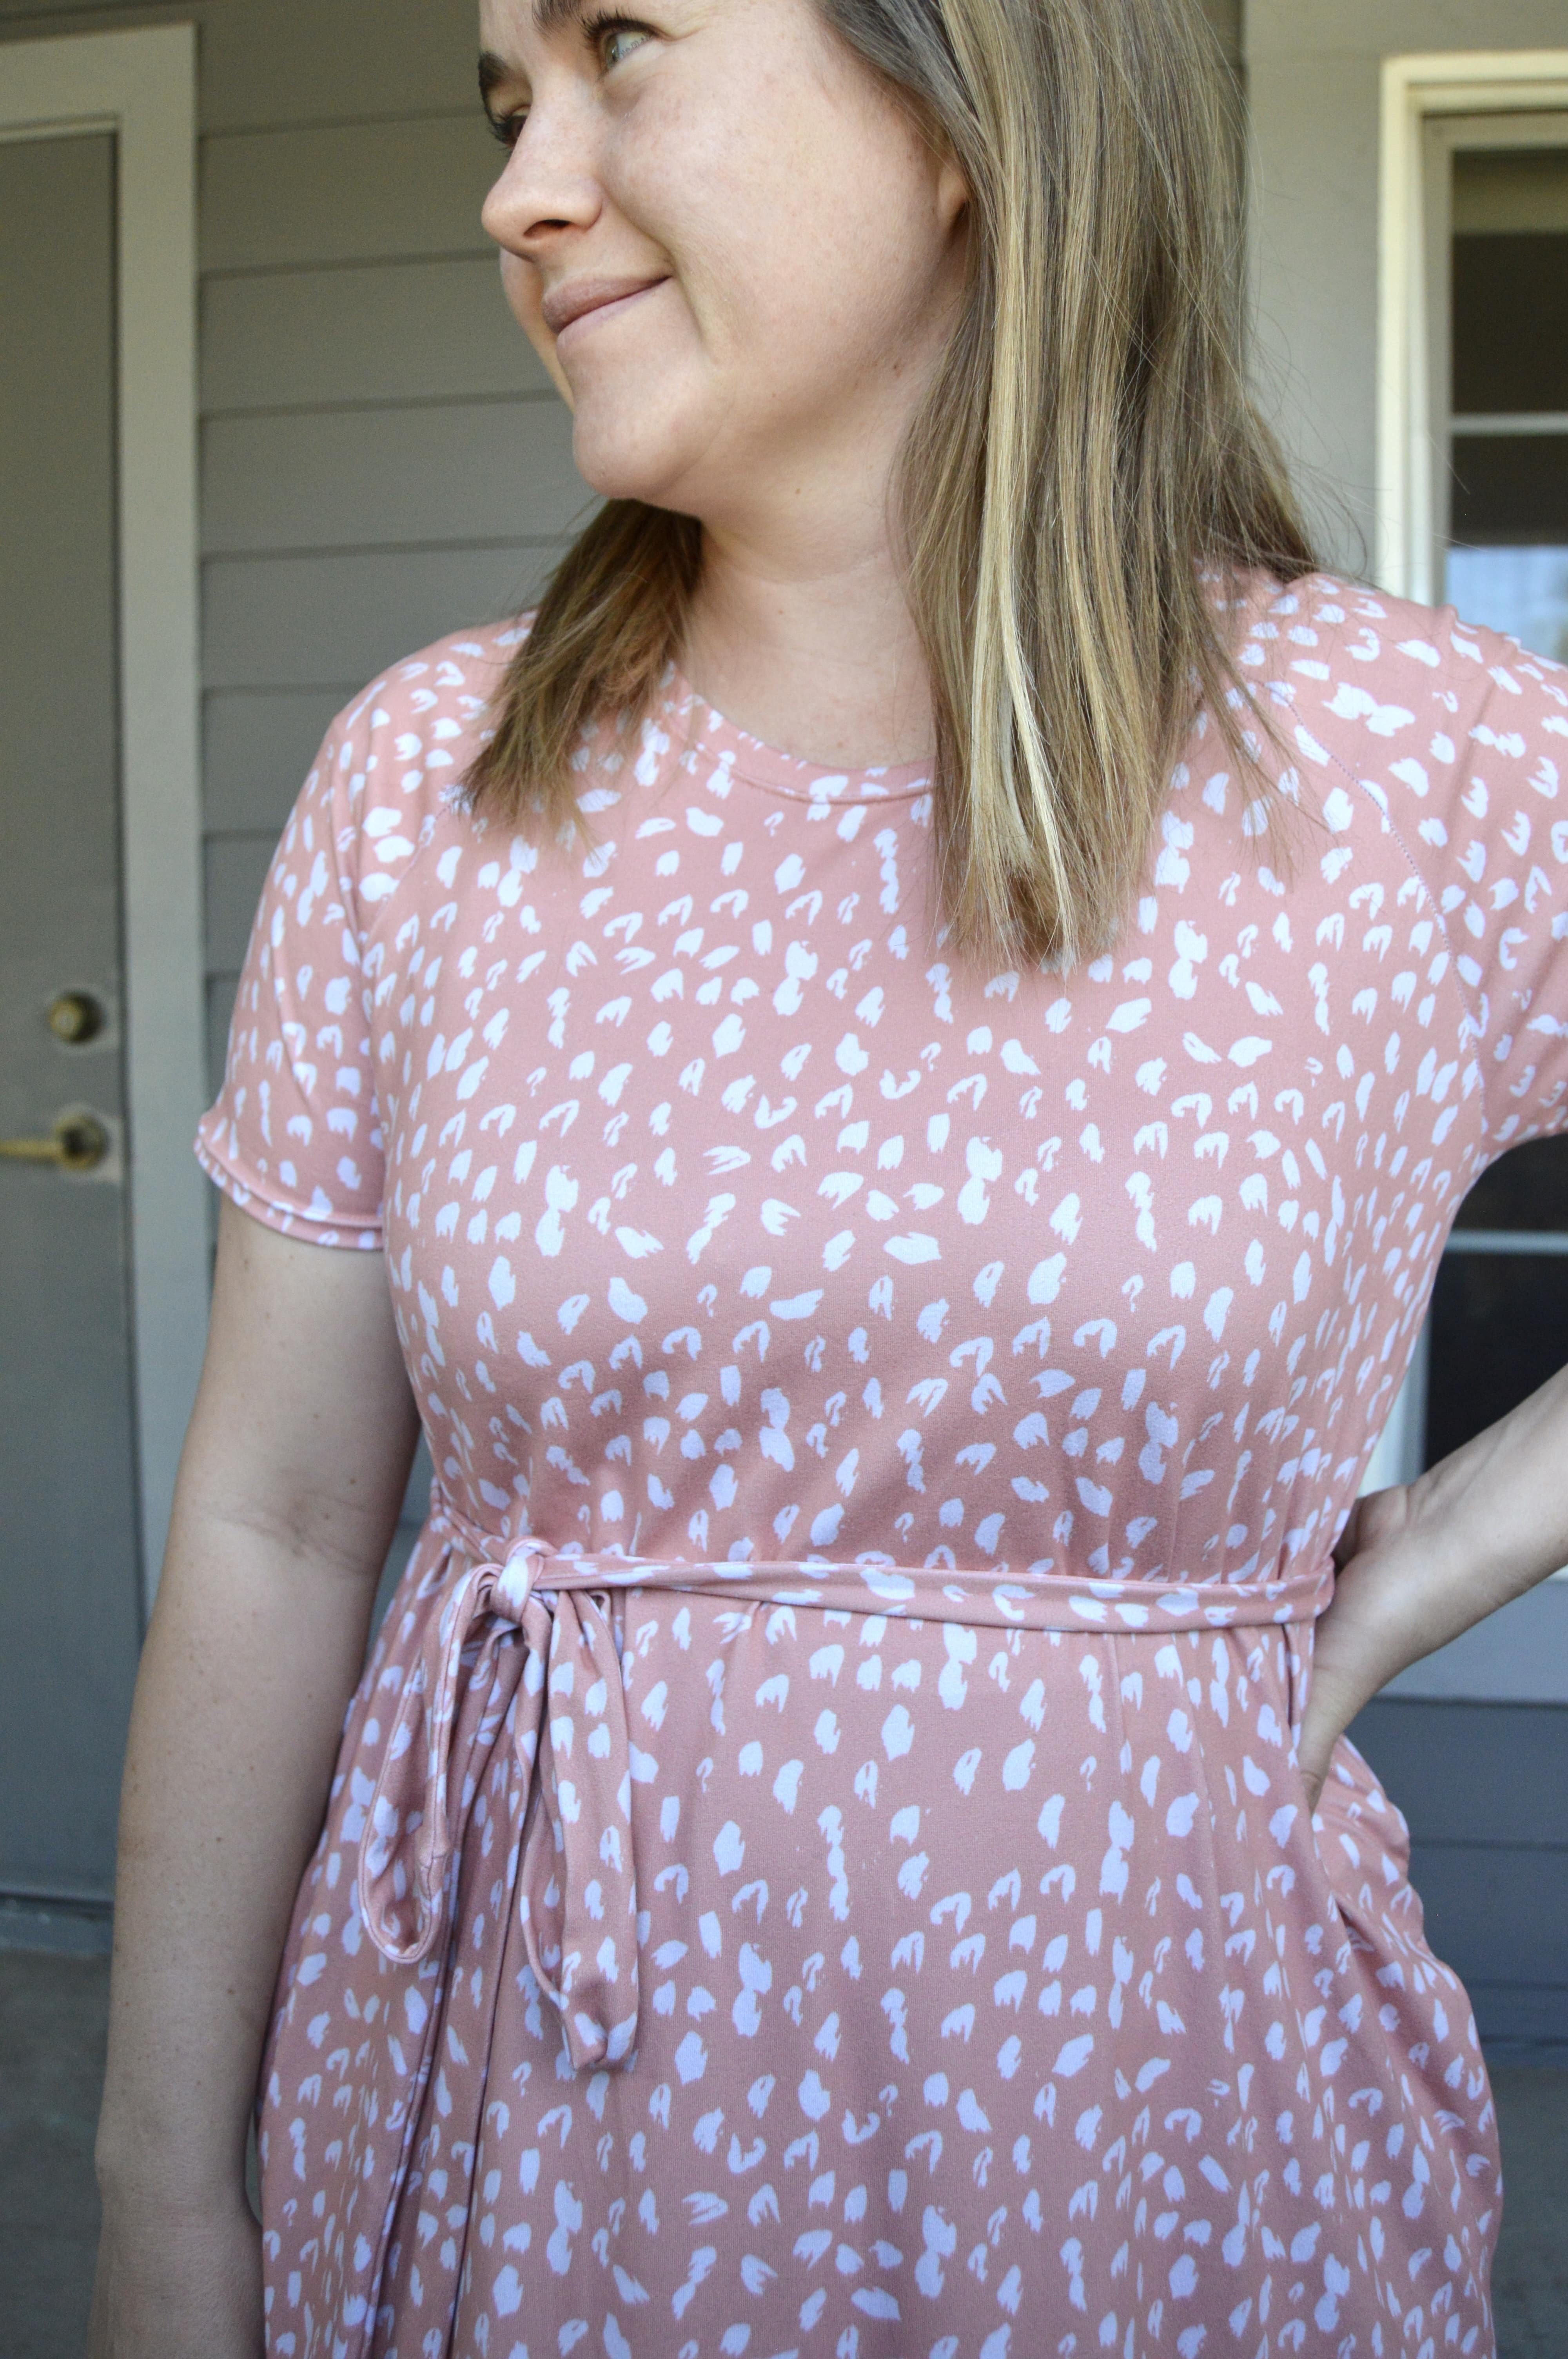
I’ve made a few Chalk+Notch patterns in the past and I’ve always praised them unabashedly. Their patterns work so well on me, which is just so NICE. Aside from the confusion regarding the hem, this pattern was akin to the rest I’ve tried from them: excellently drafted with clear and concise instructions. Because of the nature of the pattern, I didn’t really refer much to the instructions save for a quick look-through. I’ve had experience sewing all the features on the dress so I didn’t need a ton of hand-holding along the way. This is definitely one of the more basic Chalk+Notch patterns I’ve made, but I still feel like it has some nice features to appreciate. I especially love the high-low, curved (and ruffled!) hem. It’s subtle but really cute! One thing I did different from my norm was to sew the neckband on with my sewing machine before serging. Haha this seems like a no brainer but I usually just have at it on the serger and the results are varied but typically dismal. I discovered taking that extra step is absolutely worth it.
Another newish thing I did was to use a fusible web adhesive tape for the hems. I’ve done curved and ruffled hems before and they are not my idea of an awesome time. They are just finicky! Since I had 5 (!!!!!) dresses to hem, I opted for the hem tape thinking it would be the easiest option…AND IT WAS!!! Will definitely use this in the future, thank you! I had seen this recommendation before so I picked some up but at a quilt shop so it was very firm and sturdy and obviously for a fabric that wasn’t meant to MOVE. So I did a bit more research and found this Heat-n-Bond soft stretch hem tape at Joann’s. I used the “lite” version, in the only size they had (which was 1/2 inch) and I dare say it was perfect. Easy to apply, no issues sewing and you can’t feel it all in the hems. If you’re looking at a lot of knit hemline, especially if it’s curved, I highly recommend this stuff! I cut the tape into 1-2 inch pieces and spaced them an inch or so apart (because, again, the hem is curved). I used my twin needle for hems and sleeves, as per my usual with knit fabric.
Oh! I also pieced together a few pieces of my scrap fabric to create a waist tie. You can see in the picture above what it looks like without the tie. I like it with the tie. I like it without the tie. I’ve worn the dress both ways and it’s all good.

In all, the pattern was a great thing to make for a lady who’s got little energy and no desire to fiddle with fitting. I really like how the dress turned out and have enjoyed wearing it so far!
Pattern: Chalk+Notch Waterfall Raglan
Size: 6 (based on bust measurement)
Adjustments: Adding pockets, adding zippers on side seams for nursing accessibility, and adding waist tie
Fabric: Double brushed poly knit from Raspberry Creek Fabrics
Cost: Pattern $12.25 (I bought the bundle with the mini version too so I’m just splitting the cost down the middle), 2.5 yards fabric for $27.25 (but, spoiler, I had enough left to make a dress for each of my girls out of leftovers), thread $6, hem tape $4
Would I make this pattern again?: Yes! The pattern has three views, so I think I’d happily try out the other views or make this one again! Easy, cute and very comfortable.


2 thoughts on “Chalk+Notch Waterfall Raglan”