


Oh dear, this jacket took ages to finish, from the idea of it to the making of it. And now it’s still causing me grief because every time I sit down to write about it, I struggle to put words to the experience of creating it. So here’s another attempt!

The Fulton Sweater Blazer (from Alina Design Co.) came out when I very first started discovering indie designers/patterns. I had the erroneous idea that Alina Design Co. was one of, like, three indie designers, so I snagged this pattern when it came out even though it wasn’t really my personal lifestyle aesthetic. I made this version of it and it came out so horribly that I literally only wore it one time. Then I had the idea to do the knee length version in boiled wool and thankfully, things kept going terribly wrong. I’m thankful because 5 years have passed since then (how?!) and my sewing skills have definitely improved in the meantime! I’m much better equipped to handle the challenges this project included: working with thick/unfamiliar fabric, working with silk, a new technique for seam finishes, and that tricky notched collar to name a few!

So at the beginning of 2021, I bought the “orchid” colored boiled wool from StyleMaker Fabrics, with a plan to finally make my knee length Fulton. I was very conscious about fabric waste at the time and so I only bought 1 and 2/3rd yards of the wool. But then I got pregnant and was super sick blah blah blah so the project got put on hold until after I had my baby. A couple months after he was born, I finally felt ready to tackle this project! But when I laid out my fabric, it was very apparent that I didn’t have enough. Not even laying the fabric flat would allow me to squeeze all my pieces…even if I made the regular hip-length version. So pretty huge miscalculation on my part. I went back to StyleMaker to order more only to find out they were totally out of the Orchid boiled wool with no plans to restock it. Sad day! I tucked the fabric away and sat on it for awhile until I had the idea to still make the project I had planned on but to make it color blocked! Unfortunately, I paid the exact same price for 1 2/3rd yards of boiled wool in 2021 that I paid for just 1 yard 2 1/2 years later, so that kind of sucked, but also what can you do? If I had known the end cost of this project at the beginning, I probably would have passed on it!
StyleMaker stocks a handful of colors of their boiled wool so I could have gone for a darker purple but I decided to go with “sapphire,” a rich, darker blue, which I was a bit nervous about. It’s not a color combination that makes me feel things, exactly, but I do like it.

Boiled wool is an interesting fabric. This kind is made of rayon and wool. It has a dobby texture and a very subtle stretch to it. Laying it out in an attempt to cut it that first go around was an interesting experience because I couldn’t for the life of me locate the grain. Knowing very little about the fabric, I emailed StyleMaker and they confirmed that it’s more of a felted material. I wouldn’t cut things out diagonally because the horizontal and vertical stretches are similar but differ from the diagonal stretch. But I didn’t feel I had to sweat grainlines very much. It is also a fabric that doesn’t fray, so it doesn’t need to be finished, which I’ll talk about in just a second.
Since it is wool, you have to be more mindful with fabric care! The dryer is not recommended! I try to launder my fabric how I’ll launder the end garment but I also try to be realistic. I’m too cheap to use a dry cleaner and too busy (or lazy, ha!) to hand wash, so I decided to machine wash, but lay flat to dry. It did shrink up my fabric a bit! And the first time I washed the purple fabric, I did not lay it flat, and it dried all misshapen and sad! It might be hard to find a safe FLAT place to dry a large piece of boiled wool, but it is necessary!
I used a universal needle, and the wool setting on my iron seemed to work just fine.

Once I had all my fabrics washed and ready to go, I was ready to prep my pattern and cut things out. I already had the pattern printed and taped but I had to make so many adjustments to the pattern. It took forever! I had to adjust the pattern for length. I did a 3/8ths inch forward shoulder adjustment. I cut all the pattern pieces for the color block effect and then added in seam allowance. I also added pockets in the style of the Driftless cardigan pockets. The Fulton is meant to have patch pockets, and patch pockets have their place but they aren’t my favorite. My plan was to add welt pockets (because welt pockets are gorgeous) but with the color blocking, I was having a hard time figuring out where to place the welt pockets when it hit me to do it like the Driftless pockets (I don’t know if there’s a technical term beyond in-seam pockets. That’s what they are, essentially, except sewn on horizontally and flopped down). Here’s what the bottom half of the color-blocked bodice pattern piece looked like after adding the pocket:
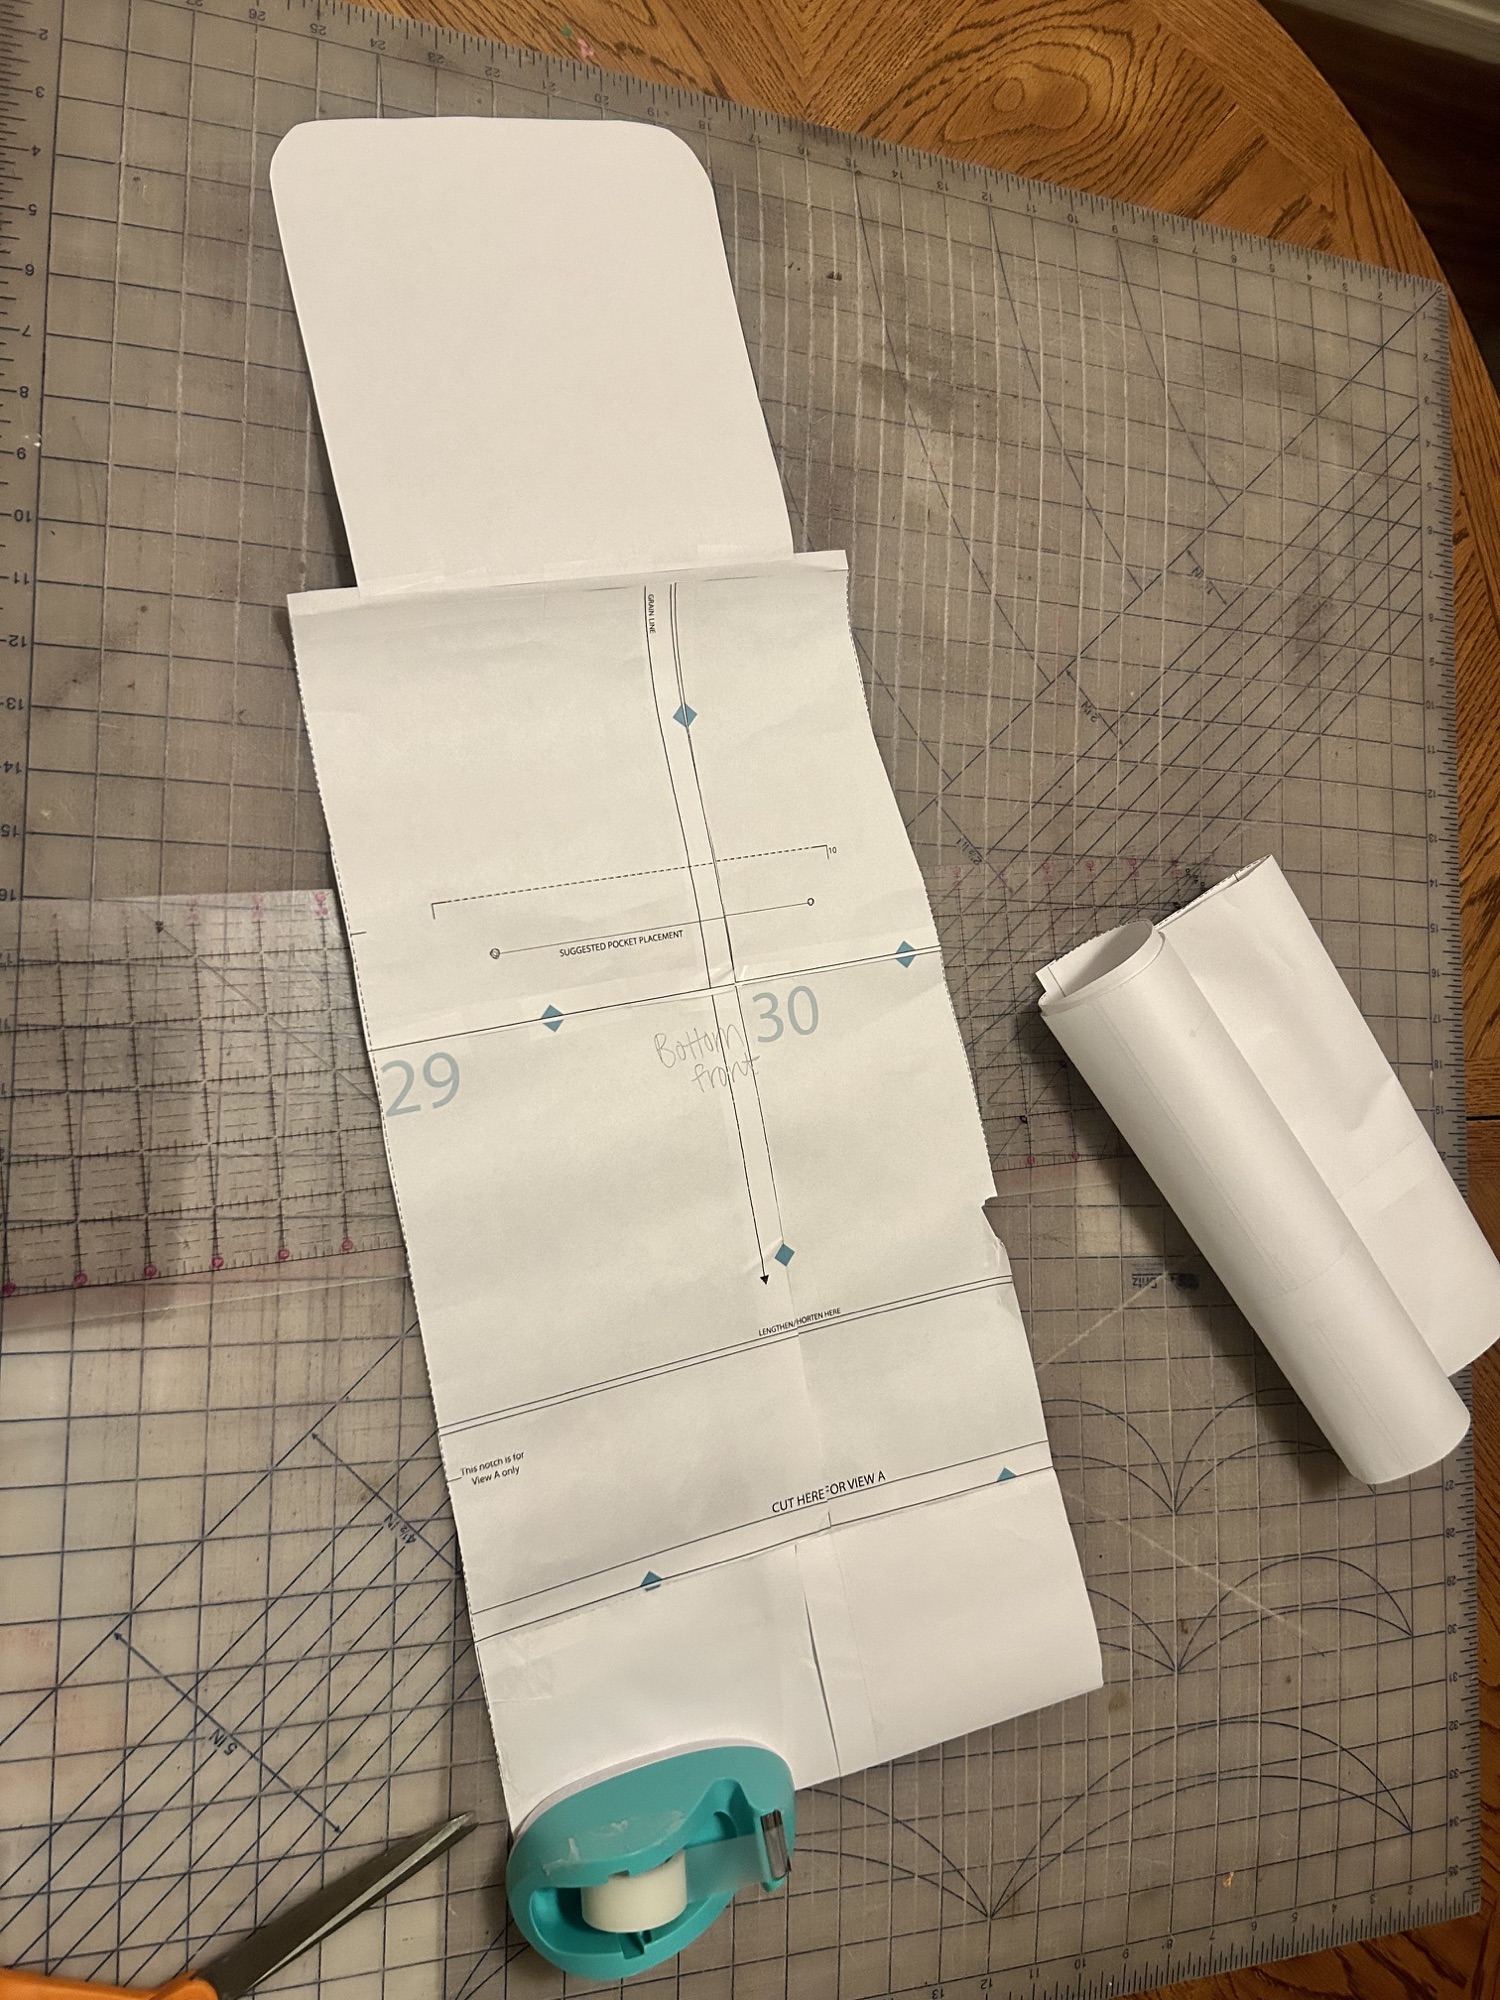
The top half of the bodice has an identical pocket piece attached at the same place, which is sewn around like normal pockets and then folded down. A solid press of the iron is necessary to make this look nice.
Anyway, once I had all my pattern pieces, I had to cut my fabric out carefully, paying attention to color. I was going to have my sleeves color blocked as well, but wouldn’t you know it, my nonexistent calculations on fabric quantity made that entirely impossible (again!).
I’ll say it again: it took fooooreeeverrrr to prep the pattern and cut everything out.
Now to get to the insides which turned out to be my favorite part of the jacket! Way back when I had the idea to make this pattern, I thought I was a lot more skilled than I actually was, and I wanted to make the jacket using the Hong Kong method for seam finishing. The Fulton is drafted to be unlined, so it’s an opportunity to make your seams look nice on the inside if you want (I rarely want. Overlocking for the win!). The Hong Kong seam finish really is a lovely method, involving wrapping bias binding around the edges of your seams, which are pressed flat. I didn’t know what I was getting myself in to! I wondered over and over again why I was subjecting myself to such tedium! I was unhappy with my sloppy attempts! But in the end (and having a few months post sewing to let the process be partially forgotten), I’m really happy that I made the effort! I still think my efforts were a bit sloppy, but that’s sewing with silk, folks!

Eh??? From afar it doesn’t look too shabby! I lined my sleeves, since wool isn’t known to glide easily. I picked up 1 yard of this pretty floral silk from Joann several years ago on clearance and used it for my sleeves and my bias binding. I mentioned it above but it’s worth mentioning one more time, the combination of the slippery silk and the bulky wool made finishing those seams a very interesting task! It was tricky! And the method (no matter what fabric you use) is very time consuming! You sew the seam like normal, but then you end up sewing it an additional 4 times (plus I always had to sew it more because the silk would slip out from my seam so I’d have to sew over it again). Even though it took loads of time, it really makes for a lovely and intentionally made garment. I’ll definitely use the technique again on more special projects. I might opt for a tame cotton, though, rather than the squirrelly silk!

Aside from the repetitive nature of the seam finishes, the sewing went pretty smooth. The wool wasn’t a breeze to work with, but also didn’t give me too many issues. The blazer itself is a more complicated pattern in my opinion, because of that notched collar. The real challenge is making sure your notches are mirrored symmetrically. It’s no easy task, but I will say that I felt much more capable doing it this time around than when I tackled it five years ago.

Once the seams were complete, I hand tacked the entire facing down, every inch or so. It took a couple nights of hand sewing on the couch. I had to use the correct thread color, but thankfully the boiled wool has a bit of a pile, so the tacks aren’t visible on the front. The final step was the hem, which I did using a blind hem foot. Whew! Such a long project! Both the planning and the constructing!

Which brings me to my thoughts on the end result. It’s difficult to say exactly how I feel about it. I am completely happy with how it turned out. The only think I would tweak (and absolutely could right now if I wanted to) is that I would bring in the lower back just a touch for my sway back. But otherwise I’m happy with the fit, happy with how it looks, happy with the insides even. I feel good about the work I put into this piece.

But being happy with a garment doesn’t necessarily translate to wearing it often and that’s where my big hang up is. When am I ever going to wear this?!? I did 3 different photo shoots for this jacket with 3 different outfits. This is the outfit that I liked best. When I thought up this long Fulton idea, I intended to wear it to church and mostly with dresses or skirts. But the length of the jacket is tricky for me. I’m not tall (I’m 5’3″). The jacket hits just above the knee, but I make most of my dresses hit at my knee or below. And the long jacket with the slightly longer skirt just doesn’t look right to me. It just makes me look shorter. I’m not comfortable with shorter skirts (although I admit I think it would look better proportionally) which leaves me the option of wearing the jacket with pants.

And I like this look. I think the proportions are right. I like that it’s not flashy but still interesting. I’m happy with it! It’s just that it is so not my lifestyle right now. Maybe if I went into an office for work? Anyway, as it stands right now, I don’t know that I’ll have many places to wear this thing but I am happy with how it turned out and happy that I put in the extra effort with the Hong Kong seam finishes. I guess this would fit into the category of “sew frosting-” something extra, not something practical. I may be able to squeeze in a couple of wears a year, I suppose.
On a related note, I’ve realized, now, that I sometimes get a project idea in my head but it takes me years to actually make it. By the time it’s off the sewing machine, though, my enthusiasm has waned, styles have changed, my preferences have changed, so I’m left with a garment that no longer fills a need-creatively or within my wardrobe. I just make it because I put it on the list forever ago and need to get it done. I’m realizing now that I need to remember that I make the list and can-just picture it-cross things off the list!! It’s a wild notion, I know, but I think I need to do better at regularly editing my To-Make list. Committing to something that was put on the list ages ago just bogs down my creativity and wastes my time and money. No thanks! I’m going to try to do better at paring down and making what’s relevant in my life right now. And, maybe, if I don’t get to an idea within the year, it’d be better to just let it go. Like Ben’s grandpa was known to say, “Sometimes dreams are just meant to be dreams.” It sounds sad, but it’s true and can be liberating.
Congratulations for making it to the end of this post! It was a long one!!
Pattern: Fulton Sweater Blazer
Size: 12
Adjustments: adjusted for color blocking, added in-seam pockets, did a 3/8ths inch forward shoulder adjustment, and lined the sleeves
Fabric: Boiled wool from StyleMaker in Orchid and Sapphire (both discontinued) and a floral silk from Joann
Cost: 2 2/3rd yards boiled wool $80; silk $8; thread $2;
Would I make this pattern again?: I would. I like the cut of the blazer and since it’s meant to be made with a stretch fabric, it’s a little easier to fit than your classic blazer


The finishing: beautiful. The sensation of being armpit-deep in an expensive project you no longer truly feel committed to: RELATABLE. It’s a very cool blazer, and indeed quite professional, and now you have something to wear if you’re ever interviewed on TV!
LikeLiked by 1 person
Meanwhile, while waiting for my interview, I’ll settle for enjoying brief glimpses of it as it hangs in my closet. The problems I make for myself 😆
LikeLike